Table of Contents
Metering
Reflected light meter:
For portrait photography, the requirements for correct exposure are so critical, and accurate metering is very necessary for this situation. Relying on the built-in metering of the camera can not always get accurate measurement results, even the internal reflection metering of complex multifunction machines is no exception. Bright objects can affect the vital skin tone. Usually, such metering is center-focused metering, because most people are accustomed to placing the subject in the middle of the picture.
The reason for the inaccurate metering is that the built-in light meter is designed to determine the amount of exposure based on the total average value of the light in the viewfinder screen. To ensure the accuracy of the built-in metering, it is recommended that the area confirmed to be mid-tone be measured as 18% gray. Even with this, for people with tanned skin or dark skin, the standard of 18% gray is somewhat darker.
Therefore, if you want to use in-camera metering, remember to place an 18% gray color card in front of the subject, and try to fill the viewfinder screen with this card for measurement. If you use a reflected light meter, you should also use the same method to meter light.
Incident light meter:
Another type of metering method (hand-held incident light meter) is ideal for taking portrait photos. It is measured by measuring the amount of light shining on the object, not by measuring the amount of light reflected from the object.
When measuring, just place the small semicircle ball of the light meter at the location of the object you want to shoot, let the small ball face the lens to measure, and then read the reading.
What needs to be confirmed is that your light meter is indeed placed where the subject is under the same light. The result obtained by this measurement method is accurate and unchanged, because it measures the amount of light that a person hits on the object, not the amount of light reflected by the object. This means that it will not be affected by materials such as strong reflections or surface absorption of light-reflecting materials.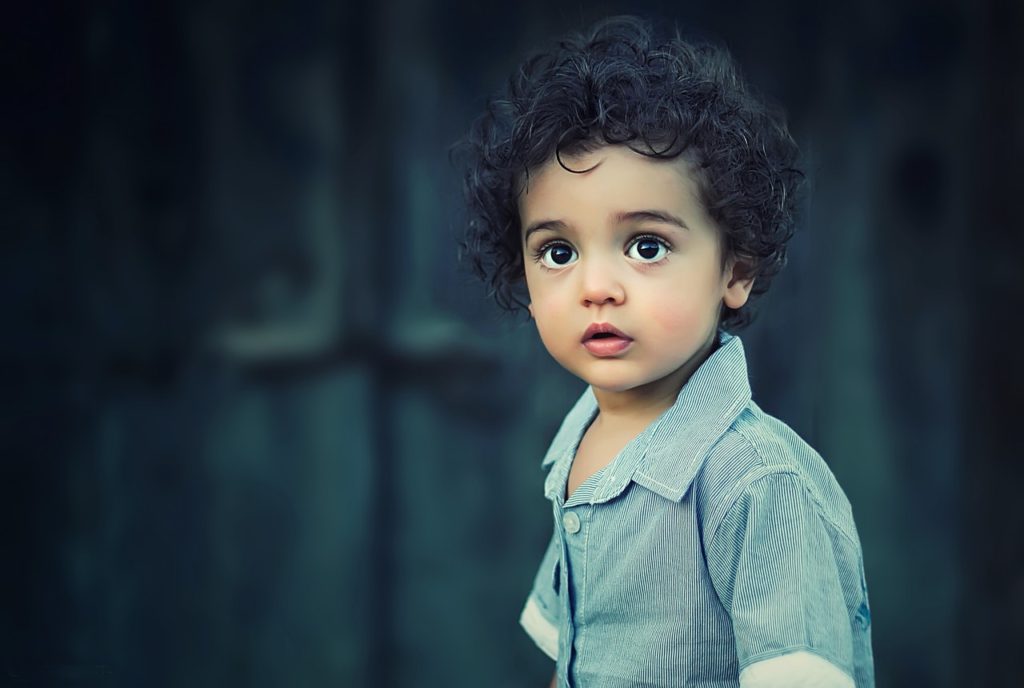
In this portrait of a child, you can see a square gaze from the reflection of the child’s eyes. The photographer used a very unusual shooting angle-looking directly down to shoot, turning the floor and seamless background cloth into a part of the portrait.
Incident light flash light meter: It is necessary to equip an incident light flash light meter, whether it is indoor or outdoor shooting, especially in the mixed light of daylight and flash will be very useful. It can also be used to measure the light ratio. When you need to determine the distribution ratio of all light in a large space, the flash meter is very useful. The flash light meter is also incident light metering, which measures the light shining on the subject, instead of metering based on reflected light like in-camera metering.
Lighting and lighting modification device
Continuous light illumination and strobe:
The lighting equipment has a wide range of options. The topic of lighting will be an endless debate. Even so, there are three basic types of lighting, portable flash, continuous light and studio strobe light.
In professional portrait photography, the portable flash is only used as a supplementary light source. Should avoid using flash lighting directly mounted on the camera body, because it will produce strong and flat light, so that you can not get the perfect level of light on the face of the person.
In addition, this kind of lighting is not equipped with modeling light to predict the light effect, making the shooting effect difficult to predict, even if it is not completely impossible to predict, it is almost impossible.
Use continuous light source lighting, or studio strobe with built-in modeling light, you can predict the light effect. The light in these two lighting methods is easier for the camera to focus than a portable flash.
Whether to use continuous light source lighting or studio strobe lighting, the choice is yours. Either of these two can achieve excellent results.
Compared with the instantaneous lighting source, continuous lighting has one main advantage: because the light you use for shooting is the same light as the modeling light, the lighting effect you see is the effect you shoot.
Getting the correct white balance has also become a breeze. You can adjust the shooting color temperature, or set a custom white balance in order to get a more accurate effect.
All continuous light is cold light. There is a new type of LED tube lighting that is fixed in the bracket slot and it is becoming more and more popular. It can be applied to both location shooting and studio shooting. This LED tube can also be mixed with tungsten bulbs to change the color of light.
There is little or no hot light from the studio strobe light. Therefore, even if several lights are used at the same time, the subject will still feel comfortable, which is the main reason.
In stroboscopic lighting, modeling light (a continuous light source) only plays a role in indicating lighting, it is not the lighting source used for shooting. Nevertheless, in most cases, the modeling light still accurately reflects the actual effect.
Lighting modification device:
So far, the most popular lighting modifiers for portrait photography are reflector umbrellas and soft boxes, which soften the light and make the subject look more pleasing.
Put them on top of the camera to get the effect of fashion style, and put them on the side of the camera to get the effect of traditional portrait style.
Although the light obtained by these lighting modification devices is already very soft, it is usually necessary to use auxiliary light to illuminate the shadows of the face so that there will be no “dead” black areas.
Reflective umbrella: Reflective umbrella can be used on flashlights or on continuous lighting equipment. If you want to use it on a tungsten lamp or quartz lamp, be careful not to get too close, otherwise it will easily catch fire.
Reflective umbrellas for photography have two linings, white and silver. In contrast, reflective umbrellas with silver lining reflect more light and are more directional. Under the same light intensity, the light source with the reflective umbrella with silver lining can be used as the main light, because it can produce stronger light and more directivity. It can also produce wonderful reflection highlights in the highlight areas of the face.
The light source with the reflective umbrella with rough white lining can be used as auxiliary light or supplement light (some reflective umbrellas are called “zebra”). A lining with alternating white and silver patterns can produce the same soft light as the white lining, but there will still be a little directional strong light interspersed in it.
You can also make some attempts to adjust the distance between the light source and the axis of the reflector to obtain different softness of light effects.
Most photographers prefer to place the light source above the axis away from the curved surface of the reflector, so that all light beams can be projected within the curved surface of the reflector. When the light source is aimed at the center of the reflector, the resulting illumination light is the smoothest and softest. This point is called the “focus” of the reflector, and it can produce the most effective lighting effect.
Some photographers use the light source and reflector in reverse. Turn the umbrella and the light source around, and let the light pass through the reflective umbrella to illuminate the subject (excess light is reflected by the umbrella and then projected on the subject). The light obtained in this way is more directional than the light obtained by reflecting the light through an umbrella through the light source facing away from the subject.
Of course, the reflector with silver lining cannot be used in reverse, because the silver material is opaque, and almost no light can pass through the umbrella surface.
Softbox:
The soft box is a box made of dark black fabric, and its front is covered with a layer of white diffusing material. Some soft boxes have “double-diffusion”, which has a gauze cover covering the surface of the illuminated surface to form the second layer.
The purpose of the soft box is to place a separate light source in the box, and the light it emits is directly emitted through the diffuser material on the surface of the box.
Since manufacturers usually place lighting devices in soft boxes, the same is true for strobe lights. (As mentioned earlier, the heat generated by strobe lights is much lower than continuous light sources). Part of the softbox can also work with the multi-function flash lamp holder to obtain additional lighting intensity and brightness.
Illuminate the background
Because the reflector and softbox can produce a wide range of lighting and are diffuse lighting, there is often no need to use background lighting. Of course, this also depends on how far the background is from the light source and the hue of the background. The farther the background is from the light source, the darker the background of the photo.
Good digital processing technology
exposure
Recording images with digital files is very different from recording with film. In terms of exposure tolerance, especially when overexposure, there are basically no details. This seemingly flawed problem has the benefit of being more careful to get accurate exposures, which makes you a better photographer. Compared with those color negative films with an exposure latitude of plus or minus two levels, digital files completely follow a different game rule.
The correct exposure essentially determines the dynamic range of the tone, the overall quality of the image, and is also a key factor in determining the quality of the final output of the digital file. Underexposure will produce a lot of noise for digital images, while overexposure will make highlights and details missing.
Claude Jodoin, a portrait photographer and digital expert, said: “It’s time to end your days of exposure, and kiss goodbye to the situation of overexposure! You must achieve accurate exposure. If you make a mistake, you can only slightly underexpose. This situation can be remedied, otherwise you will only have to compensate the customer. No matter what degree of overexposure, it is a dead end for digital imaging!”
However, taking digital photos must ensure that the dynamic range of the material used to display the image matches the dynamic range of the image processing. (Such as photo paper for magnification, ink for printing or photo paper for printing)
Determine the exposure index of the camera (Exposure Index)
Even if it is the same digital camera, it is not always the same when the factory or manufacturer initially produced it. Like all man-made objects, cameras also have manufacturing deviations, which makes the complex electronic systems of each camera slightly different. Therefore, it is very important to understand the metering system of the camera that you rely heavily on, whether its index is higher than or lower than the film speed of the film equivalent to the same speed.
The following is a method of Don Emmercih’s test with 18% gray card.
First, align the viewing frame with the gray card, use the in-camera light meter to measure light, and perform exposure according to the in-camera light metering value, and check its histogram. If the exposure is correct, a single wave peak falls in the middle of the histogram, which indicates that the film speed value calibrated by the camera is correct.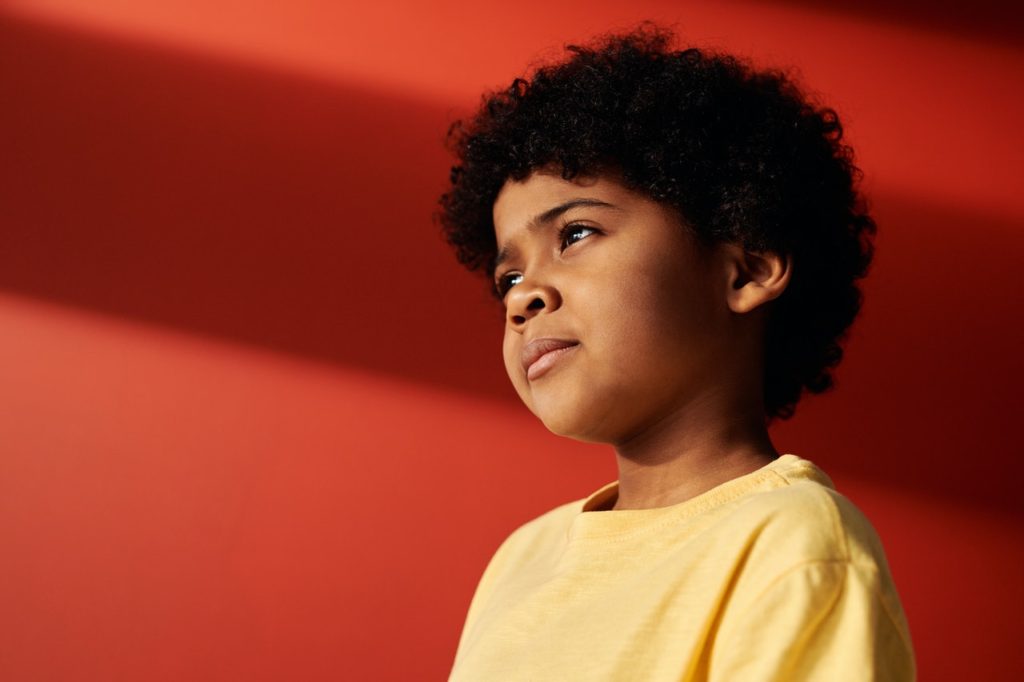
If the crest moves to the right or left, please adjust 1/3 or 1/2 block and try shooting again. For example, if you are used to setting the iso to 400 for the initial test, the peak on the histogram is slightly to the left, which means that the exposure is slightly underexposure. Adjust the film speed, set the exposure index to 320 or 250, take another shot, and check the histogram again.
So how do you use what you have learned? If you repeat the above test for different film speeds under different lighting conditions, you will get a reliable factor. Or you will find that the metering of your camera is quite accurate. However, if you find that your camera’s metering is always underexposure by 1/3 stop, you can increase the camera’s exposure compensation by 1/3 stop to perform exposure compensation. Conversely, if your camera’s metering always overexposes by 1/3 stop, reduce the exposure compensation by 1/3 stop or adjust the corresponding ISO setting accordingly.
Use this series of tests to calibrate your handheld incident light meter to ensure that all your metering equipment is accurate.