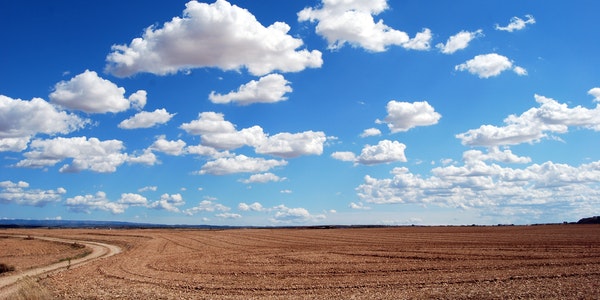
Categories
Studio Lights Education

How to Photograph Ice and Snow

The Choice of Light

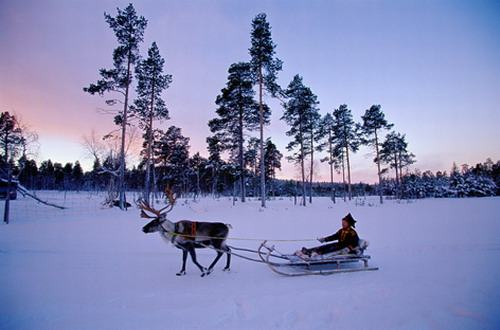
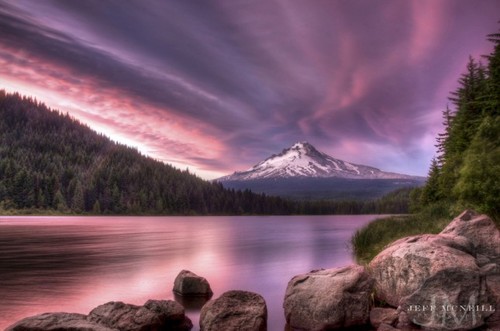
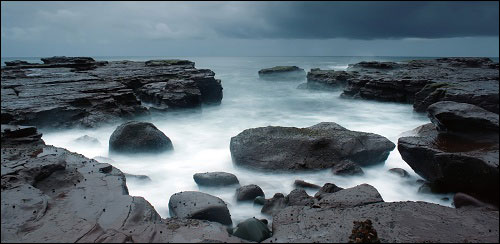
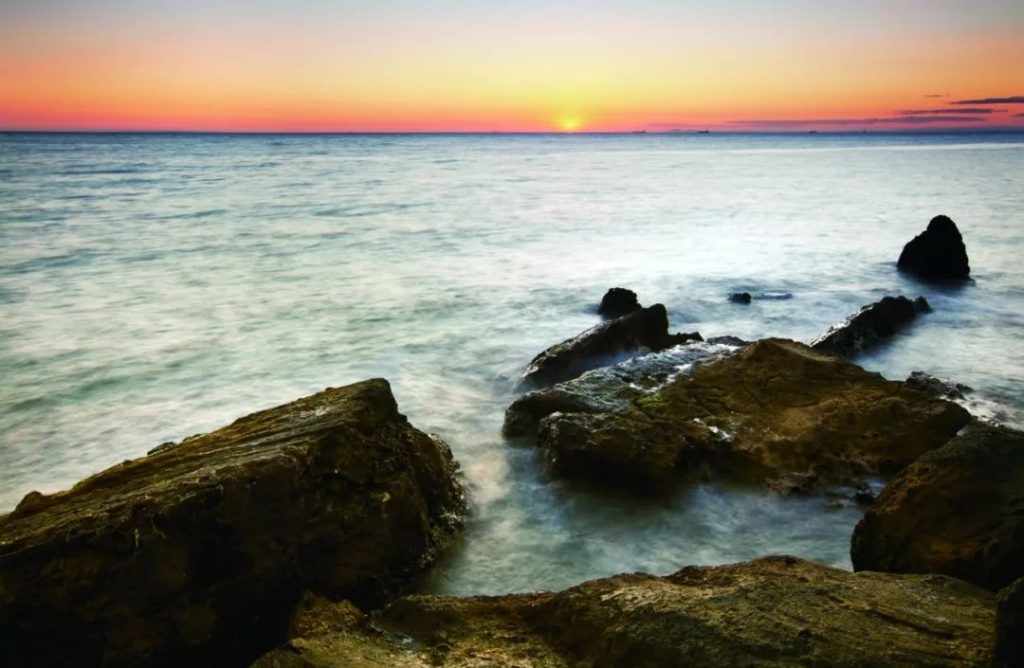
The use of side light highlights the light and dark layers of the snow scene. In addition, the combination of ladder shadows makes the tone of the overall picture more varied.

Aperture F4, exposure time 1/1250s, focal length 96mm, sensitivity 100

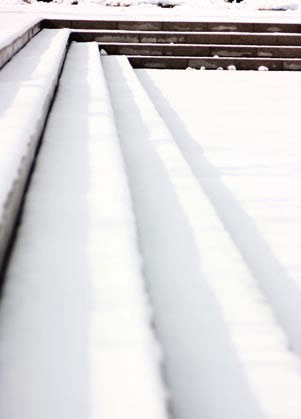
The Effect of Snow on Light

Because snow is a pure white crystal, it is highly reflective and appears brighter when the sun hits it. Therefore, in the shooting of snow scenes, if the front light or top light is used for shooting, due to the relationship of flat or vertical light, not only can the snow-white fine crystal objects not be able to produce light and dark layers and textures, but also the scene will lose its three-dimensional sense. Therefore, in order to show the light and dark layers of the snow scene and the transparent texture of the snow, it is best to shoot the snow scene on a sunny day after the snow. And it is better if it can catch up with the early morning light.
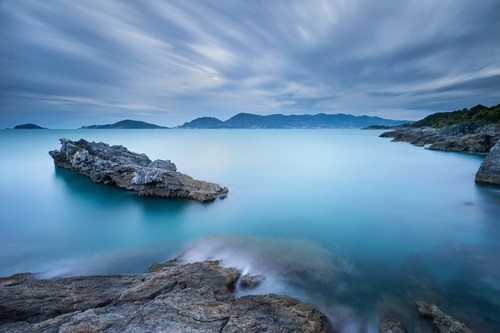
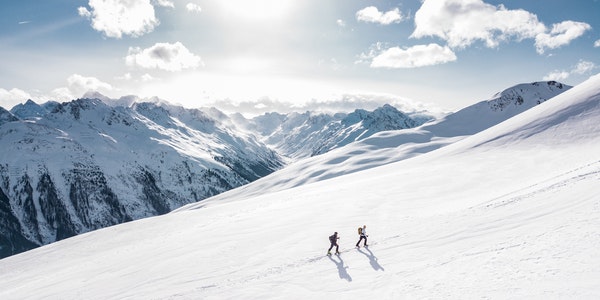
The Choice of Light

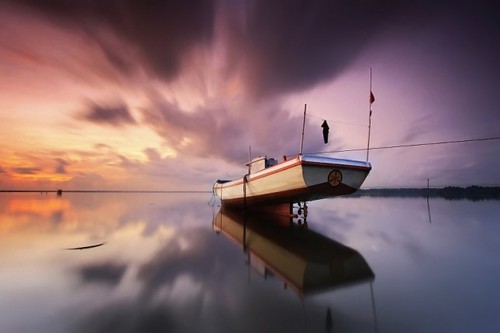
Under the sun, the use of side light, side backlight and backlight can best express the light and dark layers of the snow scene and the transparent texture of the snow particles. And the tone is also full of changes. Even a distant view can create a far-reaching atmosphere. However, when the backlight illuminates the snow scene with a large area of ​​white, the scenes of other tones that are not covered by snow will inevitably turn black. Therefore, in order to make the snow and other tones in the snow scene have a sense of hierarchy. When shooting snow scenes, it is best to choose soft sunlight.

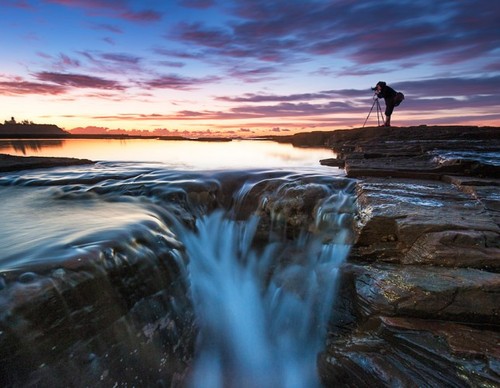
The use of light plays a very crucial role in photography. In many cases, photographers cannot change the natural light. So they have to wait for the light to change or use different angles to make reasonable use of the light.

 Correct Metering and Exposure

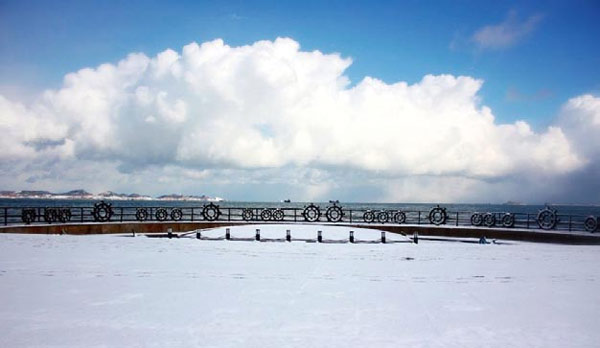
Proper metering and exposure is the key to success or failure in taking snow photos. In a large area of ​​snow, the in-camera metering system is used to meter the light. And the snow scene is generally underexposed according to the displayed data. This is because the camera’s internal light meter is metered in a certain program. And the data it displays is the average light value of the highlights, midtones, and shadows in the integrated scene. This is feasible in most cases, but the strong reflected light in snow scenes often makes the metering results differ by 1-2 stops of exposure.

The photographer can use exposure compensation. Based on the actual situation, increase the exposure by 1 to 2 levels. Maybe some beginners are not clear about the concept of exposure compensation. Simply put, exposure compensation is adding or subtracting exposure from the exposure measured by the camera. For example, in the case of aperture priority, the exposure parameter measured by the camera is F2.8, 1/60 sec. If you add a stop of exposure compensation at this time, the exposure parameter will be changed to F2.8, 1/30 sec. Decrease the exposure compensation by one stop, then the exposure parameter will be changed to F2.8, 1/125 second.

Of course, photographers can also use manual mode to adjust the aperture shutter. This can also achieve the effect of exposure compensation. Photographers can also take the more common method. That is to use the camera to aim at a mid-tone object (it can be a tree and other objects that are close to gray). Then press the shutter halfway without letting go, and then compose the camera to shoot the snow scene. During the whole process, the photographer must be careful not to directly meter and shoot at the white snow.

Shooting Snowflakes

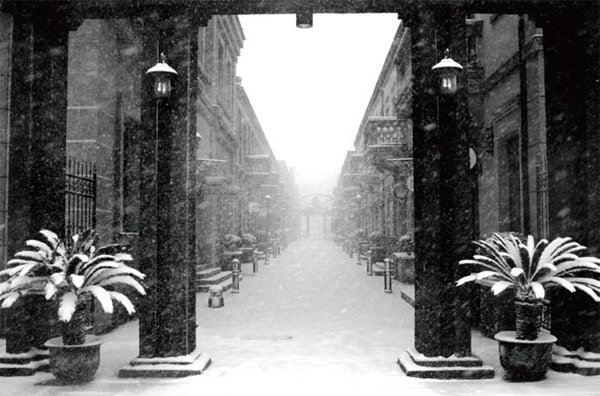
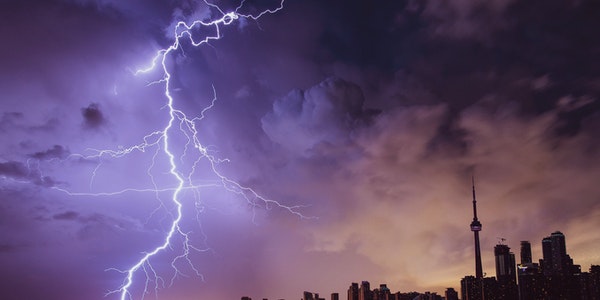
Use a high-speed shutter to freeze the momentary state of snowflakes falling. But because most of the background is too bright, the snowflakes are not obvious.

Aperture F4 Exposure time 1/250s Focal length 24mm Sensitivity 200

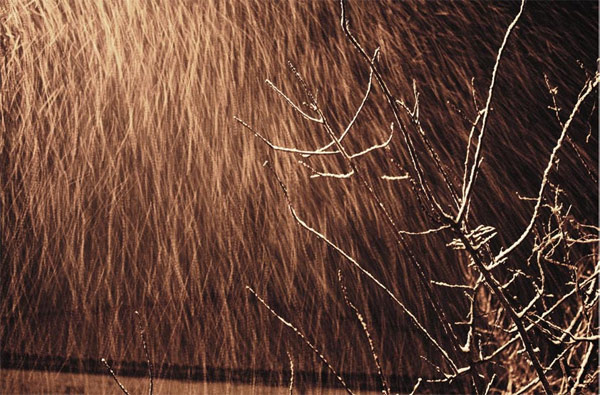
The use of slow shutter speed and dark background makes the traces of snowflakes clear at a glance

Aperture F4 Exposure time 1/5s Focal length 78mm Sensitivity 500


In snowy days, if the photographer wants to take pictures of flying snowflakes, it is important to pay attention to the choice of background and the application of shutter speed. If the photographer wants to express the sense of lines when the snowflakes are flying, he can choose to shoot at a slow shutter speed, generally 1/15~1/60s is appropriate. If the photographer wants to freeze the moment when the snowflakes fall, they can choose to shoot with a fast shutter speed. And the snowflakes are frozen at a certain moment, giving people a certain sense of beating. In the selection of the background, the photographer should choose a darker background as a foil. Because a dark background can emphasize the presence of snowflakes more than a bright background. And at the same time, it can avoid the interference of the background to the snow.


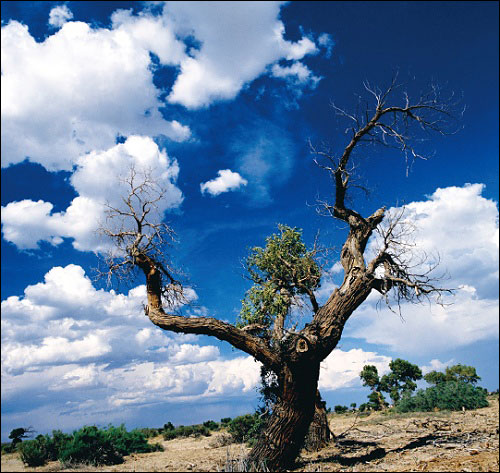
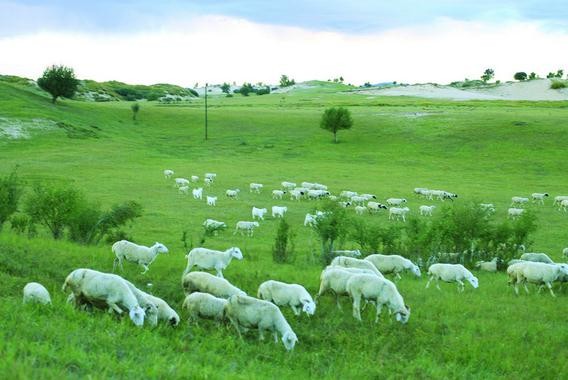
Using a Certain Carrier to Express the Snow
Scene

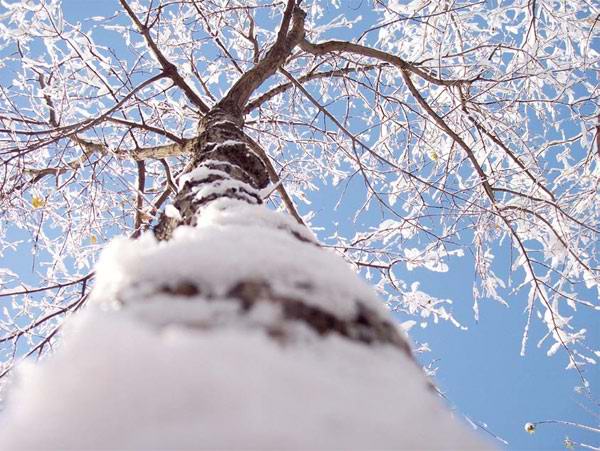
For snow scenes, photographers should not only point the lens to a large area covered by heavy snow. But also observe some other small details. For example, snow-covered branches, buildings, fences, etc. The performance of these materials may bring richer meanings to the expression of snow scenes. And at the same time strengthen people’s feelings of ice and snow. When photographers choose to hang trees as their subjects, they should give priority to multiple thin branches, low but lush woods or individual branches for shooting. For the composition, whether it is a panorama of the whole branch or a close-up of a small branch, it has a distinct expressive force.


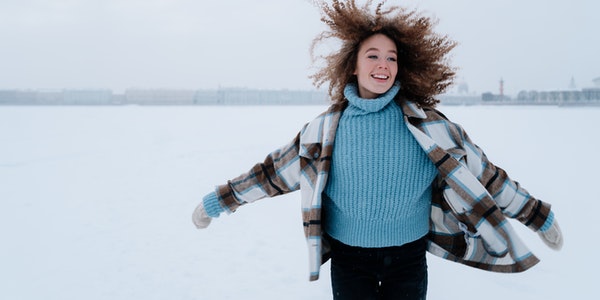
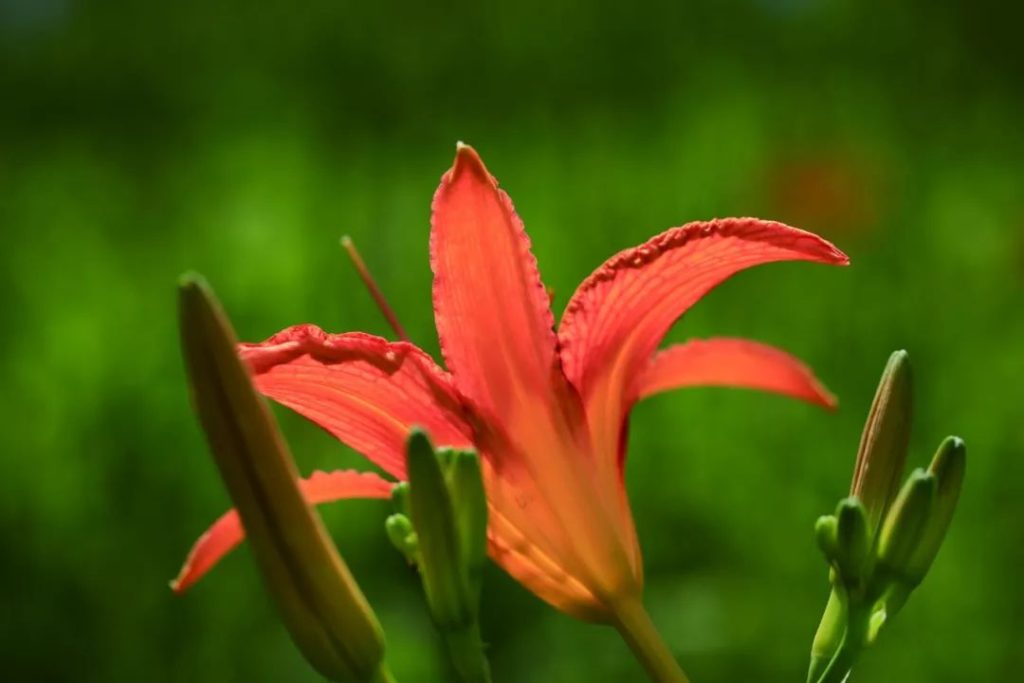
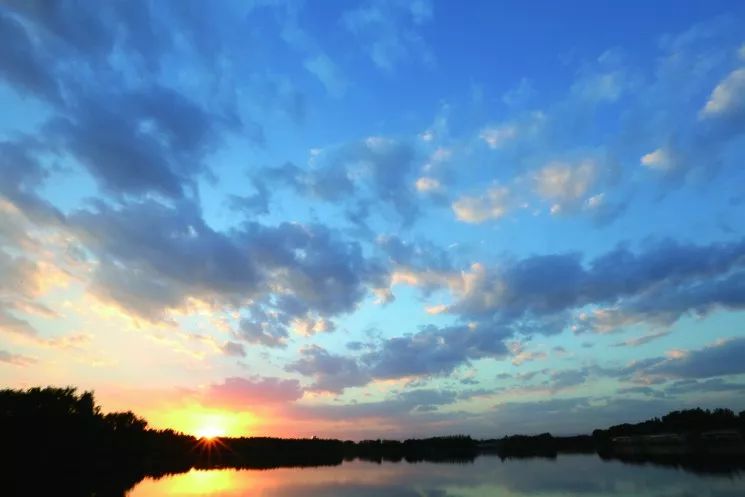
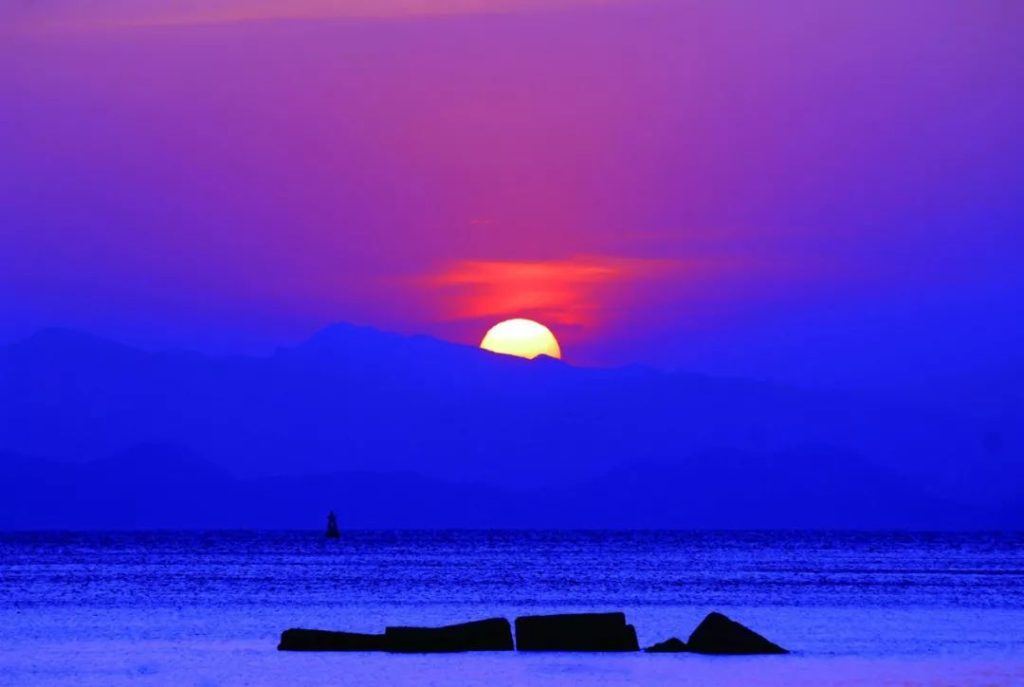
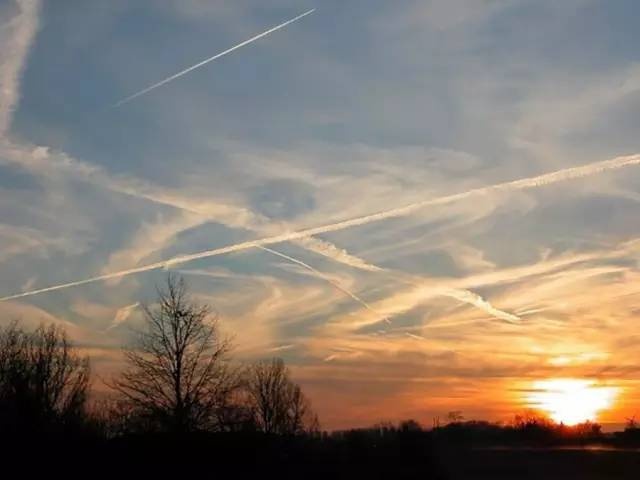
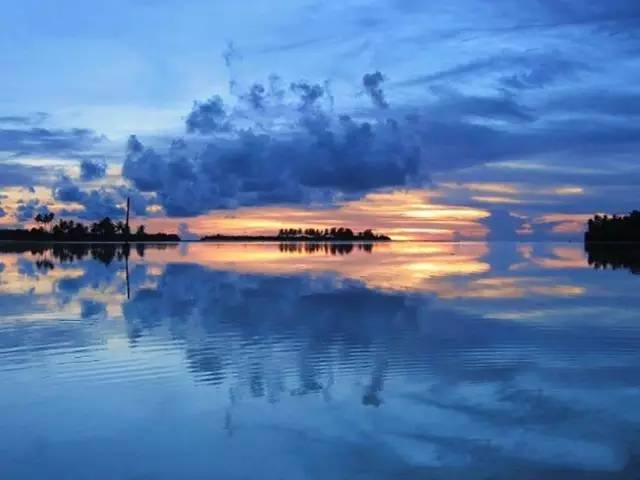
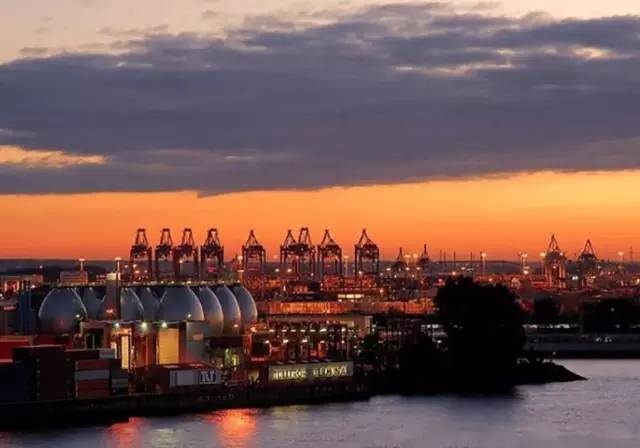
Use Color Temperature to Express Different Temperature Senses

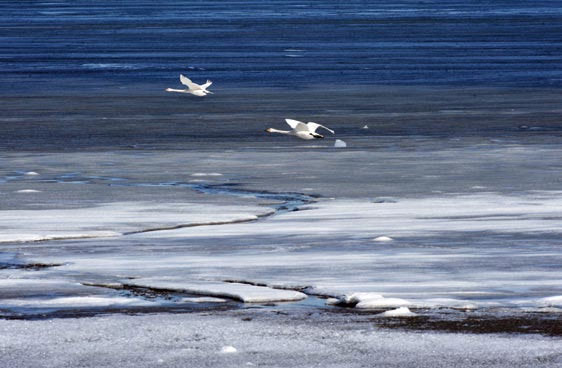
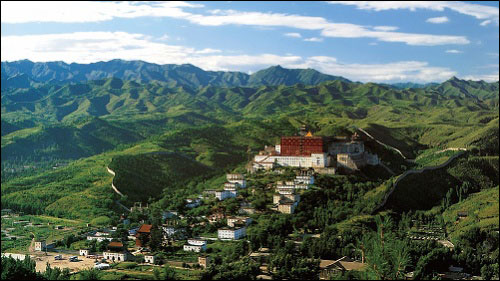
Aperture F13 Exposure time 1/640s Focal length 400mm

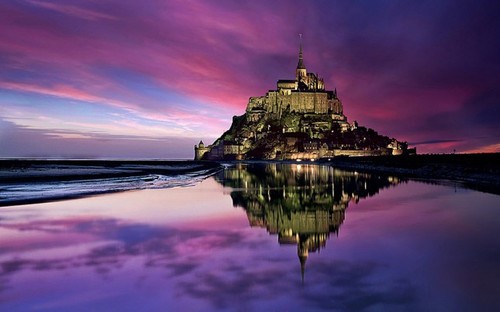
The snow scene should be white and flawless, but in different climates or time periods, photographers can get different snow scene effects through different color temperatures. On a sunny winter day, affected by the direct light, the picture taken can directly show the whiteness of the snow. When shooting on a cloudy day, the snow surface will show a cool tone under the influence of light, so that it can express the coldness and mysterious atmosphere of winter. In the morning and evening when the color temperature is low or under the dim street lights at night, the light will be more inclined to warm colors, and the white snow scene at this time will also be inclined to warm colors due to the influence of the color temperature of the light.


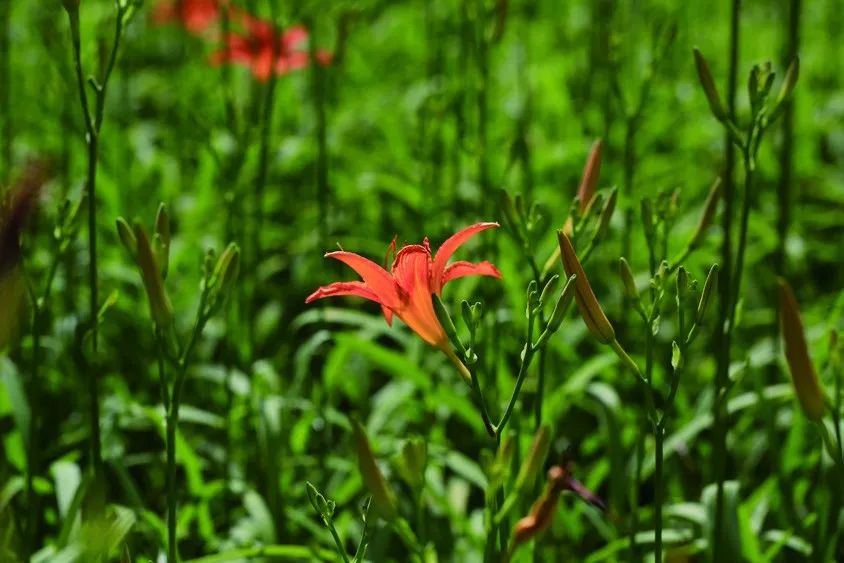
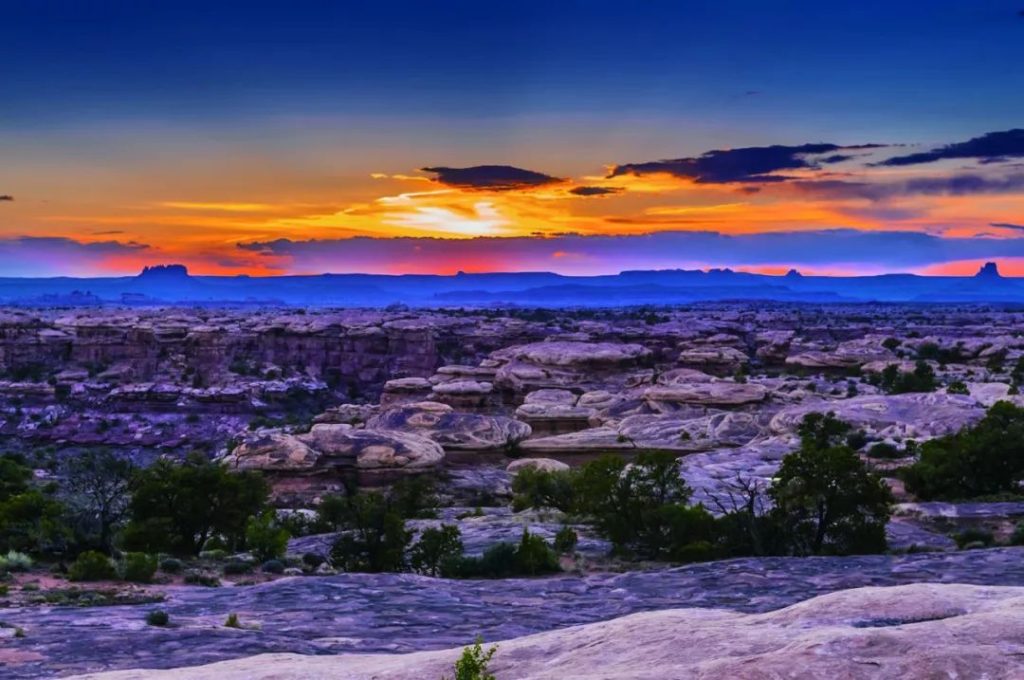
 Shoot with Foreground

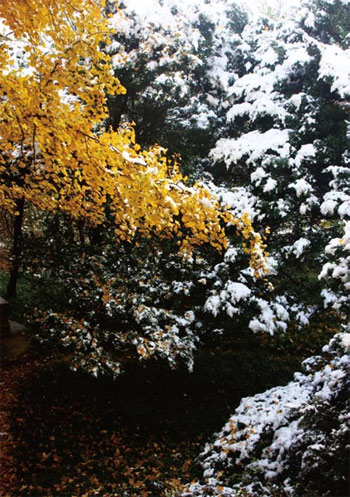
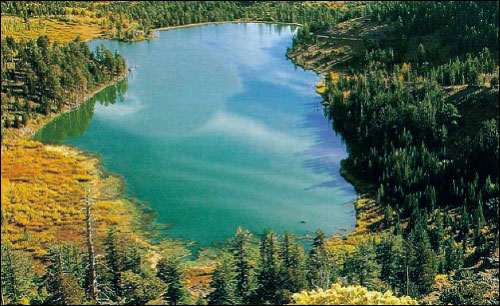
Use the yellow leaves as the foreground to set off the whiteness of the snow

Aperture F4.5 exposure time 1/250s focal length 30mm


When the ground is covered with snow, it tends to show a relatively single color, resulting in an overly flat picture. Therefore, when shooting, the photographer must master certain composition skills to find a bright foreground for the picture, so as to form a contrast with the snow-covered scene. In this way, the picture has a certain sense of three-dimensionality and distance.


 Shooting of Tree Hangings and Icicles

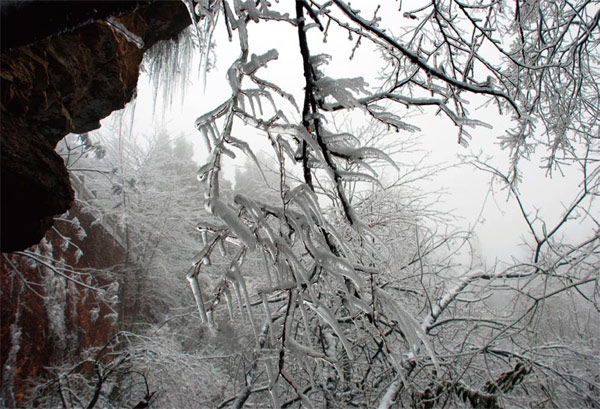
The tree hangings and icicles shot in the upward direction are more immersive

Aperture F5 Exposure time 1/100s Focal length 20mm


Tree hangings and icicles are a unique sight in winter. A tree hang is a sight of snow and ice clinging to objects such as branches. Icicles are generally hung vertically on eaves, cliffs and other places. In the process of expressing tree hangings and icicles, photographers can show the crystal clear and transparent texture of ice by increasing exposure compensation. Of course, shooting from the side and looking up at the angle can make it more compelling.

Categories
Studio Lights Education

Take advantage of area light for landscape photography

What Is Area Light

In landscape photography, area light is a light that is often used. The so-called area light refers to the local area light projected on the ground through the clouds in the sky, the plants on the ground or other scenery. Area light can increase the contrast of the picture, making the picture appear bright or dim locally. Sometimes the light projected from the gap between the clouds may also appear as a beam phenomenon. If this area light is reasonably arranged into the picture, it can bring unexpected visual effects to the dull picture.

The appearance of area light can make the originally dull picture beautiful.

 Commanding Heights

When shooting with area lights, finding the vantage point is the key to success. Shoot area light projection. When it comes to ground scenes, it is easier to perform high-angle aerial shots. In order to better represent the light and shadow effect of area light, you should try to find a position with a wide foreground when selecting the commanding height. It should be noted that some trees or weeds should be avoided, otherwise it will affect the viewing effect of the picture.

Shooting at the commanding heights can better show the light and shadow effects.

Metering Mode

The spot metering mode is suitable for shooting area light. Before shooting with area light, you can meter the light in advance according to the scene that is illuminated by the light. When metering, you must measure the part that is illuminated by the light. If you meter the dark part, it will cause the picture to be overexposed, and the area illuminated by the area light will become pale.

When everything is ready, you can wait for the area light to move to the best position and press the shutter to shoot. Of course, we should analyze the specific situation according to the shooting conditions such as on-site lighting. And if necessary, we can reduce the exposure, generally speaking, it can be reduced by 0.3-1 stops.

After using spot metering to measure the brightest subject in the screen, subtract 1-level exposure according to the measured data. That can better highlight the light and shadow effect.

Use of Lens

Use either a wide-angle or telephoto lens when shooting area light. The wide-angle lens can express wide and atmospheric scenery scenes. While the telephoto lens can zoom in on the wonderful local scenes in the distance. It is important to note that the movement of the clouds varies with the magnitude of the wind. When the wind is relatively strong, the clouds move faster, and the speed of the area light shift is correspondingly faster. At this time, the pre-shooting preparation becomes very important, because the action is a little slow when shooting. And the fast-moving area light will be missed. This is why landscape photography also needs to be captured.

Waiting to capture when the light moves to the most beautiful part of the frame is the key to success.

 Timing of Area Light Appearance

Area lights obscured by clouds do not appear very often. And are especially likely to appear in the days before and after a storm. Using the area light created by the clouds, not only can you shoot in the best light and shadow in the morning and evening, but you can even shoot good works at noon.

In real-life scenes, area lights, which are partially blocked by other objects, can be seen everywhere. This area light, which is blocked by objects, will produce different light and shadow effects according to different periods and time periods. This kind of area light can even be changed artificially. As long as you are good at observing and using it, you will be able to shoot wonderful works of light and shadow.

Categories
Studio Lights Education

Deep Resolution Aperture

To a large extent, photography is the use of aperture, shutter, and ISO. Whether you have a foundation or not, are just learning photography or are already a veteran, this aperture analysis article will benefit you a lot.

What is Aperture?

Photography is always full of annoying terms and acronyms. So today let’s talk about aperture. It is no exaggeration to say that the aperture is just a hole in the lens. The hole is made up of blades that expand and contract to control how much and how little light enters the lens. From this point on, it works basically the same way as the eye.

Is it the aperture that controls the brightness and darkness of a photo?

Yes, but it’s not the only factor that controls light and dark, shutter speed and ISO can also determine the light and dark of a photo. Aperture controls how much light enters the camera, shutter speed determines how long the sensor is exposed to that light, and ISO is how sensitive the sensor is to light. All three need to be balanced to produce the right exposure.

In many cases, you’re better off setting the aperture value yourself – use aperture priority mode or manual mode, which directly controls depth of field.

Can you explain depth of field?

While the lens can focus on a specific point, there will be an area – the image inside the area is clear and the image outside the area is blurred. This area is the so-called depth of field, and choosing the aperture is selecting the range of this area.

Simply put, a wide aperture reduces the depth of field, while a small aperture increases it. It’s easier to make an impression in your mind. Actual numbers and aperture ranges are easy to confuse. The key is to remember that larger apertures have smaller numbers, eg f/1.4 is larger than f/2.8, while smaller apertures are generally larger, eg f/22 is smaller than f/16.

There is a very easy way to remember that numbers make the aperture bigger but make it smaller, like a fraction. For example, imagine f/4 as 1/4, and f/8 as 1/8, obviously. Smaller f-stops allow more light to enter the camera.

So what do these strange numbers actually refer to?

The f-stop numbers you see on your camera are what we call “f-numbers” (f-numbers or f-stops) – which may appear to be arbitrary numbers, like jumping from 4 to 5.6 to 8, etc. etc., but the numbers are actually regular. Each time you adjust the number, the amount of light entering the sensor is multiplied by 2 or halved, depending on the value you adjust. Each halving or doubling counts as “one level” – or 1EV for the light.

That is, one stage is f/8 to f/11, and two stage is f/8 to f/16. For finer control, you can operate the aperture in half-stop or third-stop.

Difference in aperture value

Is the f/4 aperture of the 24mm wide-angle lens the same as the f/4 aperture of the super telephoto 500mm lens?

Although the size of the aperture opening varies from lens to lens, the amount of light allowed into the camera is the same. The actual meaning of an aperture of f/4 means that the opening consists of 4 parts, then f/16 means that the opening consists of 16 parts.

Using this rule, it is not difficult to find that the aperture of 24mm is f/4, and the diameter of the aperture is 6mm, then when the aperture value of 500mm is f/4, its aperture diameter is 125mm wide. However, although it has a large opening and more light can enter the lens, more light has then lost in the barrel of the telephoto lens. So we can draw a conclusion: no matter how large the focal length of the lens, the same aperture value, the same amount of light enters the camera sensor.


Tips: Depth of Field Preview

The image seen through the optical viewfinder is actually under the maximum aperture of the lens, and the actual depth of field effect cannot be seen. You need to press the depth-of-field preview on the front of the body to see the true depth-of-field effect.

Is it better to use a large aperture or a small aperture?

It depends on what kind of effect you want to shoot. For example, a wide aperture has a shallower depth of field, which can be very effective at blurring the background and highlighting the subject.

Photographers can use a faster shutter speed while using a large aperture. Because the lens allows more light into the sensor, the exposure time can be shortened. If you’re shooting sports or wildlife, you’ll have to open the aperture as wide as possible and use a fast shutter speed to capture the action. The downside of a large aperture is that the depth of field is so shallow that you have to focus very carefully to make sure your subject doesn’t get out of focus. The smaller the aperture, the less of a concern in this regard, because a large depth of field means more of the sharper parts of the photo.

A small aperture will bring a great range of depth of field, from far to near, all scenes in the lens can be clearly captured, often used in landscape photography. However, normal exposure at small apertures requires slower shutter speeds. This means that you need to use a tripod to keep the picture sharp, unless you sacrifice picture quality by increasing the ISO value to ensure the shutter speed. Of course, when using a small aperture diffraction to shoot a light source, a beautiful starburst effect will appear unexpectedly!

Use of Aperture


Is there any necessary relationship between bokeh effect and aperture?

The bokeh effect is related to the focal length, distance, and aperture. With the first two being the same, we can discuss the relationship between aperture and bokeh.

When the aperture size is the same, the more and rounder the aperture blades are, the more rounded and better-looking the out-of-focus effect will be in actual shooting. Therefore, the number and shape of the aperture blades have become an important criterion for evaluating the quality of the lens. When buying a lens, we may also pay attention to this parameter. If you prefer a rounded bokeh effect, choose a circular aperture blade, and choose the lens with the highest number of blades.

Tips: Tips for buying lenses

The rounded aperture blades provide a very rounded, soft bokeh effect. So, if you’re serious about bokeh, then you need to choose a lens with rounded aperture blades and the highest number of blades.

Categories
Studio Lights Education

How to Capture the Decisive Moment

Snapshots are taken at the decisive moment. The so-called snapshot: It is to shoot the most natural and life-like moving objects at the scene of life without interfering with the objects of the shooting.

The Decisive Moment

One of the characteristics of capturing is the speed, to put it bluntly in one word – capture.

There is no need to grab anything that is stationary. When you use the word “grab”, you have to grab the subject’s expression, expression, and movement in an instant. In the words of the master, it is the “decisive moment”.

Shooting Skills:

1. Carry the camera with you for 366 days (remember it is 366 days). Know that if you bring your camera 365 days a year, but you don’t take pictures. As a result, you didn’t bring it on that leap day, but there was an emergency! Wouldn’t that be a big loss?

2. Speed first!

Set the camera to shutter priority to maximize sensitivity. Let the sensitivity be at the level where quality and speed work best.

3. Continuous shooting or single shooting?

It turned out that we were reluctant to burn film. Now that there are digital ones, let’s shoot as much as you like! Even if you press the shutter for continuous shooting, it has to use three or four negatives, as long as one of them captures the best “moment” “, that’s enough. However, there are also objections. The essence of capturing is to capture the decisive moment when the shutter is properly pressed, and the approach of “shotgun king” has no technical content.

4, sound east and west.

With a digital camera with a rotatable lens, people can take pictures of things behind them when they are facing other places. If not, pretend to shoot something else, quickly turn to the actual subject, click.

5. Both telephoto and wide-angle are suitable. A telephoto allows you to take pictures from a distance without disturbing the subject. The wide-angle can include everything you see, so you can choose.

Nature Is Beauty

Another feature of capturing is to be natural and not interfere with the subject of the shot. Those who are most natural and live are the most valuable. Snapshots are not staged shots. Staged shots require the subject to form a certain picture for the purpose of taking pictures according to the photographer’s vision and intention, to make certain movements and expressions, and to set up light and pose to shoot slowly. Snapshots are not something you can think of in advance. You just need to go out with the camera on your back and see what you see and shoot. Going deep into life is the soul and essence of capturing.

Go deep into your life, get inside your subject, but don’t bother them. Sometimes capturing a photo requires waiting, searching, and observing. Exercise more and shoot more often.

A Few Don’ts When Taking Pictures:

1. There should not be too many people, and loud noises are not acceptable. “Into the village” quietly. A person’s goal is smaller, and many times it is not easy to do things with a lot of people.

2. Incorporate into the subject, don’t be out of tune with the subject. When you go to take pictures of market life, don’t wear suits and leather shoes, you must integrate into the group.

3. Be calm and don’t get too excited. When you see a good subject, calm down, don’t adjust the aperture and shutter when excited, or even lift the camera to shoot before the camera is turned on. It’s too late to respond.

Off topic:

Not everyone likes to be photographed, and you can find ways to hide your camera. You can hang it on your chest, cover it with something, etc. If the subject expresses disgust, learn to respond with a generous smile. Instead of escaping like a thief, you should walk over generously, and your sincere attitude will generally get the other party’s understanding.

In a word, the first thing you need to do is to exercise the basic skills of shooting, and then you need to cultivate your own observation and learn to explore. Find things that are interesting, unexpected, and unusual. You also need to cultivate your own foresight and know what the other party is going to do next! Of course, you have to wait for the opportunity in the end. When the opportunity comes, you can successfully take a good picture.

Categories
Studio Lights Education

How to Take Great Waterscape Photos

Seascape Photography

Shooting of dynamic seascapes

We often have the opportunity to go to the coast to shoot, but how can we capture stunning images?

Tip 1: Use a wide-angle lens

The photographer used a 10mm wide-angle lens to make the picture more magnificent and to capture more surrounding environments. If you can shoot the wide-angle lens slightly upward, the effect will be even more shocking!

Tip 2: Choose the right time and weather

Appropriate time and weather are very important for photographing natural scenery. We can take advantage of the soft light in the early morning, and because the sun is not too strong, we can make longer exposures and capture the traces of clouds, making the picture more dynamic!

Tip 3: Long exposure to soften the water

We can also use a tripod to stabilize the camera for long exposures when shooting shores, flowing water or clouds, so that the water becomes silky smooth and looks like fog!

Tip 4: Use a CPL filter to eliminate water reflections

There are usually reflections on the sea surface. If we use a CPL circular polarizer, the reflections on the water surface will be eliminated. In this way, the world under the water will be revealed, the photos taken will be different from those seen by the naked eye, and the water will be clearer.


Tip 5: Choose a foreground to set off the subject

The foreground can enrich the picture and bring out the subject. The photographer chose the stone in the picture as the foreground. We can also use more foreground skills when shooting, and we will definitely strengthen our photography skills!

Photographing static seascapes

There is another set, blue tones, calm water and dynamic sky, combined into a wonderful photo with movement and stillness, even if you are a novice! Check out a few simple points below!

Tip 1: Bring out the blue hue

To get a bluish tone, we need to pay attention to two things.

  1. Shooting time: Usually in one day, the sky changes from dark to bright from 5 to 6 in the morning, and the sky photographed at this time will be relatively blue. The sky after sunset is also fine, but it is easy to take in the warm sunlight. Therefore, we recommend getting up early and shooting at the beach!
  2. White balance: Using automatic white balance may not produce the desired effect. We can set the white balance to a low K number or “tungsten light” to make the photo more blue.

Tip 2: Long exposure to smooth the water surface

Use a tripod, small aperture, low ISO and long exposures to smooth the water surface, as well as manual mode or S-mode/Tv-mode. The general exposure can be from a few seconds to tens of seconds, or even a few minutes, but be careful with overexposure, and use an ND filter if necessary.


Tip 3: Prospects and the application of the rule of thirds

Many great photos also contain a foreground, and the foreground in the photo is the rock. The “rule of thirds” requires special attention when photographing coastlines. We can put the sky and the sea at the junction of one third of the picture, whether it is the top third or the bottom half. The former highlights the foreground (such as rocks, sea), and the latter highlights the sky.

Waterfall Photography

Shooting of small waterfalls

The photo is so dynamic and dynamic, and the composition is of a certain level. In fact, shooting skills are not difficult, even beginners can easily do it! Now let’s see how to take this waterfall photo together!

Tip 1: Slow shutter to shoot flowing water

A slow shutter can turn the water of a waterfall into silky smoothness, so hold the shutter down to 1/20 of a second or even a few seconds, and your photos will have mist-like water! Of course, use a solid tripod!

Tip 2: Use a Gradient Gray GND Filter

Sometimes when the sun shines on the location of the waterfall, one side of the photo will be overexposed and the other side will be underexposed, which greatly reduces the effect. The solution is to use a GND Filter to balance the exposure.

Tip 3: Use CPL Filters

Have you seen the mud under the waterfall? If you shoot directly, the reflections on the water surface will be captured and not so “clear”. To take pictures of things under running water, you can use the CPL filter! Also, this super useful filter can also reduce reflections on stones.

Tip 4: Triangle composition

Triangular composition can make the photo smooth and can also play the role of “leading lines”!

Take a look at this group again, waterfall photography with different styles.

Shooting tips for large waterfalls

Tip 1: Three Elements

A wonderful photo often contains 3 elements (up to 3, otherwise it will become cluttered), this photo contains:

  1. Warm sky
  2. Photographer
  3. Silky Waterfall

We can also try to find three elements to make the picture richer when shooting.


Tip 2: Balance sky and ground exposure

Usually shooting this kind of photos, novices will often shoot directly. Due to the large light difference, one is that the sky is exposed normally and the ground is too dark, or the ground is clear but the sky is overexposed and becomes dead white, resulting in unsatisfactory results. One solution is to use a graduated gray filter to balance the exposure. For the introduction and usage of gradient gray filter, please refer to the following.

Tip 3: The Rule of Thirds Composition

This composition method is one of the must-learn methods for all beginners, and it is easy to operate. Just put the target in one-third of the screen. It seems that the portraits and horizons in the photo also apply this technique. Please refer to our previous article for details on the rule of thirds composition.

Stream Photography

Rapids

Running water has always been a very easy but attractive subject, whether you are a novice or a veteran, you can do it and take stunning pictures. Take a look at the key points of this photo shoot, and then go do it this weekend!

Camera Canon EOS 5D Mark II

Focal length 16mm

Shutter 82 sec

Aperture f/6.3

ISO 100


Tip 1: Slow shutter to shoot flowing water

We usually use manual mode (M-Mode) to shoot flowing water, then lower the ISO, lower the aperture, and slow down the shutter according to the smoothness of the water flow.

Tip 2: Use ND Filter

If the shooting is in broad daylight, there is a chance that the photo will be overexposed due to the slow shutter speed. At this time, you can add a light filter (NDFilter) to reduce the entry of light and make the shutter slower.

Tip 3: Select colors locally to increase contrast

We can go through a simple post technique to pick the golden leaves, then increase the saturation and contrast, and lower these two settings for the rest. This will make the yellow leaves stand out even more!

How can you miss the fantastic scenery? How can I take this picture like an oil painting? Don’t worry, let’s see the little secret in it!

soothing

camera NIKON D90

Focal length 18mm

Shutter 5 sec

Aperture f/22

ISO 100


Tip 1: Slow shutter makes the water slippery

The slow shutter (5-second shutter here) makes the water silky and adds a touch of poetry to the film.

Tip 2: Make HDR Photos

HDR photos can balance and show the light and dark levels in a photo. It is usually the result of combining multiple photos with different exposures. For example, you can take 5 photos with different exposures in the same environment – from -0.5EV, -0.3EV, 0, +0.3EV, +0.5EV, and then post them in the computer. Now the software is very powerful and can achieve similar results with a RAW photo.

Tip 3: Adjust the tone

To make the sky appear a purple “dream” color, in addition to the actual color of the sky at that time, we can also set “Image > Adjustments > Hue/Saturation” in Photoshop, and adjust Hue under “Reds”. !

Summarize

The above techniques are not difficult, the most important thing is to shoot at the right time (like the Magic Hour twice a day). Of course, it is not terrible and hard work, because often beautiful scenery also requires physical effort to find!


Reflection

Reflection in the Lake

This photo is very dynamic and still, and it also contains several shooting techniques. Let us learn about the shooting techniques, which can be applied when encountering similar environments!

Camera Canon EOS 60D

Lens 10 – 22mm

Focal length 10mm

Shutter 60 sec

Aperture f/22

ISO 100


Tip 1: Shoot dynamic clouds with slow shutter speed

When there is wind, clouds are actually mobile. We just put the camera on a tripod and open the shutter for a few seconds to tens of seconds, and the photo can capture the flowing clouds! But be careful that slow shutter speed will increase the exposure, we need to reduce the aperture (f/22) and ISO (100) accordingly.

Tip 2: Shooting water reflections

Because of the slow shutter (60 seconds), the water becomes silky smooth and reflects the boat like a mirror. So let’s take a photo of the reflection of the boat as well! Note that if the wind is strong, the boat will shake, and it will become unclear at slow shutter speeds.

Tip 3: Take a picture of a purple sky

To add purple to the sky to make it more psychedelic, we can adjust the Tint (color) settings in the camera if necessary, so that the sky will be purple.

Reflection by the Sea

Camera D3s

Lens 24-70

Focal length 24mm

Shutter 80 sec

Aperture f/8

ISO 400


Tip 1: Use the water surface as a reflection

As long as we mount the camera on a tripod and take a long exposure, we can also capture the reflection on the water surface. If the water flow is calm, the image will be clearer. Sometimes the reflection is not enough reflective and dark, we can use the “black card” to increase the reflection of the water surface.

Tip 2: Aperture and ISO Considerations

When shooting a night scene, in order to make the scene of the photo clear, we will use a small aperture (such as f/8-11), but the small aperture will reduce the amount of light entering. Therefore, we can increase the shutter opening time or increase the ISO. The ability of current cameras to de-noise in general is also very good, especially when using full-frame cameras, ISO400-800 is no problem at all. Therefore, you can choose to slow down the shutter or increase the ISO according to your personal needs. But the former requires a stable tripod to avoid blurred photos, be careful!

Tip 3: How to shoot a purple magic sky?

If the sky already has beautiful colors at that time, you can shoot directly. On the contrary, we can adjust the “Hue” option in the camera, so that the color of the photo will be more magical.

Categories
Studio Lights Education

Capture the Moment of Light and Shadow Lightning Shooting Tips

Shooting lightning may seem like an advanced technique for beginners. In fact, as long as you master a little skill and practice a lot, there will always be an excellent lightning photo that belongs to you! Let’s take a brief look at how to shoot lightning!

1. Pay Attention to Safety

To take lightning photos, the first point is to pay attention to safety. Don’t stand under lightning range, or on high ground, or you may lose your life!

Take care of your own safety first

2. Long Exposure

Lightning occurs randomly and there is no rule, so it is impossible to press the shutter when you see lightning. To fix this, we’ll make long exposures with the following settings:

Set up a tripod

Adjust the camera to B shutter/T shutter in manual mode.

Set the ISO as low as possible, such as ISO100 or 200.

Adjust the aperture according to the distance of the lightning, f/5.6 for far lightning, f/8 for medium distance, f/11 for close, and you will know how much aperture to use after taking a few shots.

Set the focus to manual focus and focus at infinity.

When shooting, aim the lens at the place where lightning is expected (including the foreground/background), open the B shutter/T shutter, and wait for the lightning to appear.

Remember to calculate the best exposure time yourself if there are lights in the foreground/background, not too long or too short.

You need to set the ISO to the lowest level when shooting


3.Foreground/Background Coordination

If only lightning is included, the photo may become too monotonous. At this time, we can add foreground or background to the photo to make the photo more shocking! Examples of foreground/background are streets at night, beaches by the sea, landmark buildings, etc.

Having buildings in the foreground can make the photo more impactful.

The street at night can also be used as a foreground

4. Adjust the White Balance

Just like shooting night scenes, we can add color to the night sky by adjusting the white balance. Colors like purple, blue, etc. can add atmosphere to your photos. Of course, you can adjust the white balance when you get home after shooting RAW files.

Make photos purple by adjusting white balance

Turn down the white balance for a cool-toned photo

5. Multiple Exposures

To capture multiple lightning bolts into the same photo, we can use the camera’s multiple exposure feature. Expose twice in the same photo, so you can capture lightning in different positions!

Multiple exposures can capture lightning in different locations

Multiple exposures to capture multiple lightning bolts

Lightning does not appear often, and we need to pay more attention to some safe places where lightning may be photographed on weekdays. If lightning strikes, grab your camera and tripod and go! Another point, lightning is often followed by rain. Don’t forget to waterproof the camera when shooting, and clean it and put it in a moisture-proof box for maintenance afterwards.

Categories
Studio Lights Education

Basic Practical Portrait Photography Tips

The Combination of People and Background Environment

If you want to express a character with a story, the collocation of the background environment, framing and composition are very important. When shooting people, some people think that the larger the aperture, the better, because a blurred shallow depth of field can highlight the subject. But because of this, the subject is clear, but the way of matching the background is sacrificed. It is a tourist photo that should be avoided. , so that after the trip, it’s not clear where each photo is in the background, wouldn’t that be a bummer?

A good background environment will let the viewer know at a glance what the person and thing the photo is about to express. It doesn’t take much to describe what the photographer wants to present, and it allows the viewer to spend more time on the photo, appreciating and discovering the interesting places in the photo.

Characters (especially elderly people) are often the best spokespersons for local culture, and their dress, behavior and actions can fully show the desirable exotic style.

Take a Set of Photos

How to take a group of people photos and select and combine them into a group of works from more than a dozen photos is quite a test of your editing ability. Each arrangement and selection can generate specific themes and ideas, and there is no certain answer. But how you make your choices shows your understanding of composition and idea presentation. This is not something that can be shown by taking a lot of shots. We recommend looking at other people’s works to improve.

Portrait photography can be presented in ever-changing ways, but as long as you master a few basic shooting tips, you can capture all kinds of precious shots and create the best memories on the go.

In mid-June, the Pamirs are full of rapeseed flowers, and a Tajik woman is working. At this time, I squatted and shot from a low angle, bringing in the yellow rape blossoms as the foreground, the woman as the middle shot, and the mountains of the Pamirs in the background.

Change the Shooting Angle

When shooting, different framing angles can create unexpected effects and change the way a photo is presented. When most people take pictures, they press the shutter at a height that is parallel to their eyes. That is, when they stand and look out from their height. In this way, you may wish to try different angles when shooting, such as: shooting from the top or shooting at a low angle. This can show different picture expressions.

Although the same person and background are shot, the difference in the viewing angle of the eyes will greatly change the viewer’s experience.

Change the Subject’s Eyes

Portrait eyes are often the most important part of portrait photography. Usually, the subject will look at the camera or pay attention to the photographer, resulting in an unnatural look. At this time, through mutual communication and interaction, the subject can reduce tension and pressure. And then guide the other party in a timely manner to capture the momentary sincere eyes when the other party is inadvertent. Because the viewing angle of the eyes is different, the photos will have a different sense of extension, you can try more.


Use Light to Highlight the Subject

The use of light is an important subject in photography. In portrait photography, there are countless ways to use light. And changing the angle of light projection can make the facial features of the characters present a completely different feeling. Shooting in side light, for example, can make the photo more three-dimensional and can also deepen the theme of the atmosphere.

Of course, you can try various ways to create, whether it is natural light source or external flash to assist, and shoot the creation you want.

The beautiful light that fills the room is highlighting the subject of the entire photo.

Silhouette Shooting

Using the contrast of the background light, the silhouette effect of the main body can be created. When shooting, pay attention to the control of the metering system. Under normal circumstances, it is best to use “central metering”, with the background light source as the metering point. This way you can maintain a fast shutter speed, freeze the silhouetted subject, and get creative with it.

The black silhouette jumps in the blue sea and sky, making it more dynamic.


Movement Capture in a Moment

Dynamic picture capture, some can be prepared in advance. For example, in camera settings, you can adjust various settings on the camera according to the environment you are in at the time and the subject you are shooting, such as: ISO, aperture, shutter speed, white balance and other related settings. The photographer can construct the presented picture according to the communication between his own creation and the action of the subject. Such as jumping and movement speed are very suitable. Of course, don’t forget the required settings on the camera.

It takes a quick eye to shoot the action moment, after all, such an opportunity is always fleeting.

Shooting Partial Close-ups

Appropriate local close-ups can enhance the presentation of the theme. And appropriate shooting angles will make the local close-ups more narrative and expressive.

People’s love and affection for cats are fully expressed through partial close-up of face-to-face cuddling.


Grab the Expression

For portrait photography, rich facial expressions can often breathe life into the photo. How to capture a good expression is often more important than good photography skills. You don’t need a high-speed shutter that can take several pictures in one second. You only need to pay attention to the changes of the other party’s expressions at any time when communicating and interacting with the subject, and have the ability to guide. Know clearly what the other party’s expressions and movements may change in the next second, and press the shutter precisely. The more you shoot, the experience will tell you when you have to press the shutter.

In the conversation, the humorous conversation guides the subject. I know the other person is about to laugh, so I wait with the camera and press the shutter at the right time. At this time, you must continue to talk to the subject and help the other person ignore the tension caused by the camera.

Clever Use of Reflection to shoot

Shooting with reflections and reflections can sometimes produce unexpected effects. This can increase the attractiveness and creativity of the photo, and has the meaning of the subject echo. Reflections can make a simple composition interesting, abstract, and create a sense of visual correspondence.

Capture the Cultural Atmosphere

The different cultural backgrounds of different countries are the visual feast that can most shock travelers when traveling. These unique cultural atmospheres will bring different colors and vitality to the photos. In addition to a variety of local costumes, photographers should pay attention to the movements of the characters and the messages they want to convey.

Categories
Studio Lights Education

Shooting Tips for Landscape Photography

Tips for Taking Great Landscape Shots

Among the various photographic subjects, the landscape photos of nature are the most visually stunning.

Whether it is the vast grasslands or green jungles, the vast sea or the blue sky, these spectacular natural scenery will bring an unprecedented shock to our hearts.

Maybe you will sigh the magic of nature, it is nature that created all this and brought us a kind of happiness away from the hustle and bustle.

The common expression techniques of landscape photography are tonal contrast and tonal contrast.

Direct light can be used to create the bright and dark parts of the picture, and the contrast of shades makes the difference between the subject and the background, the subject and the foil in the picture.

Tonal contrast is usually warm to cool to warm or cool to warm to cool. Of course, you who love photography will not let these beautiful and spectacular scenery slip away from your eyes. You will definitely find a way to record everything you see, and then share it with your family, friends and more people. Then get your photography backpack ready, and don’t forget to bring a tripod. Get away from the city, return to nature, and explore the beauty of nature with a wise and sharp eye!

To be a great landscape photographer, one must first be a hard worker. The scenery that can be seen everywhere in life is no longer interesting. We should look for some less common scenery, explore unique shooting perspectives, and even go to uninhabited places to discover new scenery. Such photos are sure to attract countless viewers.

Selection of Lenses for Shooting Nature Scenery

Wide-angle and ultra-wide-angle lenses are the best choice for landscape photography.

A wide-angle lens is ideal for panoramas with wide skies and expansive foregrounds. Not only does it have a larger depth of field, it can clearly present both near and far objects, but it also has a stronger sense of perspective and depth of field than other lenses. The focal lengths of common wide-angle prime lenses are 35mm, 28mm, and 24mm.

Since the digital SLRs in the hands of most photography enthusiasts are APS frame cameras, the APS frame size is much smaller than the full frame size of 36mm × 24mm. If you use a conventional wide-angle prime lens, the angle of view will be reduced. Therefore, it is not recommended to buy a wide-angle prime lens.

Wide-angle zoom lenses dedicated to APS format, such as the AF-S10-24mm f/3.5-4.5G ED lens and the EF-S10-22mm f/3.5-4.5 USM lens, both feature that even when multiplied by 1.5 Or a factor of 1.6 can still obtain focal lengths from ultra-wide-angle to wide-angle, so it is very suitable for shooting natural scenery.

If you want to shoot sunrise, sunset, moon and stars, you must have a telephoto lens above 200mm, otherwise the sun, moon, and stars can only show small images in the frame.

Tripod

Landscape photography scenes are usually well lit, and you can get sharp photos even with handheld shots. But it’s not uncommon to see professional landscape photographers set up on tripods in movies, magazines, or websites. Why is this?

Because when shooting landscape photography, even using a higher shutter speed does not necessarily prevent blurred image outlines. Especially after the landscape photo is enlarged, the viewer will easily find that the outline of the scene is not clear enough.

Another reason to use a tripod is because of the minimum aperture of the lens that is often used in landscape photography. In order to ensure sufficient exposure, it is often necessary to use a slower shutter speed. At this time a tripod can ensure the clarity of the picture.

The significance of a tripod for capturing clear pictures and ensuring image quality is more important than the significance of large aperture lenses, shock-proof lenses, and high-sensitivity cameras. So, if you want to be a professional landscape photographer, be sure to stick to a tripod. When choosing a tripod, we should consider its stability and portability in order to make our shooting journey more convenient.

Shot in Aperture Priority Mode

Professional landscape photographers usually choose aperture priority mode to shoot outdoors. This is the Av file on the mode dial of digital SLR cameras.

Aperture priority mode provides more room for creativity, we can control the depth of field according to our shooting requirements.

If you want to focus on the subject scene and don’t want to be disturbed by those cluttered scenes, just set the aperture to a large aperture such as F2.8. Then focus on the subject scene, and a photo with a clear subject and a blurred background is born. It’s just that the F2.8 wide-angle lens is more expensive. If you want to shoot the background behind the subject clearly, just set the aperture to a medium aperture such as F8 or F11. And the subject and most of the background can be clearly presented.

However, most photographers will choose a smaller aperture when taking landscape photos of large scenes.

Why choose a small aperture when shooting a large scene? Because a small aperture can obtain a very large depth of field, all the scenes in the picture can be clearly presented. And this is the effect pursued by landscape photos of large scenes. It’s just that most lenses now can’t reach F64. Generally, the minimum aperture is only F22 and F32, and only a few lenses can reach F45. We need to note that shooting with the minimum aperture of the lens often results in reduced image quality and contrast. So choose carefully when shooting.

The Magical Use of Polarizers in Landscape Photography

When appreciating some excellent landscape photography works, you will find that the contrast and color saturation of the picture are very high. In fact, this is all due to the polarizer. There is a lot of polarized light in the blue sky, and the use of polarizers can prevent this polarized light from reaching the electronic sensor in the camera. And thus shoot a more realistic blue sky.

FVLAICA P.L Polarizers

Under natural light outdoors, every object is more or less illuminated by scattered light from all directions. Objects that were supposed to be brightly colored are covered in a layer of gray fog, and the contrast is reduced. The photos taken in this way are not bright enough in color and have low saturation. And it is difficult to achieve good results even through post-processing.

At this time, as long as the polarizer is installed in front of the lens, the contrast, saturation and contrast of the picture can be controlled by rotating the polarized lens. So that the colors of the blue sky, white clouds, sea and grassland we shoot are more realistic. Polarizers are especially useful when the sun is at a 90° angle to the direction of the lens.

Polarizers include linear polarizers and circular polarizers. Digital SLRs should choose circular polarizers with the “CPL” mark, because the use of linear polarizers on digital SLRs can easily lead to AF autofocus and AE autoexposure failures.

Focal Length 28mm|Aperture F16|Shutter Speed 1/125s|ISO 100

Categories
Studio Lights Education

The 8 Most Common Mistakes Beginner Photographers Make

When beginners take photos, they often encounter some problems in composition.

Today, we summarize several typical composition problems and show the front and back comparison photos. You can see at a glance where the problem lies by comparing.


The Main Body is Not Prominent

One of the most common mistakes beginners make when framing and composing a picture is that they always want to put many elements of the scene into the picture. In the end, the picture is too cluttered, the subject is not prominent, or there is no subject at all.

So what is the subject?

Simply put, the subject is the most important scene in a photo relative to the background scene. This most important scene undertakes the main task of expressing the subject of the photograph.

A good photo usually quickly draws the viewer’s attention to the subject that can express the subject of the photo.

Since the subject has such an important task, we must consider how to highlight the subject in the picture?

First of all, a photo should not have too many subjects, preferably only one.

Of course it is not advisable for a photo to have no subject, but too much subject cannot make the subject well expressed. When it is necessary to express the key points of multiple pictures, in order to avoid affecting the expression of the theme, it must be done in a primary and secondary order.

Secondly, as far as the position of the subject is concerned, it is best to place the subject in a prominent position, and try to exclude or compress other scenes that interfere with the subject.

The framing range is too large, the picture is cluttered, and the subject is not prominent enough

Narrow the framing range and select one of the flowers to focus on, so that the subject stands out

Horizon Position Is Too Stiff

In the photographic composition, if there is a horizon, the choice of the horizon position will play a very important role in the final effect of the picture. Especially in landscape photography, the horizon is the most common element.

When shooting, we are often used to the rule of thirds composition, that is, placing the horizon in the upper or lower third of the picture to highlight the subject of the picture and maintain the stability and harmony of the picture.

Sometimes, the horizon can also be placed in the center of the frame.

Of course, this is a relatively special horizon composition. For example, when shooting the shore scenery against the water surface, we can place the horizon in the center of the picture to get a symmetrical picture.

The most common problem with framing with the horizon is that the horizon is skewed or placed too rigidly.

Some do use the rule of thirds for composition, but the choice of the upper or lower thirds without considering the actual position of the subject in the frame is not accurate enough, causing the horizon to distract people’s attention.

Some place the horizon line very bluntly near the edge of the picture, which has a sense of abrupt stop and makes the picture look very uncoordinated.

By the lake, the view before the sun goes down is very attractive, but because the position of the horizon is arranged too close to the edge of the frame, the picture is very incongruous

Arrange the horizon in the lower third of the picture, so that the scenery of the water surface appears reasonably in the picture, and let the sky occupy more of the picture, so that the theme of the sunset is more prominent, and the picture is very artistic

Horizon is Skewed

The horizon can also be said to be a horizontal line, so if you want to be “level”, you must keep the horizon level in the picture when composing the shot.

Some friends just ignore this point when taking pictures with the horizon appearing.

A slanted horizon line would disrupt the harmony of the picture, making it uncomfortable. We say the composition is a flexible, skewed horizon that affects the beauty of the picture.

Sometimes, we can try to break the rule of keeping the horizon level, and pursue the dynamic and freshness of the picture by tilting the horizon. But most of us still have to keep this rule, after all, this is the best composition rule that photographers have been exploring for many years.

The skewed horizon affects the aesthetics of the picture

Put the horizon at the position of the upper third line, and keep the horizon level, the picture looks more natural and harmonious

When shooting sunsets in the canyon, keeping the horizon level can make people feel comfortable after seeing the picture, and the scenery of the canyon matches the scenery of the sky, which is very charming


Blindly Use the Head-up Angle to Shoot

Head-up is the most common visual angle in our lives, and it is also the shooting angle that is most in line with the visual habits of the human eye. But if you blindly use the head-up angle to shoot, it will inevitably give people a boring feeling.

For example, when taking portrait photos of tourists, using the same head-up angle to shoot will make the picture appear flat and boring.

Some people only use the head-up angle when shooting portraits, and even when shooting landscapes, animals, buildings and other subjects, ignoring other shooting angles. This will miss a lot of the original wonderful picture.

Even if it is the same thing, different picture effects can be obtained by using different angles. Some pictures may only become a photographic work if they are shot upward or downward.

So when shooting, we might as well try to squat down and shoot from a low angle, or find a commanding height to try the effect of looking down.

Although there is no problem with each composition of these beautiful portrait photos taken from a horizontal perspective, the pictures will appear very dull if they are shot blindly with a horizontal perspective.

Using the wide-angle end of the lens to look up to shoot beautiful portraits, on the one hand, you can shoot the effect of slender legs, and on the other hand, it can also give the viewer a very novel visual experience

Looking down on a portrait of a beautiful woman from a height, the character will appear petite and cute, and at the same time, it will also give the viewer a refreshing and eye-catching effect.

The Picture Composition Lacks Visual Center

When we see a photographic work, the most eye-catching place is often the visual center in the picture, which can also be said to be the most attractive point of interest. However, many photos taken by beginners will lack this visual center, resulting in a flat picture.

Sometimes, the scenery in front of us is obviously beautiful, but the pictures we take are dull and unattractive. This may be the lack of a visual center in the picture, that is, the lack of something that can attract the viewer’s eyes.

For example, when we take pictures of landscape subjects, the blue sky and the sea are beautiful and vast. But as far as photographic composition is concerned, if there are no particularly brilliant colors, it is not enough to have the two elements of the blue sky and the sea, and there needs to be a visual center to stay in the viewer’s line of sight.

For example, arrange a boat on the sea, or arrange a shell in the foreground of the picture. In this way, the visual center and other elements of the picture contrast with each other, which can make the picture more complete.

In the picture, the Tyndall effect caused by the clouds covering the sun is actually very attractive, and the color of the sky and the lake is also very good, but it always feels like something is missing.

When there is a boat passing by, we can take a picture of the boat just passing the highlight area on the water. In this way, the sky, the lake, and the boat form a very charming picture.


Handheld Shooting Results in Blurry Picture

Whether the picture is clear and whether the subject is in focus is the most basic requirement for evaluating the quality of a photo.

In addition to the pursuit of some blurring effects, most photos with blurred images and out-of-focus subjects can be classified as waste.

Only photos with clear picture and accurate subject focus can let people see the content of the picture clearly, and can also give people a visual experience.

When shooting handheld, there are two reasons why we encounter blurring of the picture. The first point is because of the exposure conditions.

In low-light conditions, the camera needs to slow down the shutter speed to get an accurate exposure. Shooting with a handheld camera without a tripod to hold the camera, even the slightest shake can result in a blurry picture.

The second point is the problem of inaccurate focus.

In fact, this is not only encountered when holding a camera, but also when shooting with a tripod.

Some friends who are new to photography can’t find the focus area of ​​the camera when shooting, and they don’t know that the focus area must be aligned with the subject to achieve focus. In the end, the subject is out of focus and the picture is blurred.

Therefore, if we want to shoot good photography works, we still need to shoot more and become more familiar with our cameras and shooting techniques.

When shooting portraits at night, because the shutter speed of the camera is too slow, and there is no tripod to keep the camera steady, the picture is blurred.

When shooting portraits at night, we can choose a place with better lighting conditions and use a tripod to stabilize the camera in order to obtain high-quality night portrait photos.


The Background Is Too Cluttered

For beginners, there is also a common problem that the background of the photos taken is too cluttered.

When shooting, you can clearly see the subject, and shoot at the subject through the viewfinder, but the obtained picture is still cluttered, and the subject cannot be highlighted.

There are many reasons why the subject is not prominent. The most common situation is that the background is too cluttered when framing the shot, or the background is not noticed, as long as the person is in the picture, the shutter is directly pressed to shoot.

For example, when taking commemorative photos of people during travel, many people have such problems. Regardless of the choice of the background and the clutter around the characters, just press the shutter to shoot the characters as long as the characters are in the picture.

In this way, the picture without the composition arrangement will eventually cause the subject to not stand out in the picture.

In fact, we can choose a simple and clean background when framing, or use a large aperture to blur the background, or change the shooting angle to avoid the clutter of the background and make the subject more prominent in the picture.

When taking pictures of flowers, a cluttered background can distract the viewer’s view and reduce the appeal of the subject.

In order to avoid the cluttered background interfering with the blooming flowers, we can use the upward viewing angle and shoot with the sky as the background.

In this way, the flowers will be more prominent in the picture, and the details such as the shape and color of the flowers can also be well reflected, making the picture more attractive.


There Is No Reserved Space in Front of the Field of View

When composing a shot, the use of scenery is a very flexible composition technique.

In order to make the picture more attractive, we can add a foreground in front of the subject, which will not only increase the spatial layering of the picture, but also guide and set off the subject.

Some friends are not used to taking pictures, or do not know how to use the foreground, so that there is no reserved space in front of the field of view of the picture, or there is no foreground to set off the subject to embellish the picture. Although there is nothing wrong with the subject presented in this way, after adding some foreground in front of the subject when shooting, it will definitely have a visual freshness compared with the previous effect.

For example, when shooting the scenery of the seaside, we can use the rocks on the seaside as the foreground of the picture to highlight the sense of space in the picture. Or use the beach as the foreground to play a role in a visual extension of the sea.

When shooting outdoor portraits of beautiful women, using some branches, flowers and plants as the foreground can increase the attractiveness of the picture.

Using the lower third of the composition method to shoot the sea and sky, there is not much problem in the composition. But the picture looks very dull and lacks attractiveness.

Arrange the beach in the foreground of the picture, and combine the waves, small islands, and blue sky for composition shooting. That

makes the picture have a strong sense of spatial hierarchy and adds to the attractiveness of the picture.

Using the rock with a very strong seaside texture as the foreground of the picture can make the photo more three-dimensional.

Categories
Studio Lights Education

A Great Way to Focus in Landscape Photography

Hyperfocal Method

This is the method most mentioned in traditional photography textbooks. Hyperfocal distance refers to the maximum depth of field range that can be achieved under the condition of constant aperture and fixed focal length. We call it the hyperfocal distance at this focal length and this aperture.

When we focus on the skyline (infinity) when framing, we will get a clear point closest to the lens, and the unsharp range between this clear point and the lens is the hyperfocal distance. If we find this clear and blurry boundary in actual shooting, and focus on it, we can achieve the effect of panorama depth.

Since it is impossible to always use the same focal length and aperture between shots, it is necessary to test the lens with different focal lengths and apertures. We can also predict the hyperfocal distance from the depth of field window on the lens. This can be easily applied in actual shooting.

Depth of Field Characteristic Method

We all know that to get a large depth of field, you can shoot with small apertures, long distances, and short focal lengths. But we also need to understand that the depth of field also has a characteristic, that is, the depth of field in the back is greater than the depth of the foreground, and it is twice the depth of the foreground.

When we understand the characteristics of the depth of field, we only need to follow this depth of field characteristics when focusing on the actual shooting, and focusing on the front third of the selected picture will naturally conform to its characteristics. In this way, the picture taken will naturally achieve the effect of deep panorama.

Depth of Field Compositing

The two focusing methods mentioned above can basically meet our general shooting requirements. If the depth of field requirements are particularly strict, the depth of field synthesis method can be used.

During specific shooting, the fixed camera position does not move after framing, and one shot is taken for the foreground focus, one for the medium focus, and one for the distant focus. In this way, three pictures with different focus areas are obtained, which are then synthesized by post-production software, and the details of the synthesized pictures are far beyond the above two methods.

Unknown Tips for Landscape Photography

Foreground, Subject and Background

In the picture, you can find the three elements of foreground, subject and background, which is a perfect big picture.

With the blue sky and white clouds as the background, the rolling mountains as the main body. And the meandering streams as the foreground, it constitutes a superb scene that should only be found in the sky.

If there are only two of the three elements, although the layering is good, it cannot be called a stunning photo. Try to analyze landscape photos, which often have three elements: foreground, subject and background. In the foreground can be streams and lakes, or silhouettes of shadows on the ground. The subject is a building, a mountain or a visual focal point. The background is accompanied by blue sky and white clouds, or morning and evening sky.

levels of light

Forward light with a little side light can present the best level of distance and distance. This is the decisive factor for beautiful scenery. The clear weather in the early morning was shot again, the lakes and mountains were beautiful. And the distance and level were excellent. Although the light in the afternoon is quiet and pleasant, the gray light cannot show the sense of hierarchy.

Often we appreciate a photo of a superb view, and we happen to have visited it before. And we may sigh “why can’t I take such a beautiful photo”. In fact, often in addition to composition, the creation of light is very important. The master will choose the most appropriate time and weather for taking pictures. And even visit again and again, just to cooperate with the best weather. When traveling photography, you should also collect detailed information and plan ahead in the morning or afternoon to shoot in order to obtain forward light or side light shooting.

Straight and horizontal composition

In large-scale photography, the banner composition can show a broad momentum. But appropriate vertical composition can also show a sense of continuation before and after. The large and small waterfalls lined up in a row are very spectacular. When the streams and waterfalls in front are all in view, they are not only clearly explained, but also pleasing to the eye. The large and small waterfalls hanging on the mountain walls are also magnificent when displayed as banners.

The vast majority of landscape photos should be presented in a banner composition. As this gives a sense of spaciousness and continuity. However, when the scenery is properly arranged before and after, or the super high buildings, etc., the straight frame composition can express the long history and enhance the three-dimensional feeling.

Photography should not be greedy

Especially in landscape photos, the focus of the scene is more resonant. A simple lookout on the beach, when you look up close, you can see that the building is simple. And from a distance, it is just an inconspicuous small house. However, relying on the change of color temperature of the setting sun, the continuous adjustment from yellow to blue. And the waves on the water surface, constitute a refreshing and stunning photo.

When encountering rare and superb scenery, photographers sometimes fall into a myth: the sky and clouds are extremely beautiful, the green mountains and green water cannot be omitted. And the flowers and plants in the foreground are brightly colored, etc. All of them are recorded with a wide-angle lens. The result becomes visual disturbance and loss of visibility. Simplify the complexity, look for simple things around you, match the best moments, and the beauty is natural.

Horizon processing

The placement of the horizon, depending on the particularity of the sky or foreground, decides on the upper or lower third of the picture.

When encountering a scene reflected on the water surface, most people may adopt the practice of placing the horizon in the middle of the picture. In fact, it should be adjusted according to local conditions. If there is something special about the foreground, such as dark rock layers or foreground silhouettes, let the foreground take up two-thirds of the way and raise the horizon. If the sky is cloudy, lower the horizon to the lower third. As for the visual experience, it can be understood by viewing the actual photos.

Geometry elements

Circles, triangles or overlapping geometric figures can stimulate people’s visual senses, and the durability will be greatly improved. When people look at a photo, they will involuntarily find geometric elements in the picture, such as circles, triangles or rhombus. And their vision will be stagnant there. If repeating geometric elements can be found in the scene, take advantage of them.

Manipulate white balance

Trying fluorescent white balance or white balance shift function for morning and evening photography will have unexpected effects. Fluorescent white balance, combined with a white balance shift, produces exceptionally bright tones. When shooting with automatic white balance, the camera corrects the color temperature of the morning and evening hours, often at the expense of particular tonal shifts.

If it is set to “Daylight White Balance”, the color rendering is the same as when shooting with positive film in the past. But there’s a better suggestion: use a “fluorescent white balance” that preserves the red hue while intensifying the blue, and the special blue-violet effect is addictive.

Built-in flash

Landscape photos use the built-in flash, which subverts the traditional impression, but it is a good tool for filling light. Fishing down a tree full of cherry blossoms, creating a sense of exaggeration with an ultra-wide-angle lens. The built-in flash fills the light, and the details of the stamens are clear. If no flash is used, the backlit cherry blossoms appear dull.

Don’t think that flash is used for portrait photography, and landscape photography should not use flash. In fact, as long as it is backlit, when you need to supplement the light, the flash can still be used appropriately. And although the built-in flash has a low index, the amount of fill light may be insufficient. But because of this, it will not destroy the overall picture coordination and achieve a sense of balance.