Table of Contents
Tips for Taking Great Landscape Shots
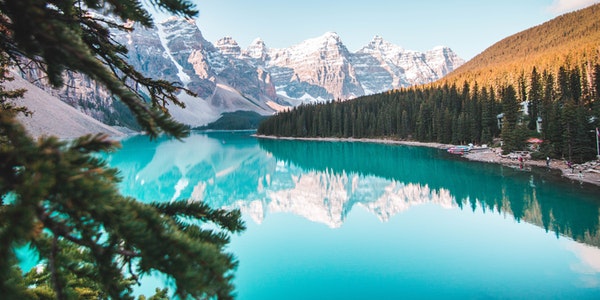
Among the various photographic subjects, the landscape photos of nature are the most visually stunning.
Whether it is the vast grasslands or green jungles, the vast sea or the blue sky, these spectacular natural scenery will bring an unprecedented shock to our hearts.
Maybe you will sigh the magic of nature, it is nature that created all this and brought us a kind of happiness away from the hustle and bustle.
The common expression techniques of landscape photography are tonal contrast and tonal contrast.
Direct light can be used to create the bright and dark parts of the picture, and the contrast of shades makes the difference between the subject and the background, the subject and the foil in the picture.
Tonal contrast is usually warm to cool to warm or cool to warm to cool. Of course, you who love photography will not let these beautiful and spectacular scenery slip away from your eyes. You will definitely find a way to record everything you see, and then share it with your family, friends and more people. Then get your photography backpack ready, and don’t forget to bring a tripod. Get away from the city, return to nature, and explore the beauty of nature with a wise and sharp eye!
To be a great landscape photographer, one must first be a hard worker. The scenery that can be seen everywhere in life is no longer interesting. We should look for some less common scenery, explore unique shooting perspectives, and even go to uninhabited places to discover new scenery. Such photos are sure to attract countless viewers.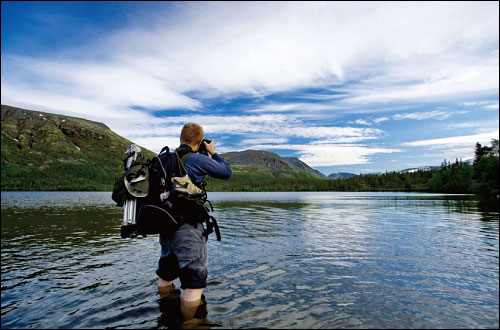
Selection of Lenses for Shooting Nature Scenery
Wide-angle and ultra-wide-angle lenses are the best choice for landscape photography.
A wide-angle lens is ideal for panoramas with wide skies and expansive foregrounds. Not only does it have a larger depth of field, it can clearly present both near and far objects, but it also has a stronger sense of perspective and depth of field than other lenses. The focal lengths of common wide-angle prime lenses are 35mm, 28mm, and 24mm.
Since the digital SLRs in the hands of most photography enthusiasts are APS frame cameras, the APS frame size is much smaller than the full frame size of 36mm × 24mm. If you use a conventional wide-angle prime lens, the angle of view will be reduced. Therefore, it is not recommended to buy a wide-angle prime lens.
Wide-angle zoom lenses dedicated to APS format, such as the AF-S10-24mm f/3.5-4.5G ED lens and the EF-S10-22mm f/3.5-4.5 USM lens, both feature that even when multiplied by 1.5 Or a factor of 1.6 can still obtain focal lengths from ultra-wide-angle to wide-angle, so it is very suitable for shooting natural scenery.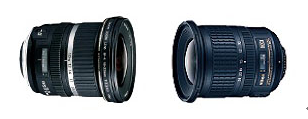
If you want to shoot sunrise, sunset, moon and stars, you must have a telephoto lens above 200mm, otherwise the sun, moon, and stars can only show small images in the frame.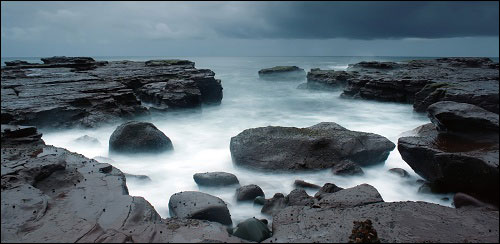
Tripod
Landscape photography scenes are usually well lit, and you can get sharp photos even with handheld shots. But it’s not uncommon to see professional landscape photographers set up on tripods in movies, magazines, or websites. Why is this?
Because when shooting landscape photography, even using a higher shutter speed does not necessarily prevent blurred image outlines. Especially after the landscape photo is enlarged, the viewer will easily find that the outline of the scene is not clear enough.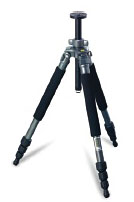
Another reason to use a tripod is because of the minimum aperture of the lens that is often used in landscape photography. In order to ensure sufficient exposure, it is often necessary to use a slower shutter speed. At this time a tripod can ensure the clarity of the picture.
The significance of a tripod for capturing clear pictures and ensuring image quality is more important than the significance of large aperture lenses, shock-proof lenses, and high-sensitivity cameras. So, if you want to be a professional landscape photographer, be sure to stick to a tripod. When choosing a tripod, we should consider its stability and portability in order to make our shooting journey more convenient.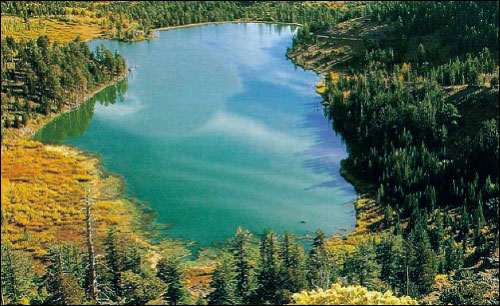
Shot in Aperture Priority Mode
Professional landscape photographers usually choose aperture priority mode to shoot outdoors. This is the Av file on the mode dial of digital SLR cameras.
Aperture priority mode provides more room for creativity, we can control the depth of field according to our shooting requirements.
If you want to focus on the subject scene and don’t want to be disturbed by those cluttered scenes, just set the aperture to a large aperture such as F2.8. Then focus on the subject scene, and a photo with a clear subject and a blurred background is born. It’s just that the F2.8 wide-angle lens is more expensive. If you want to shoot the background behind the subject clearly, just set the aperture to a medium aperture such as F8 or F11. And the subject and most of the background can be clearly presented.
However, most photographers will choose a smaller aperture when taking landscape photos of large scenes.
Why choose a small aperture when shooting a large scene? Because a small aperture can obtain a very large depth of field, all the scenes in the picture can be clearly presented. And this is the effect pursued by landscape photos of large scenes. It’s just that most lenses now can’t reach F64. Generally, the minimum aperture is only F22 and F32, and only a few lenses can reach F45. We need to note that shooting with the minimum aperture of the lens often results in reduced image quality and contrast. So choose carefully when shooting.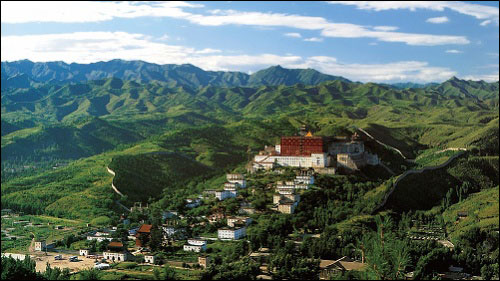
The Magical Use of Polarizers in Landscape Photography
When appreciating some excellent landscape photography works, you will find that the contrast and color saturation of the picture are very high. In fact, this is all due to the polarizer. There is a lot of polarized light in the blue sky, and the use of polarizers can prevent this polarized light from reaching the electronic sensor in the camera. And thus shoot a more realistic blue sky.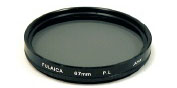
FVLAICA P.L Polarizers
Under natural light outdoors, every object is more or less illuminated by scattered light from all directions. Objects that were supposed to be brightly colored are covered in a layer of gray fog, and the contrast is reduced. The photos taken in this way are not bright enough in color and have low saturation. And it is difficult to achieve good results even through post-processing.
At this time, as long as the polarizer is installed in front of the lens, the contrast, saturation and contrast of the picture can be controlled by rotating the polarized lens. So that the colors of the blue sky, white clouds, sea and grassland we shoot are more realistic. Polarizers are especially useful when the sun is at a 90° angle to the direction of the lens.
Polarizers include linear polarizers and circular polarizers. Digital SLRs should choose circular polarizers with the “CPL” mark, because the use of linear polarizers on digital SLRs can easily lead to AF autofocus and AE autoexposure failures.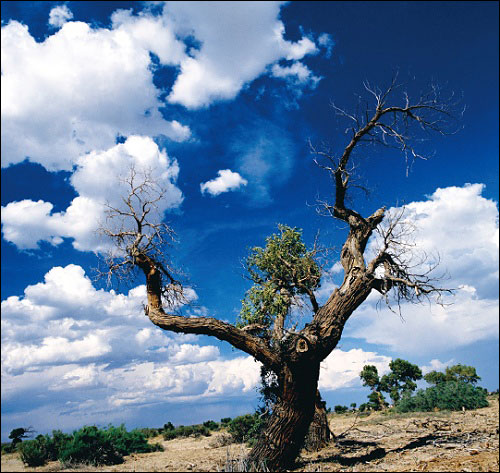
Focal Length 28mm|Aperture F16|Shutter Speed 1/125s|ISO 100