If you want to elaborate on the lighting of portrait photography, you can make a separate book. Because different directions and intensities of light will produce different picture effects.
Today we will briefly introduce several common or commonly used exposure and lighting methods. On this basis, everyone can learn from each other and create their own style of lighting methods for portraits.
Table of Contents
Accurate Exposure is the Basis
Taking portrait photos, accurate exposure is the basis. What does it mean?
That is to say, to take portrait photos, first of all, we have to clearly present the people we want to take in the picture through the camera in our hands. The picture will not show a large area of darkness due to underexposure, nor will it show a large area of bright white due to overexposure.
The characters in the picture are moderately light and dark, and the details can be clearly presented. To achieve this effect, it can be said that it is a portrait photo with accurate exposure.
Of course, due to some special needs, we will also shoot portraits that are underexposed or overexposed, which will be discussed later.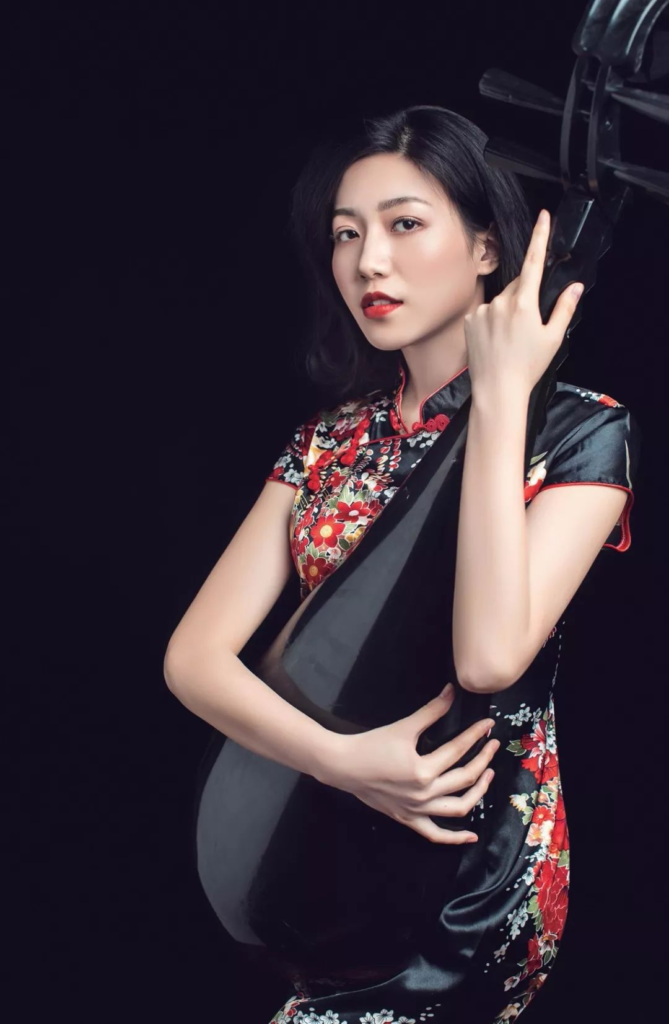
Accurate exposure of the portrait photo, the face of the character is moderately light and dark, and the details of the skin can be clearly presented. Focal length 50mm, aperture f/3.2, shutter 1/160s ISO100
Appropriate Overexposure Makes People’s Skin Fairer
For us yellow people, fair skin is definitely a very important criterion for judging whether a woman looks beautiful.
The so-called “one white covering one hundred ugliness” means this. For portrait shooting, proper over-exposure can make people’s skin appear more white and tender.
Therefore, in order to make the beauty of the beautiful woman’s skin look better, you can choose to overexpose a little bit. If the initial shooting does not achieve the desired effect, it is easy to adjust the exposure in the software later.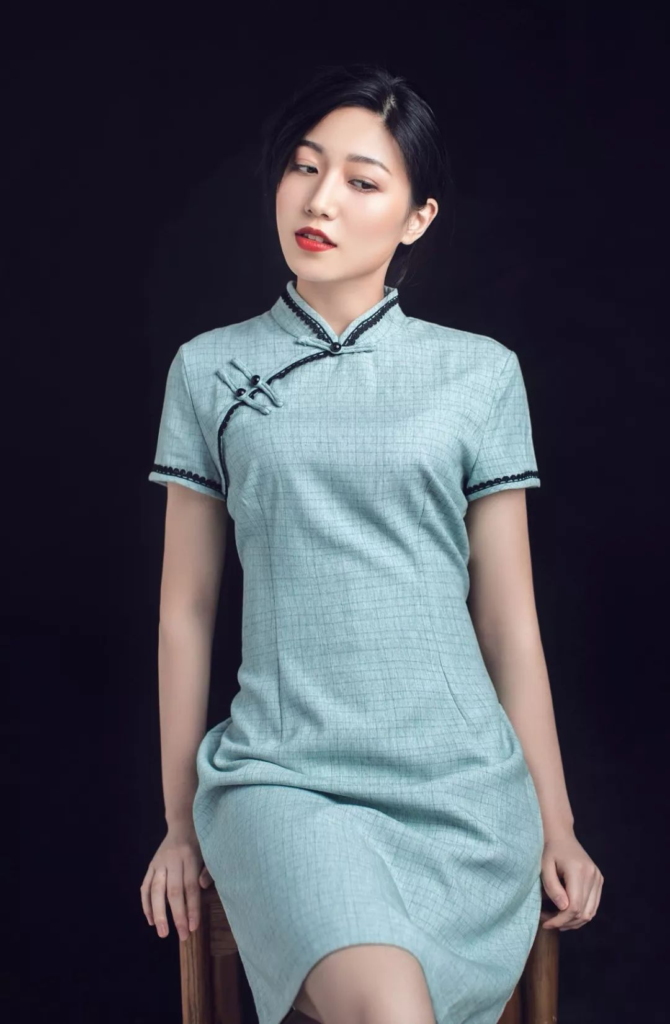
Properly let the exposure a little, the skin of the model’s face appears fairer. Focal length 50mm, aperture f/2.5, shutter 1/160s ISO100
Underexposure Creates a Unique Atmosphere
When taking portrait photos, in addition to taking regular normal exposure photos, sometimes in order to express a special mood and create a unique atmosphere, you can also take underexposed photos.
If the picture is underexposed, the overall effect will be dark and low-key. Portrait photos with this effect will give people a mysterious, cold, and secluded feeling.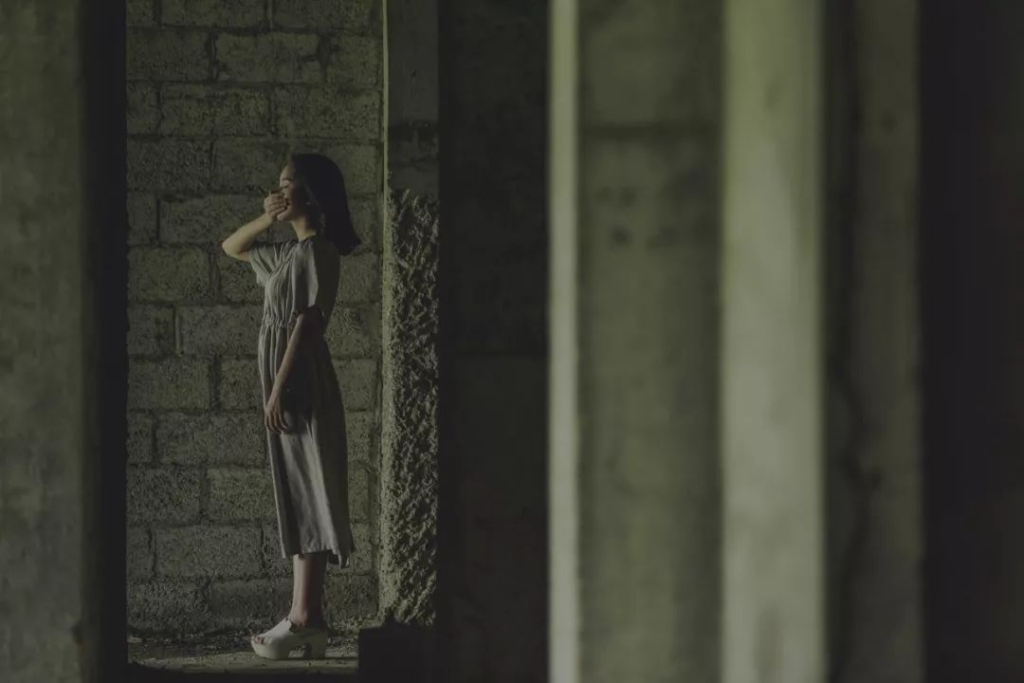
The underexposure gives the overall picture a low-key effect, giving a sense of mystery. Focal length 140mm, aperture f/2.8, shutter 1/500s ISO2000
Backlight Shooting Portrait Silhouette Effect
When shooting a portrait in a backlit environment, if the subject is severely underexposed, it will appear in a silhouette state, which is also a way of expression often used in portrait shooting.
To shoot wonderful portrait silhouette photos in a backlight environment, you must first choose to shoot in the early morning or dusk. At this time, the angle of the sun is very low, the intensity of the sun’s rays is not strong, and the color of the sky at this time is also the most charming of the day.
Therefore, to shoot portrait silhouettes, you must first choose the shooting time.
In the actual shooting, in order to make the silhouette effect more obvious, you need to adjust the camera’s metering mode to spot metering. Then the light is measured for the brightest area in the background, so that the brightest part of the photo can get the correct exposure, while the main character will be suppressed, showing a clear silhouette effect.
If the silhouette effect is still not obvious, we can further darken the picture by reducing the camera’s exposure compensation to make the silhouette effect more obvious.
In addition, because the silhouette of a portrait can only show the silhouette of the person, the pose of the person must be graceful when shooting, and try to choose the angle that is the easiest to show the beauty of the person’s silhouette, such as the side.
If there are a lot of people being photographed, you can use the silhouette effect to interpret the relationship between the characters, or let the characters pose in various poses to make the shape of the silhouette more exciting.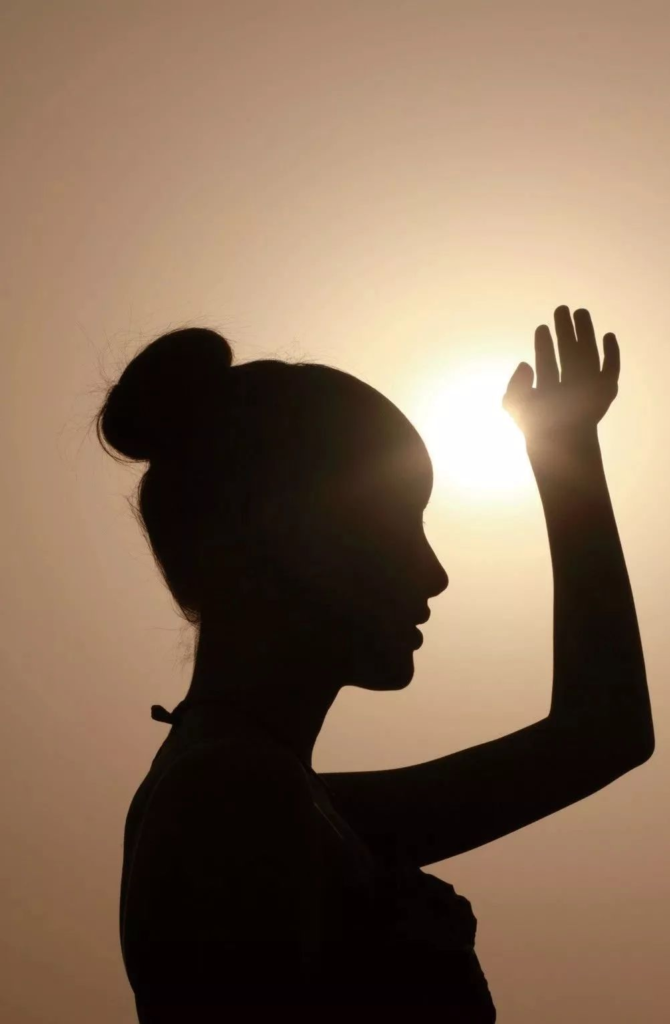
Shooting the side of the model, even if it is a silhouette, can make the outline of the model’s facial features clearly presented in the picture. Focal length 85mm aperture f/19 shutter 1/500s ISO125
Main Light Positioning Work Style
In the studio portrait photography, the key light is the important light source that we need to determine first.
The intensity, position, and angle of the main light often determine the style and tone of a portrait work. For example, when we need to shoot high-key style works, the light intensity of the main light is usually stronger, and the angle with the model is smaller, so that even and sufficient light can make the picture brighter.
When we need to shoot portraits with a strong sense of three-dimensionality, the main light is often on the oblique or front side of the person. Such a light angle can bring a clear contrast between light and dark to the picture, and make the three-dimensional sense of the picture more prominent and clear.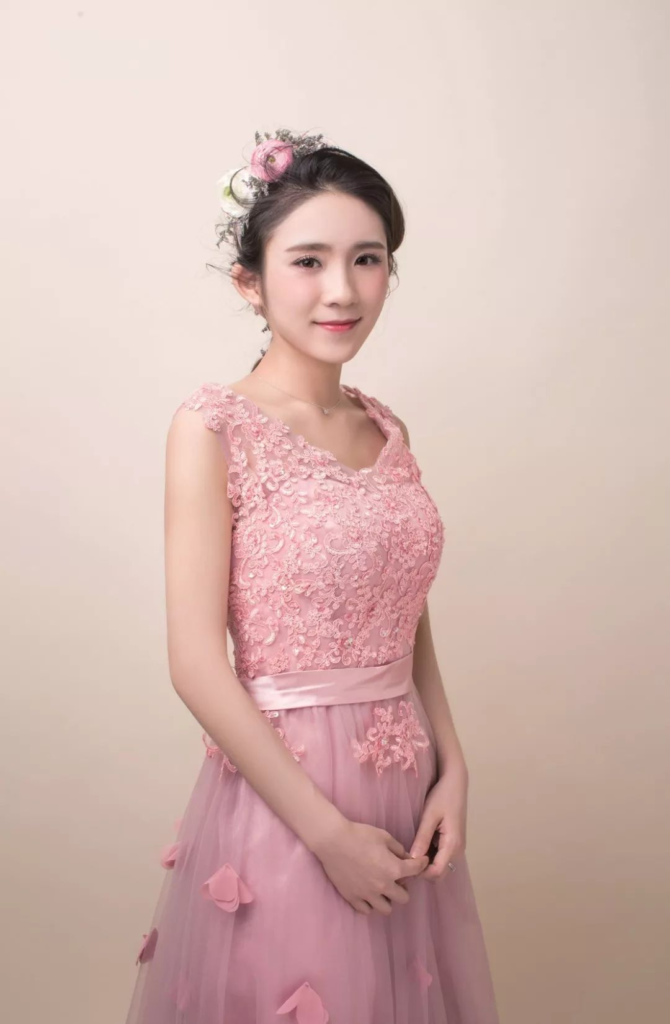
In the picture above, I arranged the main light at a 45° angle obliquely in front of the model, and the attachment is an octagonal softbox with a diameter of 140cm. The height of the main lamp is about two ends higher than that of the model, so that the light covers the characters evenly. Also set the aperture to f/11. (Focal length 50mm shutter 1/125s ISO100)
Since only one main light is used for shooting, and no reflector is added, you can see that the model’s left face has obvious shadows, which can make the face look three-dimensional and increase the sense of mystery.
The Auxiliary Light Reflects the Details of the Work
If the main light determines the overall style and tone of the photo, then the biggest role of the auxiliary light is to solve the problems left by the main light.
The main function of the auxiliary light is to supplement the lighting of the shadow area of the picture, presenting more dark details. Therefore, the light intensity of the auxiliary light is usually lower than that of the main light, so that the picture can show a clearer and moderate contrast effect of light and dark, and highlight the three-dimensional effect of the picture.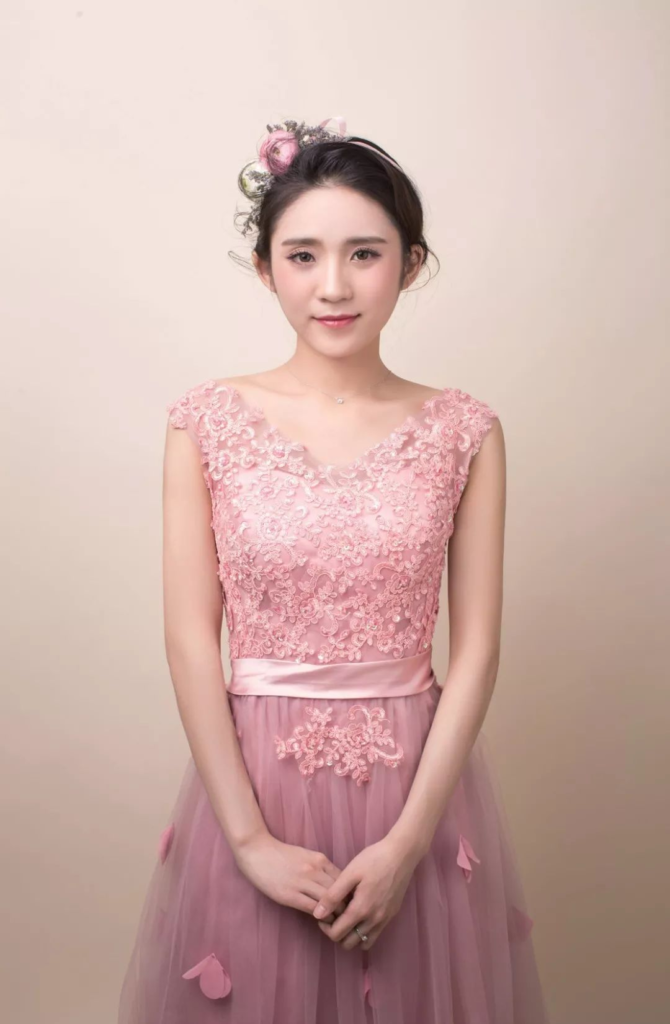
From the picture above, we can see that the main light is in the direction of the model’s right face, and the attachment is an octagonal soft box with a diameter of 140cm. (Focal length 50mm aperture f/11 shutter 1/125s ISO100)
In the direction of the left face, a 1m×2m foam reflector is used as an auxiliary light, which makes the light transition from left to right in the whole photo more natural, and the left face has only a small shadow. The overall picture is transparent, the hair has more details, and the skin will look fairer.
Background Light Makes the Characters Jump Out of the Screen
In portrait photography, the main function of the background light is to separate the main character from the background and make the character more prominent and clear.
It should be noted here that the background light is usually used in a dark background, and the light background should not be illuminated by the background light as much as possible, otherwise the background will be too bright.
The placement of the background light also has certain skills. When the light source is directly facing the background, a circular light gradient will appear behind the character that diffuses from the center to the surroundings. And when we let the background light source and the background present a certain angle, the background light behind the character will show a certain angle of gradual effect.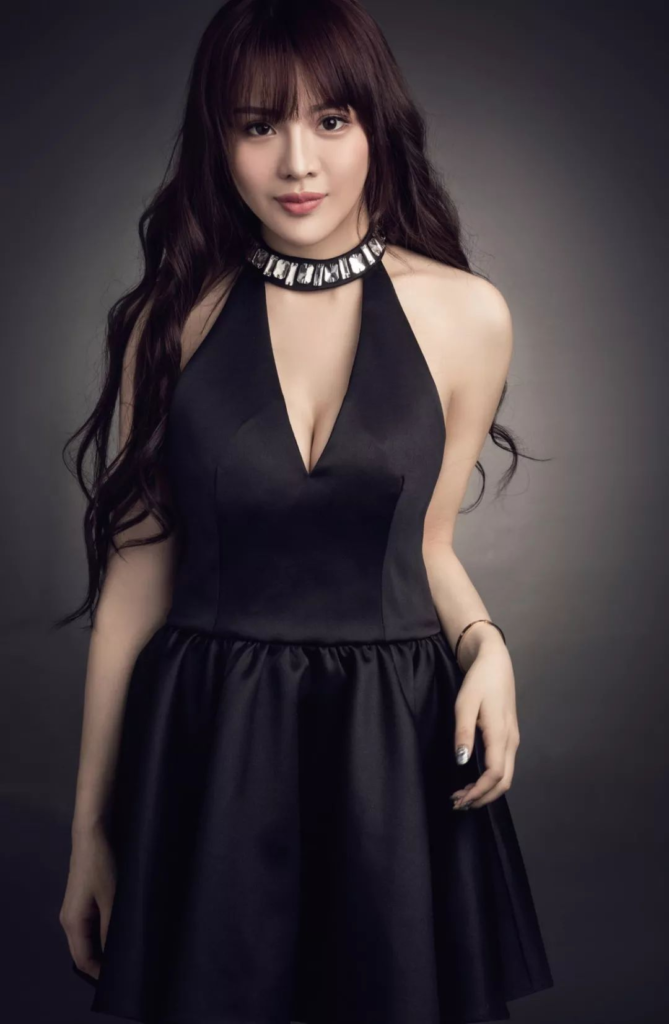
The addition of background light enhances the sense of space in the entire work. Focal length 120mm, aperture f/22, shutter 1/125s ISO100
In the picture above, we can see that the background light is arranged directly in front of the dark background. The light source uses a round hood, and behind the model there is a round light effect that diffuses from the center to the surroundings.
At the same time, because of the appearance of the background light, the model in dark clothing is well separated from the dark background, and the three-dimensional picture is enhanced.
Hair Glow Makes the Hair Transparent and Layered
Hair glow refers to the special effect of making the character’s hair brighter and more textured through the illumination of the light source. Under normal circumstances, top light, backlight or side backlight is the best angle to make hair glow.
The main light or auxiliary light can complete the manufacture of Hair glow. Backlight or side backlight is to arrange the main light or auxiliary light directly behind or behind the person.
It should be noted that this arrangement needs to properly fill the shadow of the model, otherwise it will leave a very obvious shadow area on the model’s body, which will seriously damage the details of the picture.
The top light means that the main light is arranged at a higher position above the head of the character, covering and illuminating from the top to the bottom.
Such a light source is similar to simulating the sun’s rays, and the model’s hair will have a very clear and bright effect due to the illumination of the top light.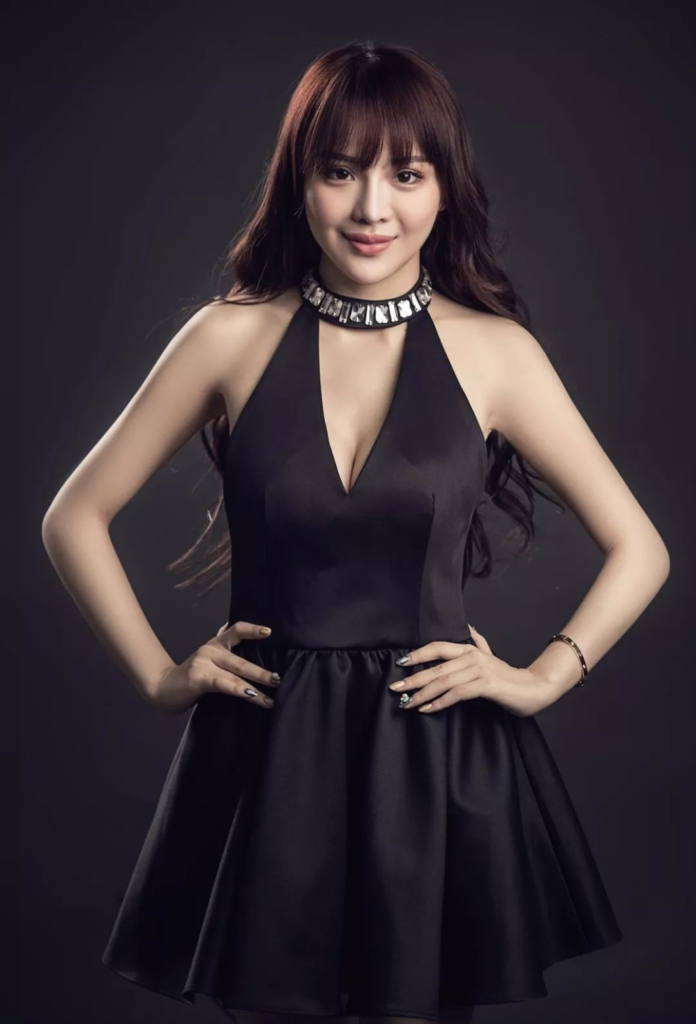
This lighting method can make the model’s hair form a beautiful golden color. Focal length 120mm, aperture f/4.3, shutter 1/125s ISO100
In the above figure, a main beam is used to illuminate from a 45° angle of oblique square, and the attachment is a 140cm diameter softbox. Arrange a light emitting light on the diagonal of the main light for shooting, and the accessory is a 35cm×140cm narrow soft box.
Raise the height of the lamp holder to the highest, forming an oblique angle, and illuminate the model’s hair to form beautiful highlights.
Feather Light Shooting Dignified and Generous Style
When shooting a dignified and generous style, we should try our best to ensure that the light is soft and even. Strong contrasting light tends to produce intense and emotional visual effects, so avoid using side light, side backlight and backlight as much as possible.
Front light or feather light (part of the light on the edge when the light is illuminated) is our best choice.
Under normal circumstances, a single light + reflector can complete this type of subject shooting. Of course, if we want the picture to have richer light and more prominent picture effects, we can appropriately add a light source. But don’t increase the light source too much, too much light source will bring cumbersome and complicated visual atmosphere to the picture.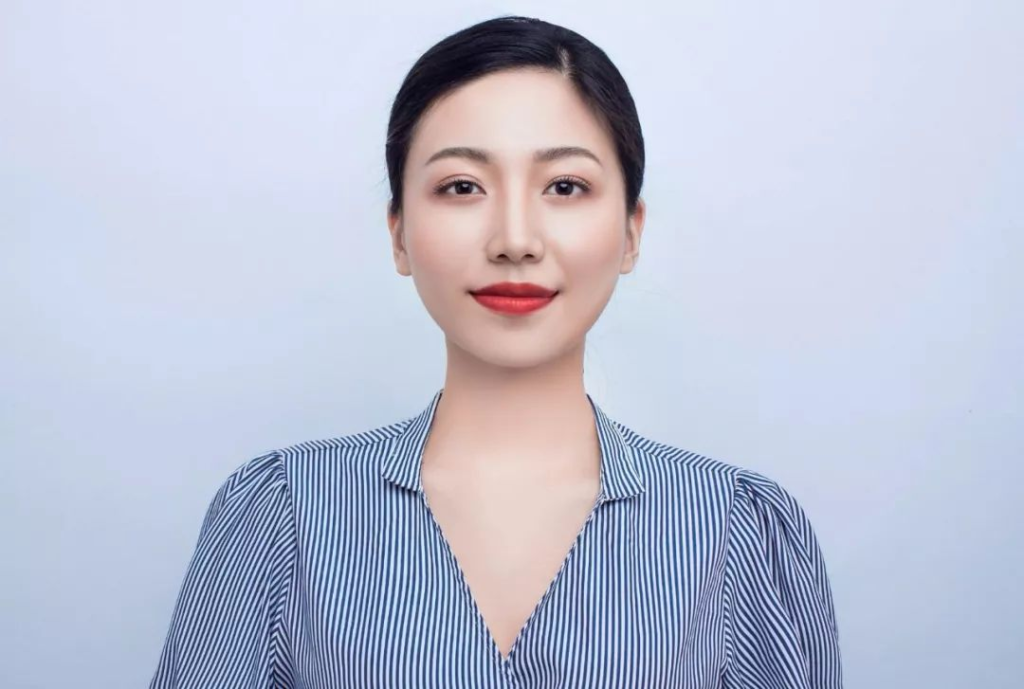
With this lighting method, the overall model looks dignified, gentle and beautiful. Focal length 50mm, aperture f/1, shutter 1/160s ISO100
In the above picture, a flash is used as the main light source, and the overhead light holder is used. The accessory is a 120cm octagonal softbox, placed on top of the model’s head, but not overlapping the model’s head, so that the light is evenly irradiated from the front of the model’s face.
Add a 1m×2m foam reflector on the left and right sides to eliminate the shadow on both sides of the model’s face, but the shadow on the chin should be preserved to make the model’s face more three-dimensional. The whole picture feels pure and simple.
Taking Sweet and Soft Magazine Style
The feeling of the soft magazine style is: soft light, fresh and beautiful colors, and the characters are sweet and pleasant. Generally, the choice of accessories should be considered when arranging the lights, and the soft box is the best choice.
Compared with the tough style of European and American magazines, when shooting soft and sweet styles, we will arrange the main light directly in front of the model, so that the light can also form beautiful highlights on the hair.
Use a larger softbox as much as possible, generally you can choose a size over 140cm, so that the light will cover a wide area and there will be no dark corners on the background paper. When shooting, both the front and the side can be shot, and the model has a large range of activities, which is more conducive to shooting.
The model can choose a slightly softer posture, and the expression is mainly soft.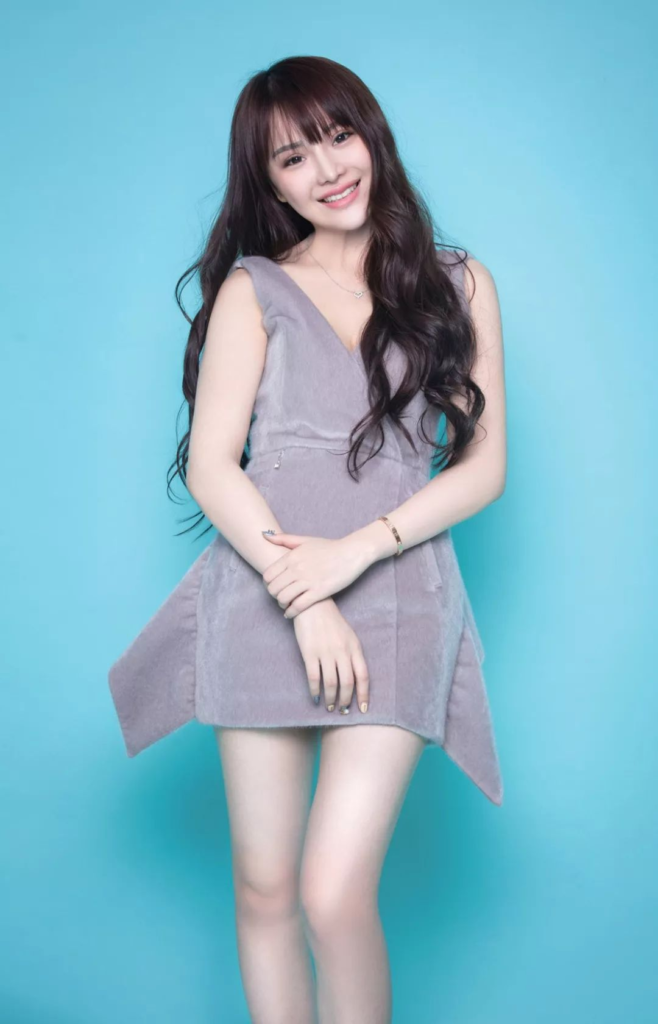
When shooting soft-style portraits, you can choose a fresh and bright light blue. With the sweet smile of the model, the work looks very soft and beautiful. Focal length 90mm aperture f/8 shutter 1/125s ISO100
In the above picture, a flash is used as the main light source, and the attachment is a 140cm soft box, placed directly in front of the character, and the height is about two ends higher than the model. The model is very close to the background paper, only a few centimeters.
Because it is a soft box, there are moderate soft and hard shadows underneath, and the whole photo feels very soft and beautiful.
Win-win for Texture and Detail
When shooting portraits in the studio, the choice of accessories can be determined according to our needs.
If you want to shoot a style work between Japanese magazines and European and American magazines, it feels harder than the Japanese style and softer than the European style, we can choose to use a 140cm octagonal soft box + two reflectors plate.
In this way, the details of the photo are more, and the texture of the picture is more moderate.![]()
This lighting method can make the face of the model delicate, but without losing the texture, it can be described as both texture and detail. Focal length 70mm, aperture f/11, shutter 1/125s ISO100
In the above picture, a main light is used in front of the model, and the attachment is a 140cm octagonal soft box. Add a 1m×2m reflector on the left and right sides. The moderately soft and hard light makes the model’s skin soft without losing texture, both fashion and sweetness. This is the style that most beauties like.