There is no specific formula for portrait shooting. But the clever application of light does give the picture a deeper mood. However, some specific situations can also cause unnecessary shadows and reflections to have obvious negative effects.
In this article, we will gain insights into common light-using problems for beginners in portrait photography, understand the nature of light, and realize the ability to deal with “harsh” light conditions freely during shooting.
Table of Contents
Understand the Quality of Light: Hard Light and Soft Light
The quality of light describes how soft its shadows are and how it behaves. There are many ways to control the interaction of light with the subject. In the most basic sense, it boils down to two points: hard light and soft light.
We can control the softness (quality) by adjusting the size of the light relative to the subject.
Hard light produces sharp shadows and tends to come from a light source, usually either very small or far away. Conversely, soft light either produces soft shadows or no shadows at all. It can be produced by a variety of light sources, by using a barrier (for example, a diffuser, or even just a piece of paper) to diffuse light, or by reflecting light from different surfaces so that objects are illuminated from different angles.
Under natural light conditions, when there are almost no clouds on a sunny day, hard light (strong light) will be produced, which should be avoided under normal circumstances.
Especially for beginners, you can try to shoot in other types of weather, such as cloudy or foggy, because the sun’s rays will be reflected or diffused by particles in the air (moisture, pollution, etc.) and produce soft light .
The Principle of Light Attenuation:
The intensity of light is inversely proportional to the square of the distance. You don’t need to be a great mathematician to understand this, it just means that if you move a lamp twice as far away from your subject, you will end up with a quarter of the light before. This is something to keep in mind, because closer light sources produce softer light, while farther light sources produce harder light.
Usually the size of the light source is inversely proportional to the hardness of the light, which means that a smaller light source produces harder light, and a larger light source produces softer light. According to the characteristics of light, we usually use two ways to process hard light.
Method #1: Reflected light
The function of reflected light is essentially to turn the reflected light into a secondary light source. Many things can be used as reflections, which are very effective whether they are shot indoors or outdoors. Compared with using the flash directly when shooting, the reflected light looks more flattering. If you use a single flash indoors, you can reflect strong light by aiming it at a surface such as a wall or ceiling.
Method #2: Diffuse Light
In natural light conditions, clouds are a good diffuser. Under artificial lighting conditions, any translucent material that can diffuse or soften light can be used. For example, a diffuser is a good example of light diffusion.
Both types of light have their own advantages and disadvantages. Hard light can be used to create images with strong contrast and highlights, emphasizing structure and texture. It can be used to enhance the three-dimensional effect of an image and create dramatic effects. However, hard light is difficult to use, and it is generally considered not suitable for shooting portraits.
In contrast, soft light creates a more uniform light, which can better describe the color and shape of the object. Which type of light to choose depends on the type of photography, the subject and the desired effect, but soft light is usually the first choice, and for beginners, it is of course the safest choice.
Understand the nature of light sources: natural light and artificial light
The biggest difference between natural light and artificial light is that natural light can be found in nature instead of electronic light sources.
The controllability of natural light is poor, and its controllability largely depends on many conditions, such as the time of day and the weather.
It does not require any equipment, except for your choice of diffuser and reflector. In the choice of using natural light or artificial light, portrait photography and still life photography are obviously more relevant than landscape photography or wildlife photography (in landscape photography or wildlife photography, your choice is usually limited to natural light).
Natural light and different weather
As mentioned earlier, cloudy days produce soft light and are usually the first choice for portrait photography. In contrast, the light conditions under the sun will produce stronger light. Bright light is the most difficult factor in portrait photography, but sometimes you have to deal with it. Here, a folding five-in-one reflector can basically help you solve this problem. The following is a brief description of the five-in-one reflector.
Silver part:
The silver side is probably the side I use the most. If there is plenty of sunlight outside, you can use it as the main light source and let a strong beam of light illuminate your subject. If it is cloudy, you will reflect less light from the reflector, so it can act as more fill light.
Golden part:
Sometimes we have some specific ideas in our minds, but they cannot be realized under the existing ambient light. For example, you want to get the effect of sunset at noon. Using golden reflectors can give you a warm light, similar to a sunset.
You can even reflect a golden lamp on the back of the subject, producing golden hair. The gold and silver sides are very similar, both can produce a strong concentrated light, so pay attention to the intensity of your light source and the distance from the reflector to your subject.
White part:
For a bright light source, silver is too strong, and white will slightly lower the tone without adding any color. Since it is not as strong as silver, white can be used at closer distances, making it appear softer on the subject. White can also be used to reflect the main light source, making the light source larger.
Black part:
Black is mainly used for shading. If you have bright sunlight shining on your subjects, you can shade them with the black side. If your fill light is too strong and you need some shadows, you can block some of the light. If the color of the environment affects the color of your subject, for example, if the subject is standing in a room painted red, you can use the black side to prevent the color from reflecting on the subject.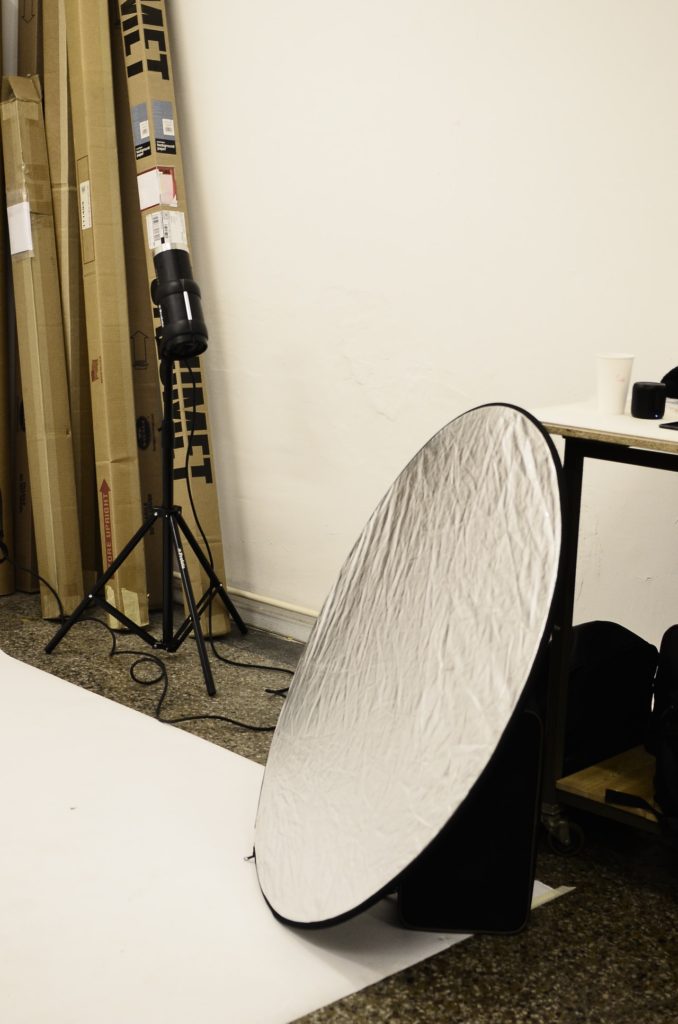
Translucent part:
This side is used for diffusion to produce a soft light, which you can use to diffuse sunlight or your main light.
Natural light and different time
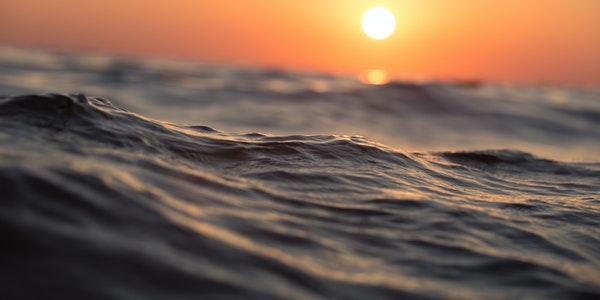
We can usually get softer light conditions early or later in the day. This kind of light is usually warmer and produces an image with lower contrast than the sun is high in the sky.
Sunrise and sunset are generally considered the ideal time for portrait photography.
Prime time photography obtains its characteristic appearance from the lower position of the sun in the sky. During this time of day, lighting conditions change rapidly, both in intensity and color. This time of day is called golden time, and there are three main characteristics that together constitute the magic of golden time.
Soft: The transition from light to dark is gradual, creating soft light, which is a common expectation, especially for portrait shots.
Warmth: The low-angle sun creates an orange glow, creating an atmosphere of calm and happiness.
Directionality: When the sun is at a low angle, it is easy to create back light, side light or front light.
It is also a good choice to choose to shoot in the blue hour. The blue hour occurs before sunrise and after sunset, and the sun has dropped to a certain extent below the horizon. The sky showed a refreshing and quiet blue before it became a little darker or what we call night.
If the weather is clear, it is not uncommon to see some pink or red near the horizon. However, although it is called the “Blue Hour”, it does not actually last for an hour. It lasts an average of 20 to 40 minutes, or even shorter, depending on the season and where you are.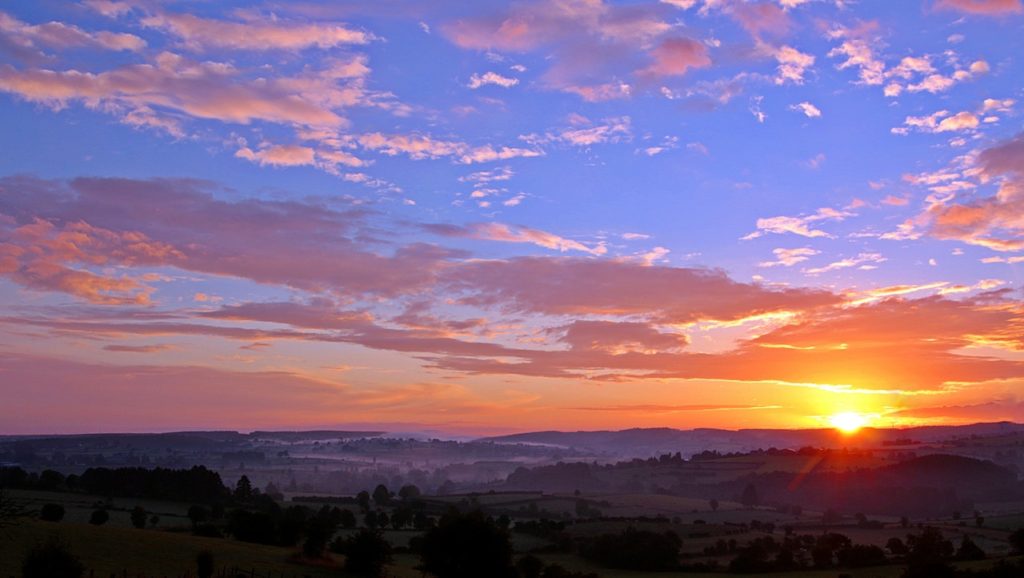
The challenge of artificial light
The challenges of using artificial light are very similar to those faced when shooting under natural light. We must understand how various light sources act on an object and how to produce the desired effect. But in this case, the photographer can directly control factors such as hardness, distance, strength, and angle.
In addition, artificial light from different sources produces heat signals of different color temperatures. For example, a halogen lamp has a lower temperature and emits blue light, while a tungsten lamp has a higher temperature and emits red light.
When using different artificial light sources, these light sources need to keep the same color heat signal as much as possible, the only exception is if you are taking a black and white photo.
When it comes to controlling and manipulating light, whether it is dealing with artificial, natural, soft or hard light, there are many options in photography. It boils down to understanding how the image is affected by different lighting conditions and setting the required lighting environment.
Front lighting
Front lighting minimizes shadows: we have been looking for a shadow-free lighting before. Front lighting is produced by directly focusing the light source on the surface of the object, which minimizes shadows and textures. But the disadvantage is that the light produced by the front lighting looks very flat, which will cause the portrait to have no three-dimensional effect, which also explains why the shadows are also important.
Side lighting
Side lighting makes the picture more dramatic: when light enters the scene from the side, it creates interesting long shadows. In this sense, the side light has something “dramatic” that the front light lacks, as well as its charm and artistic appeal. Sidelight is a very popular lighting method, which can help you create images with bold visual impact.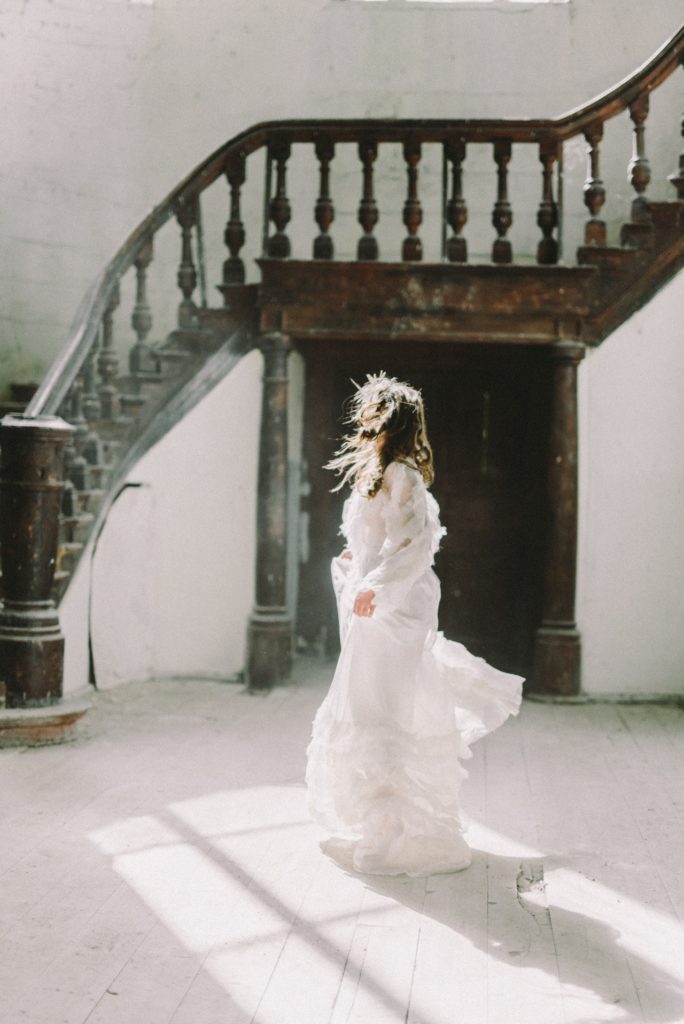
Backlight
Backlight means fewer details: Backlight is another common lighting method that minimizes the details of the subject by transforming it into outlines.
Depending on the nature of the backlight, the silhouette can be any effect between very dark (you can only see the outline) and medium light (the model’s facial features can still be recognized). Similar to the side light, photographers often use the backlight in more artistic shots.
Facing harsh light: the low light challenge of portrait photography
Most people think that the best time to shoot portraits is during the day, with plenty of light, contrast, and shadows. However, as a photographer, there is no reason to limit yourself. If we only focus on shooting during the day, we will miss some amazing opportunities for night portraits. In fact, as long as a few “little tricks” cameras and lenses can show what we can’t imagine.
Correct exposure in low light conditions
First, we should understand how exposure works. There are three factors that affect exposure, namely shutter speed, aperture and ISO. The first thing we need to do is to set the camera from automatic mode to manual mode. This gives you complete control over all these exposure settings. Low light conditions mean that we need to change the settings to compensate for the correct exposure. We may need to expand the aperture, slow down the shutter speed or increase the ISO.
Pay attention to the use of safety shutter:
Photographers often want to use the slowest possible shutter speed while still achieving the sharpest shooting possible. When shooting with a handheld camera, the answer to the question “how slow is the shutter speed you can use” is very important.
The easiest way to know how slow the shutter speed is while still taking clear pictures is to use the 1/focal length rule, also known as the safety shutter. What 1/focal length means is that you only need to take the focal length of your shot (for example, 50mm), and then use it as the denominator of your shutter speed. So, if you shoot with a 50mm lens, the shutter speed cannot be lower than 1/50.
Take the 1/focal length rule as the final conclusion. One thing to note is that if you are using a crop sensor camera, you need to multiply the focal length by the crop factor. But the safest way is to use a stable tripod.
Note the available ISO of the camera:
It seems to make sense to use a high ISO when shooting in low light, but doing so will also increase the noise in the image. Today some high-end cameras can shoot at higher available ISOs. However, for most consumer cameras with a limited light sensitivity range, sticking to a low ISO is the most practical method.
Understand the limits of the camera’s ISO level. To do this, take some low-light test photos with different ISO settings. Check the photo to find out at which ISO level it becomes rougher. If it does not seem to be available in ISO1600, then stick to the setting below this value. Basically all cameras can set a maximum ISO limit, which is also very helpful for us.