Table of Contents
Introduction
For every photographer who is the first to take portraits, people are always a little bit at a loss in lighting. In fact, as long as you master the basic lighting methods and prepare the necessary lighting equipment, indoor portrait shooting is far less advanced than imagined. Some simple use of light equipment can produce satisfactory portraits at home. The key lies in the familiarity and use of light.
Indoor portrait photography is an indispensable and important branch in portrait photography. Especially in commercial portrait photography, it is often encountered. When it comes to indoors, as long as the space is 20 or 30 square meters. It can be your own living room or a space without any storage. Putting it in the light is a temporary studio.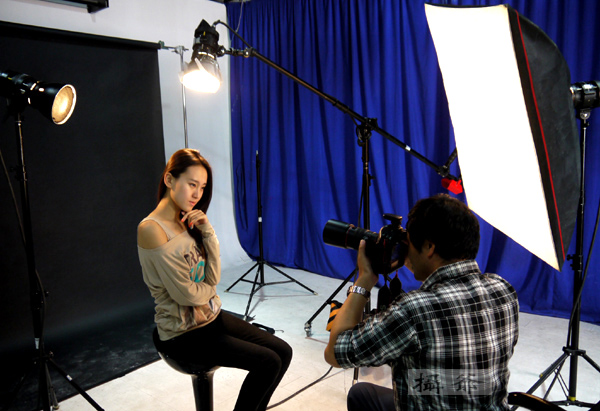
Single-lamp Studio Portrait Shooting
The so-called single light, as the name implies, is to use a single light for photography lighting.
The use of a single lamp for photographic lighting may be the need of the photographic subject itself, or it may be due to limited equipment conditions.
With reasonable lighting, a single lamp can also take a black and white portrait of a satisfactory photo.
Single-lamp lighting generally requires a soft box to make the light softer. You can also cover several layers of sulfuric acid paper in front of the standard lampshade to replace the large diffuser, which is especially suitable for single-lamp shooting women.
When shooting this group of female models, I only used a flash with a standard lampshade covered with sulfuric acid paper. The light shines at 45° from the oblique side of the model.
When shooting portraits, a large aperture can be used, but the focus must be placed on the eyes of the person to make the person clearer. Since the background is relatively dark, the blemishes on the skin of the person may be more obvious when exposed. In order to make people’s skin brighter, I increased the value of 0.3EV to shoot this work.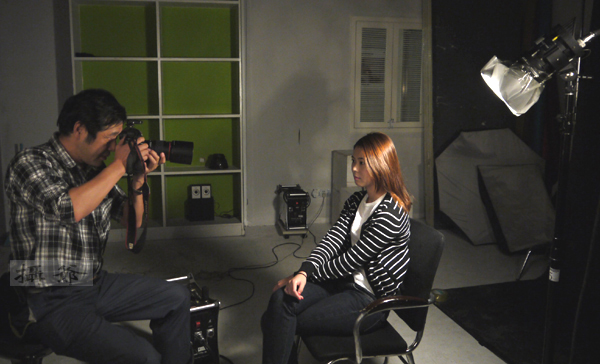
Double-lamp Lighting That Makes the Characters Artistic
Compared with single lamp, double lamp is the more commonly used method of studio lighting. Double lamp means to use one lamp as the main light and the other as the auxiliary light or contour light.
The function of the main light is to provide the main light source. And photographers often use the contour light to express the contour lines of the subject, and it is mostly expressed by backlighting.
Especially when the subject is dark and the background is dark, the contour light can achieve the effect of separating the subject from the background. When taking this photo, I first placed the square soft box at 45° as the main light source. The main light source mainly falls on the character’s face, shoulders, hands and back.
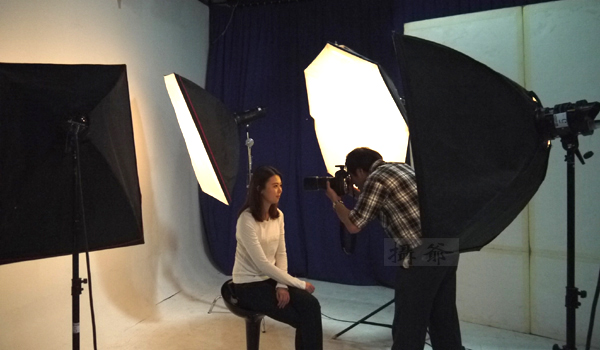
Since the main light source is a rectangular soft box, the lighting range is relatively large. But the black background and black hair are blended together. Therefore, I deliberately placed a light behind the model so that the light, the model and the camera are in a line to form a contour light to separate the model and the background. effect. The picture below shows the shooting scene with dual-lamp lighting.
Among the artificial light sources, photographers often use the contour light in conjunction with the main light source and the auxiliary light source, which can give the picture more layer changes and enhance the beauty of the picture.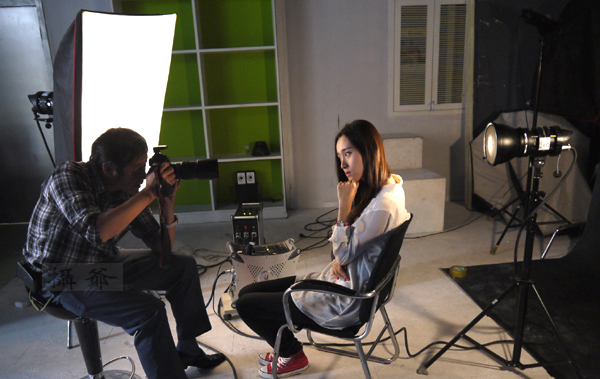
Classic Lighting scheme of Three-lamp Standard Set
Buy a studio flash, usually three lights as a standard set. At the same time, photographer should equip it with necessary accessories such as soft box, honeycomb, and reflective umbrella. With the three-lamp standard set, a variety of classic lighting methods can be combined.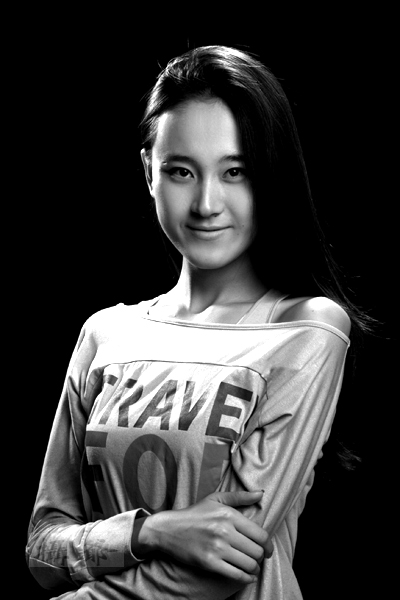
This photo is a typical lighting work in a standard set of three lamps. First, the photographer uses a rectangular soft box placed at 45° as the main light source. The main light source mainly shines on the model’s face, shoulders, and hands. Due to the limited range of the main light source, the illumination of one lamp will make the other side of the model dull. Therefore, the photographer put an auxiliary light with a honeycomb on the rear side of the model, allowing the auxiliary light to supplement the light and shadow effects of the model. Then put a hair light on behind the model directly above the model, the purpose is still to separate the black hair from the black background.
In fact, it is not difficult to take this kind of classic light-using photos. The key is to master the role and light ratio of the auxiliary light and the main light.
When the main light shines on the right side of the character, a heavier shadow will appear on the left side of the character. At this time, we can add an auxiliary light to the left of the character to reduce the shadow. It should be noted that the power of the auxiliary lamp is generally lower than that of the main lamp, so that the shot of the person will be more three-dimensional.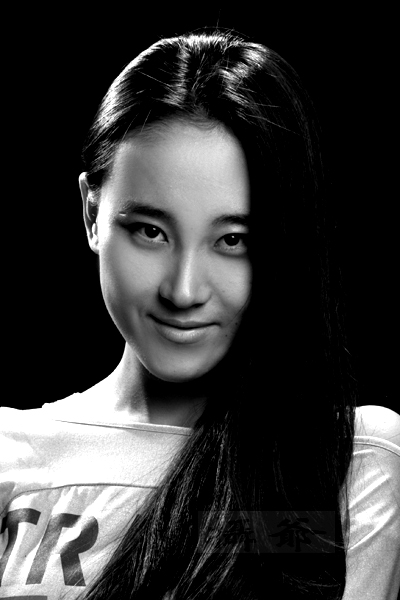
Four-lamp shooting high-profile solution
The so-called high-key is that the subject and the background are lighter tones, and the brightness of the light is higher, and the photos taken present a brighter and warmer style.
High-profile photos are mainly white, and white usually accounts for 75% to 95%. High-profile photos generally use soft light and choose a light or white background. When shooting, it is necessary to eliminate the shadows formed by the strong light projected on the background to ensure the cleanliness of the picture.
When shooting high-profile portraits with lights in the studio, except that the model should wear white or light clothing and use a light background, the lighting should be forward light.
The number of lights is usually more than four lights. The following high-profile work. The photographer shared four studio lights. First, put a studio light with a soft box as the main light source at a position of 45° in front of the model. Photographer has placed a studio lamp with a soft box on both sides of the model’s back against the white background cloth. Its function is to make the background have no obvious shadows and no projections, making it appear clean, bright and soft. Photographers can control the brightness of the illuminated background light at about two levels beyond the brightness of the model’s face.
Control light ratio
When shooting high-profile portraits, pay attention to the lighting light must be soft and well-proportioned. When taking close-up portraits, pay attention to the light ratio of the face not to exceed 1:2.
Keep a certain distance between the person and the background, and use stronger light for the background than the person. With model as the metering center, the background is overexposed to form a bright tone. But remember that the background brightness cannot be too strong than the model body, otherwise the highlights will overflow and the picture will have heavy fog. Because there are few external light meters in modern studios. Photographers usually deal with it through experience, and after regular light testing, increase the exposure by nearly one stop.
Concluding remarks
The use of lights in the studio is also an art. Each light has a different function. It’s not that the more lights, the better. Just like writing an article, the extra light is the extra nonsense in the article, and refinement is the key.