Table of Contents
The Importance of Flash
For ordinary portrait photography enthusiasts, there may be a misunderstanding about the use of flash. They think that flash is used for lighting. In outdoor portrait photography with strong sunlight during the day, flash is useless. Of course, this understanding is rather one-sided. People who only use natural light to take photos don’t necessarily use flash. Those who can master flash must know how to use natural light. Therefore, truly outstanding flash works are not necessarily pure flashes, but a proper combination of natural light and artificial light.
Although natural light has the advantage of being real and natural, making good use of natural light can properly express the atmosphere of the scene when shooting, but natural light is not perfect, and it cannot appear in every place that needs to be illuminated. So adding a flash can help make up for the lack of natural light and improve the quality of the photo. Once you have mastered the technical skills of the flash and incorporated it into your future creations, you will find the same content and the same pictures, but the work is “on the next level”.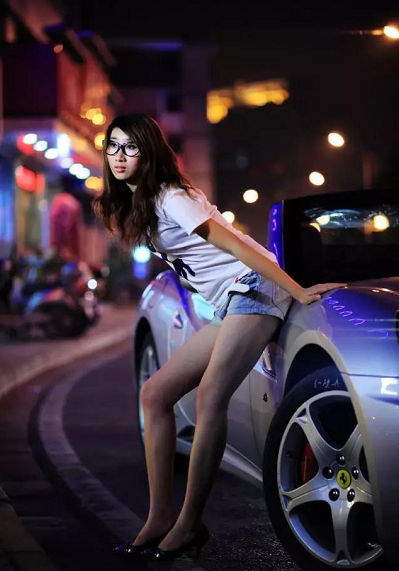
Daytime Outdoor Portrait Fill Light-Flash as Fill Light
Don’t think that you need to use the flash only when the light is low. Sometimes when the light is sufficient, you must use the flash to fill up the light. One situation is that when shooting against the light, the contrast between the subject and the background is great. If the subject is exposed, the background must be overexposed, and the background is restored normally, and the subject is underexposed. At this time, you need to use a flash to fill up the light.
The shooting environment was under the sun at 4:30 in the afternoon. Although the ambient light dimmed with the sunset, the light was still very bright due to the impact of the backlight. The character is backlit and her face is dark. When taking this photo, the environment is metered first, the metering data is aperture F3.5, shutter is 1/250. After the metering is completed, switch the camera to M gear, set the aperture and shutter, turn on the flash, TTL mode, reduce the output by 1.5 gears, and finally take the finished picture. The face of the character is exposed normally, and the atmosphere of the environment is also better reflected.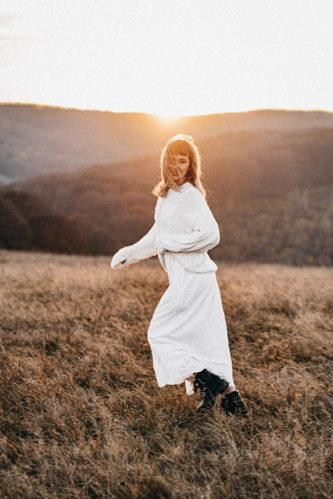
The backlight draws a circle of warm lines around the girl’s hair and sweater, which isolates it from the background, while also accentuating the subject of the character. The front flash fills in light. When framing the shot, be careful to slightly block part of the sun’s subject with the subject to avoid excessive glare.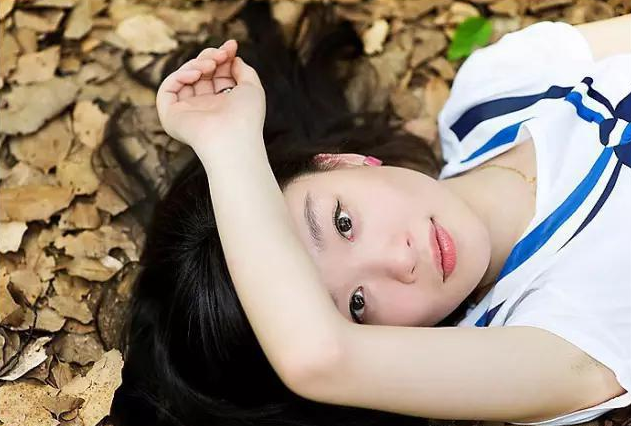
Shooting Steps:
Generally, portraits are taken in a sunny environment with blue sky and white clouds. Because the light difference between the subject and the background environment is too large, it is not easy to take into account the normal exposure of both at the same time. If the face of a portrait is used as the basis for metering, the background will be overexposed and there will be no details. If the blue sky is used as the basis for metering, the face of the portrait will be underexposed, or even become a silhouette.
It is an effective method to use TTL flash or automatic flash to fill the subject with light:
- 1. Start metering against the background. Then switch to M mode, set the aperture and shutter value to the metering results just now. (It should be noted that the shutter must be within the synchronous shutter range of the flash).
- 2. Use TTL flash or automatic flash to aim at the subject to fill light.
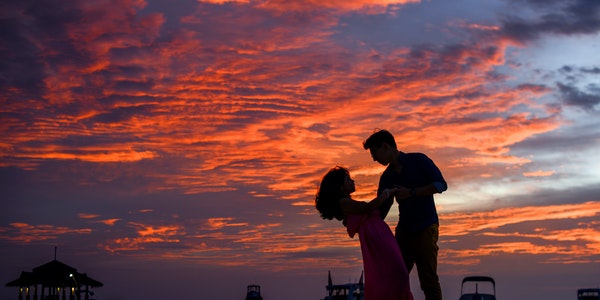
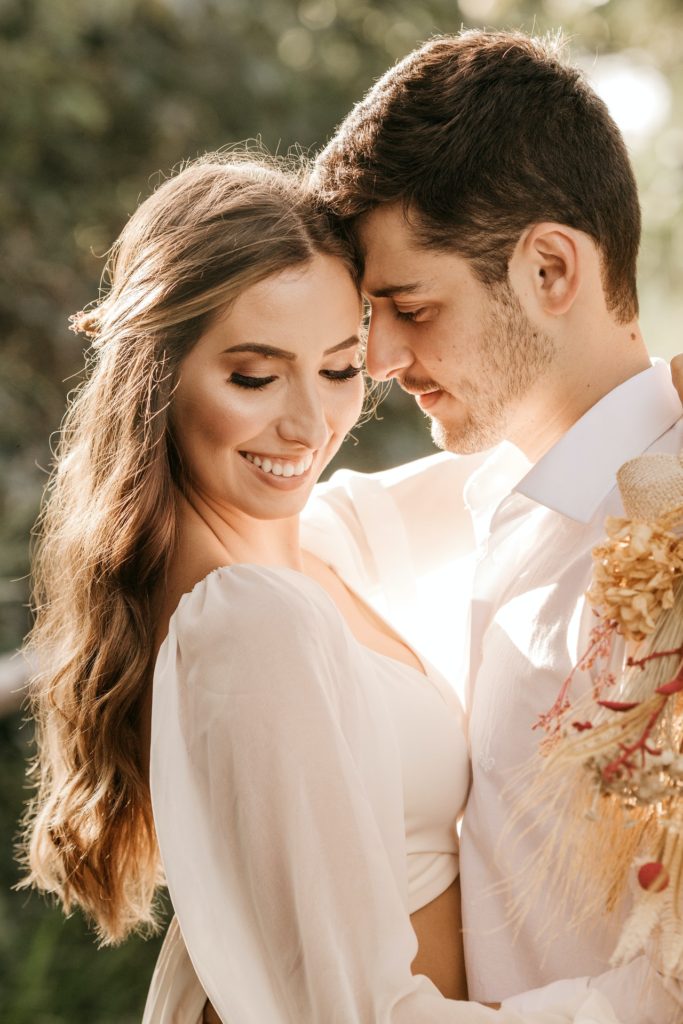 For the shooting of couple films, the use of backlight shooting techniques to highlight the warm and warm emotional atmosphere of the picture. The flash reduces the output by 1 stop.
Precautions:
In backlight photography, in order to enrich the picture level and obtain a good color reproduction, you need to use the flash as a supplement light. Generally speaking, when used as fill light, the flash does not need to exert strong power lighting, but attention should be paid to control the flash brightness to avoid excessive fill light. Generally, it can be set to about two levels equivalent to normal underexposure. If you use the wide-angle end of the camera’s zoom lens or the angle of view equivalent to that of a standard lens, set the flash to the “lower” level to prevent excessive fill light.
Tips:
Add a diffuser on the flash head. The light of a small flash is relatively hard, so you can add a diffuser. If not, cover it with a layer of paper towels. This way the light can be softer.
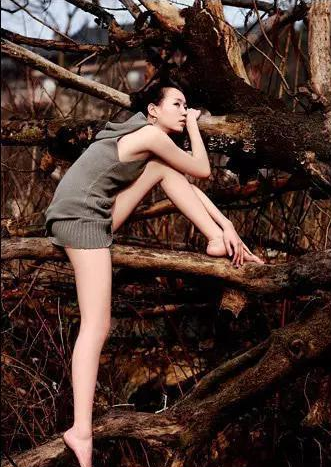
In the daytime outdoor photography, there is another situation, we also use the flash to fill the light. For example, in a cloudy environment, or in other scenes such as the shade of a tree, the outdoor light is even. We use flash to fill up the character, which will make the skin color of the character more smooth and bright. In this case, the fill light, because the light is uniform, we can directly meter the shot. Of course, the flash must generally reduce the output of about two gears to weaken the traces of strong light. As shown in the picture below: the model is lying on the leaves, and the flash is output with reduced files, and the color of the characters is bright.
In the Daytime Outdoor Portrait Fill Light-flash as the Main Light.
In outdoor portrait photography, when we use the flash as the main light of the photography, the flash can suppress the ambient light, the blue sky can be bluer, and the environment level is more distinct. The picture effects presented often have strong individual characteristics, strong texture and rich details. Using flash as the main light for shooting, we can summarize the idea of shooting in one sentence: use the aperture to control the brightness of the flash on the face, and use the shutter to control the brightness of the environment.
As shown in the figure below, we first meter the ambient light, and the data obtained by metering is that the aperture is F11 and the shutter is 1/125. After getting the environmental metering data, we set the intensity value of the flash, set it to F11, and the shutter can be set to 1/250. In this way, the brightness of the characters is ensured, and the environment is also darkened by a level, which highlights the fashion sense of the picture. If you feel that the ambient light is still too strong, you can continue to adjust the exposure combination.
Daylight is a backlight light source, and the front flash fills in light, and the intensity is over one level to slightly darken the background.
Shooting parameters: aperture F8 shutter 1/125 second
photography skills:
If you want to express the blue sky and white clouds, if you want to make the sky bluer in the light conditions, you must use the front light of the outdoor shooting light to complement the natural light to achieve the effect of enhancing the illuminance. Increase the ratio of front light to background light, making the sky bluer. Under backlight conditions, first measure the natural light data, and then use an external light to fill in the backlight direction. The flash data must be 0.5 or 1 block higher than the natural light to achieve a bluer sky.
Precautions:
The flash duration is very short, generally within one thousandth of a second. Therefore, the camera control that controls the exposure of the flash is only related to the aperture and sensitivity settings, and has nothing to do with the shutter speed.
As long as the shutter speed is within the flash synchronization range, no matter how it changes, as long as the aperture and sensitivity settings remain the same, the flash exposure is the same.
We can use flash as the main light source for the subject and sunlight as the light source for the environment. Select and fix a correct flash exposure aperture value for the subject, and then adjust the speed gate speed during shooting. At this time, the exposure of the subject has been fixed by the aperture and almost any change occurs, the ambient brightness can be drastically suppressed, and the subject and the environment can be separated.
Tips:
The flash for outdoor shooting can be equipped with many light effect accessories. Adding a diffuser can make the light quality very soft. With the light barrier, the light can be used more accurately. You can change the color of the light by inserting different color chips.
If the outdoor light is only used for supplementary light under natural light conditions, it can directly illuminate the reflector at any desired position to generate supplementary light for the main body, with greater controllable intensity and more free adjustment in position.
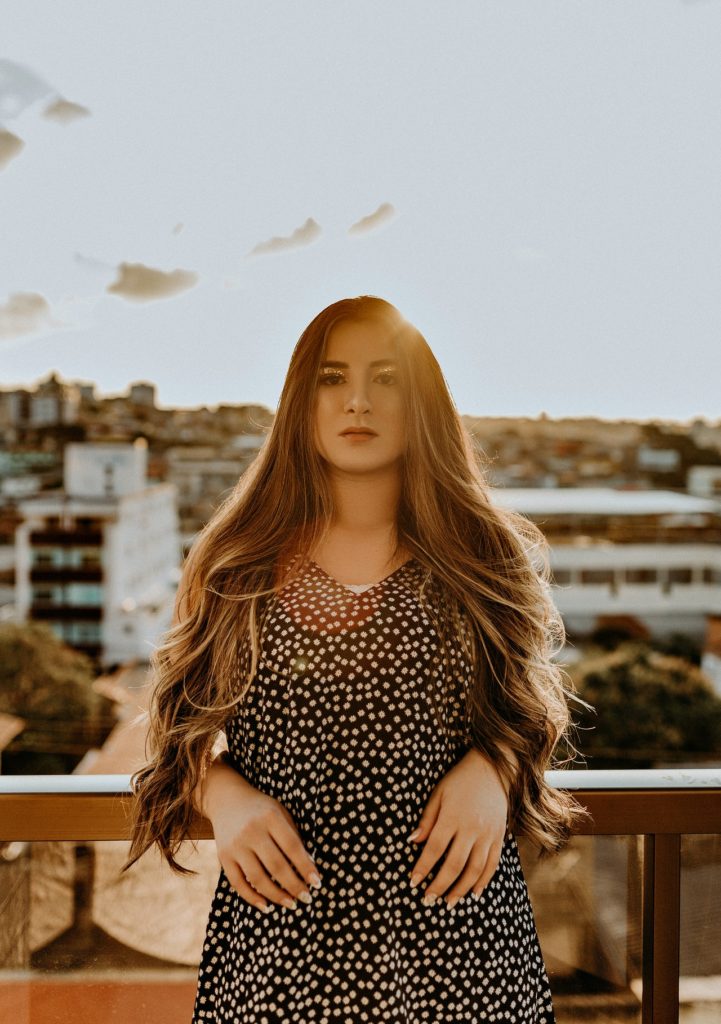
Shoot on the balcony, set the metering data on the camera M file, adjust the aperture value, darken the background, and separate the characters and the environment to express the atmosphere of the picture.
Shooting parameters: aperture F13 shutter 1/100 second
Night Portrait Photography
Generally speaking, it is not advisable to use flash when shooting night scenes. The use of small apertures and long exposures can show beautiful night scenes. The flash is generally used to shoot portraits at night. If you directly turn on the flash to shoot portraits, the restoration of the characters is normal, but the night scene behind is very dark and cannot be restored, so you need to use the slow flash function at this time.
In general night scenes, the background is usually very dark. In order to make the lights and colors of the background appear, this time may be 1/10 second, or it may be longer. For the foreground model, because we used a flash, it actually only takes about 1/100 second to complete the exposure.
 We first metered the background and found that aperture 2, shutter 1/10 second, can achieve accurate exposure of the background. We directly manually adjust the exposure combination to aperture 2, shutter 1/10 second, and then we choose to turn on the flash, TTL mode, downshift between 1.5 and 2 to reduce the flash marks of people.
With the effect of shooting in this way, we can see that the faint light in the background and the face of the model are fully exposed, and the light in the background creates a soft atmosphere. The model is organically integrated into the background, making the entire night scene more attractive.
Shooting steps:
First meter the environment and set the camera aperture and shutter combination. Then turn on the flash, TTL mode. Set the flash reduction on the flashing light. The value of this setting can be set according to the specific situation, generally around 1.5 levels. Put the camera on a tripod. When shooting, unless special effects are taken, remind the model not to move after flashing, because for the background exposure is normal, the shutter time is relatively long, 1/10 second or longer, if the model moves, the character It’s blurred.
Precautions:
If you don’t have high-end equipment in your hand, it means you can’t use high ISO to increase the shutter speed to achieve handheld shooting. Therefore, you have to prepare a stable tripod, which is an indispensable condition for obtaining beautiful night portraits.
Tips:
To shoot night portraits with dreamy spots, the choice of scene is particularly important. We generally choose places with abundant neon lights, street lights, and car lights, such as squares, shopping malls, and pedestrian streets, so that the photos have such an effect.