Table of Contents
What is a Scene
The picture scene refers to the size and scope of the image of the subject in the picture.
There are two factors that determine the size of a scene: the actual distance between the camera and the subject and the focal length of the photographic lens, which is the shooting distance. Shooting distance refers to the relationship between the distance between the shooting point and the subject.
The choice of shooting distance, reflected in the photo screen is the change of scene. Through the change of the distance, the size of the scene image and the space range included are determined.
Under the premise of the same shooting angle, the change of shooting distance can change the size of the image of the picture. When the distance is close, the image is enlarged and the scene becomes smaller. Otherwise, the scene becomes larger.
On the other hand, when the distance between the camera and the subject remains the same, you can also change the focal length of the photographic lens to change the scene of the picture. The rule is that the longer the focal length of the photographic lens, the smaller the scene. On the contrary, the larger the picture scene.
Division of Scenery
In theory, there is no scientific definition of the division of scenes, it only expresses a concept. The reason is the inconsistent standards for measuring the sceneries of the pictures. Some take the proportion of the subject in the picture as the standard, and the whole picture of the subject is the panorama.
Some take the structural methods of different scenes as the standard. Anything that shows a relatively complete thing or a whole closely connected thing is a panorama.
There are also adult bodies as the standard scale, and scenes are divided by intercepting a certain range of human body parts shown in the picture.
At present, most people agree to use the body of an adult as the criterion for classifying scenes. According to this standard, the scenes are divided into 4 levels, namely, distant view, panoramic view, mid-range view and close-up.
Different shooting scenes are used to express different effects and themes. The shooting methods and precautions for different scenes are different.
1. Shooting in the Middle Shot
The middle shot is a picture that shows the part of the human body above the knee or a part of a scene.
The characteristics of the mid-range scene: the scene is small, and the brightness change of the scene is not complicated. This kind of picture mainly shows the detail level, surface texture, color reproduction and expression of the subject. But there is not much to the whole picture environment. This kind of picture is conducive to expressing the relationship between people and things.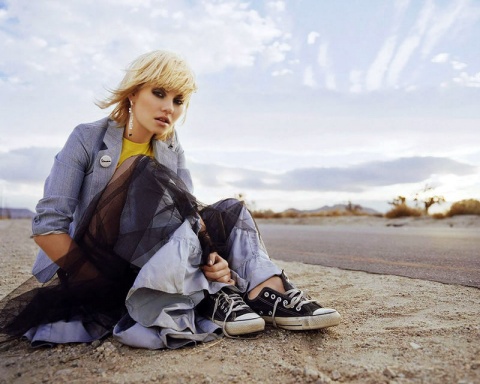
Compared with the panoramic view, the middle shot has a reduced range of performance and is closer to the subject. In addition to the subject, the surrounding environment related to the subject is shown in the screen. At this time, the environment and background factors play an auxiliary, foil or foil role, and express a relatively complete meaning together with the subject.
The middle shot is mainly used to reveal the subject’s emotions, identity, and action goals. For example, use the middle shot to take pictures of students answering questions. It can not only show the expression and attitude of the student answering the question, but also show the reaction of the next student (such as expressions, actions, etc.).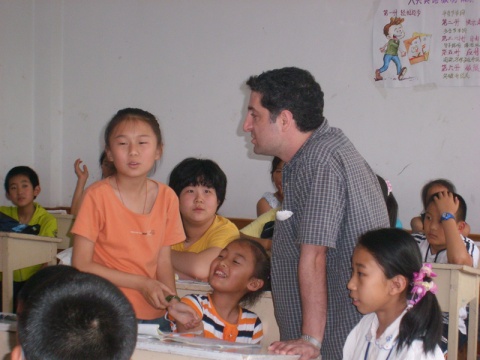
(1). Determination of Shooting Distance
The purpose of the middle scene is to show the expressive plot and action part of a certain event or object, show the focus of contradictions, and the emotional communication and connection between people.
Mid-range often wins with action plots, and the environment drops to a secondary position. If it is a static object, always use the most interesting and noticeable part of the object. For example, the middle shot of Whitehall may be a row of imposing pillars protruding from the second floor. In the middle shots, gestures are often the main part of the picture.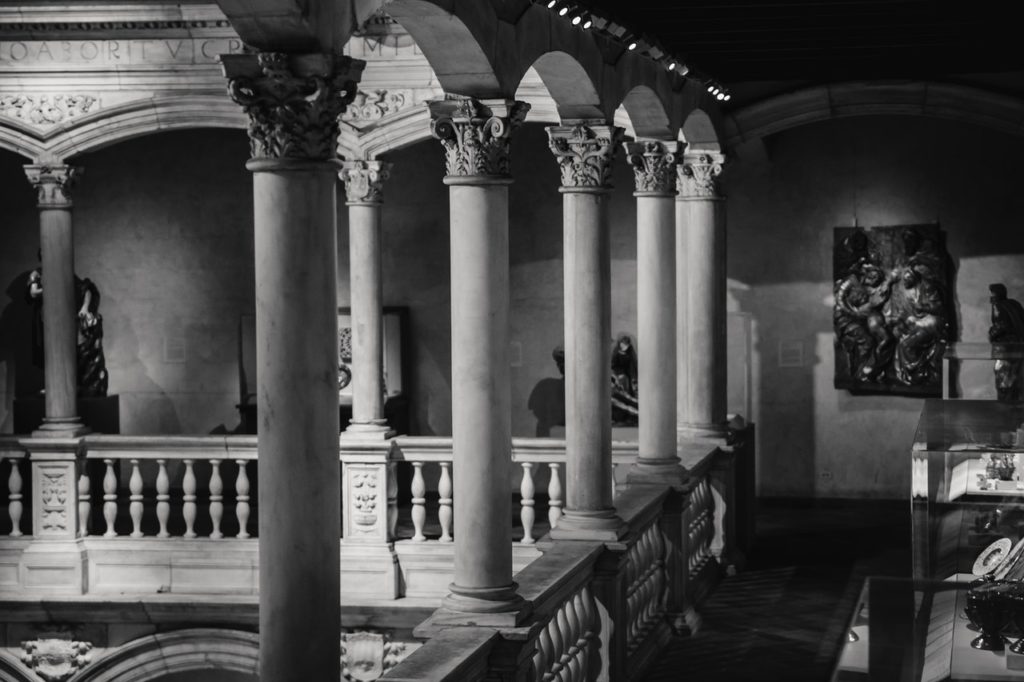
Since the scene in the middle shot is relatively small and the object being photographed is relatively large, the distance between the camera and the subject cannot be too far. If the distance is too far, the subject will be affected by the large background. And if it is too close, it will also affect the subject. When shooting medium shots, the distance between the camera and the subject is generally 3~5m.
(2), the Determination of the Focal Length
Since the subject shot in the middle shot is generally relatively large, it is not difficult to see from the relationship between the focal length and the size of the object that the short focal length lens will not be used when shooting the middle shot. Generally, a standard lens or a medium-focus lens is used, that is, a lens with a focal length between 50 and 100 mm. If you use a zoom lens, you will be more comfortable when shooting.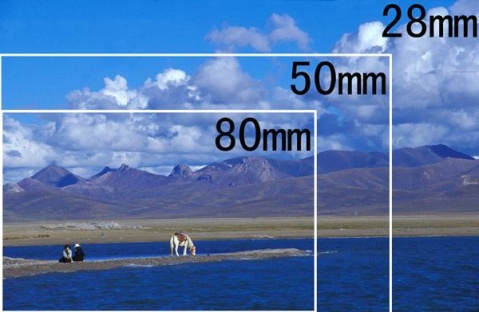
(3) the Method of Exposure
Since there is a certain background in addition to the subject in the middle shot, if you use average metering, it will definitely affect the accuracy of metering because of the background. Therefore, the “close-up method” is generally used when shooting mid-range, that is, metering close to the subject. In this way, most of the subject can be filled with the picture, avoiding the influence of the background on the subject.
Of course, after the metering is completed, you have to return to the original shooting position and perform exposure based on the data just recently measured. This method is most common when shooting mid-range portraits. Generally, the distance of close measurement is between 10 and 30 cm.
(4). The Relationship Between Theme and Background
The background of the mid-range scene generally has the effect of setting off the main body and deepening the theme. However, a background that is too messy will play a role in overwhelming the audience and weaken the subject’s expressiveness. And an overly simple background does not serve the purpose of emphasizing the main body. Therefore, pay attention to the selection and arrangement of the background when shooting the middle shot, as shown in the figure.
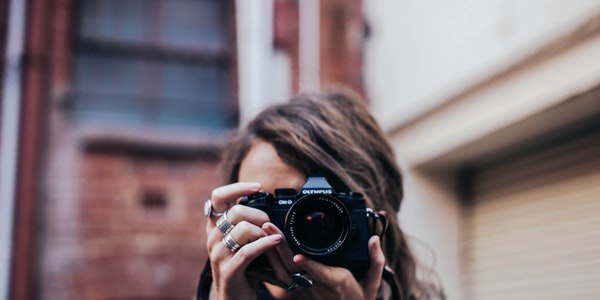
2. Close-up Shooting
Close-up refers to the picture above the chest of a person or a part of an object. Compared with the middle shot, the space of the picture performance is further reduced, and the content is also more single. It is mainly used to express the actions and changes of facial expressions, etc., which can give people a sense of communication. For example, students answer questions, read aloud, do homework, do experiments, teachers give lectures, write blackboard books, do demonstration experiments, etc. This is the most commonly used scene in classroom photography.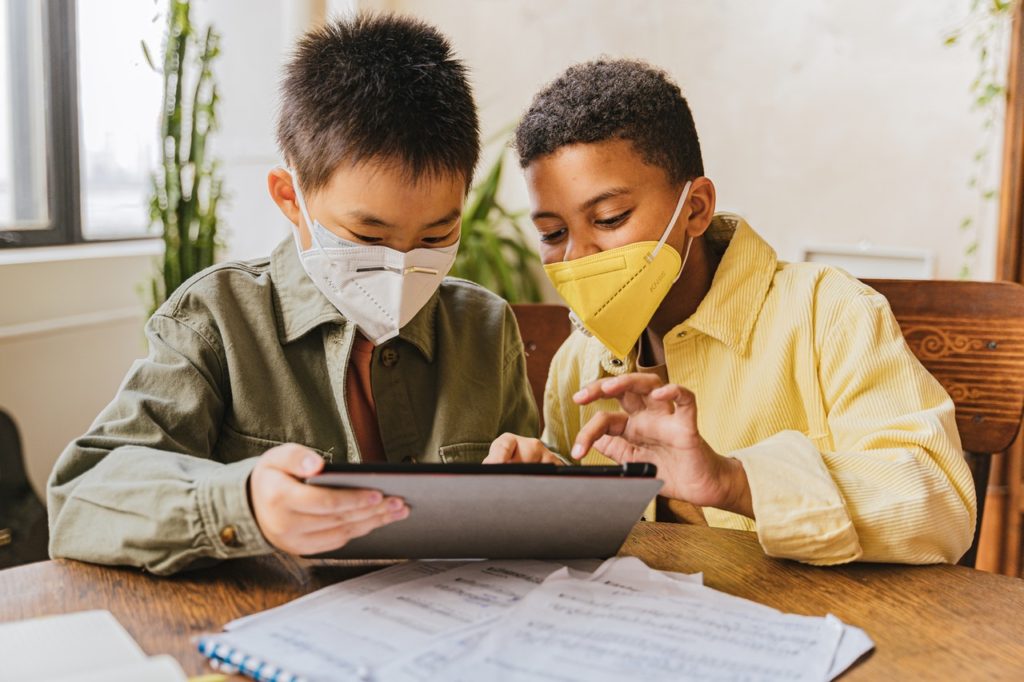
(1) Determine the shooting distance
Close shots are mainly used to highlight the look of characters or the delicate texture of objects. This is the characteristic of close-up performance. Close-up shots of characters, facial expressions are the main content of the picture, and eyes become the central part of the picture. Therefore, close-up shots should be handled well and expressively. Use good light when shooting objects in close range, and express the texture and texture of the objects well.
Since the close-range scene is smaller than the middle-range scene, and the object being shot is larger than the middle-range scene, you should pay attention to it when choosing the distance between the camera and the subject. Generally, it is appropriate to be between 1m and 3m.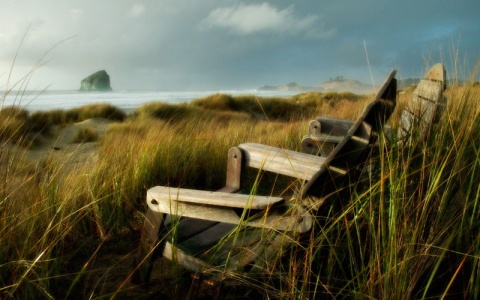
(2) Confirmation of focal length
The focus of the close-range image is the subject, and the close-range subject is larger than the mid-range. So when shooting close-up shots, the short focal length lens is also not selected. Generally, medium-focus lenses are more commonly used, with 70~100mm lenses being more common.
(3) Method of exposure
Since the subject itself is highlighted in the close-up, the status of the background becomes secondary.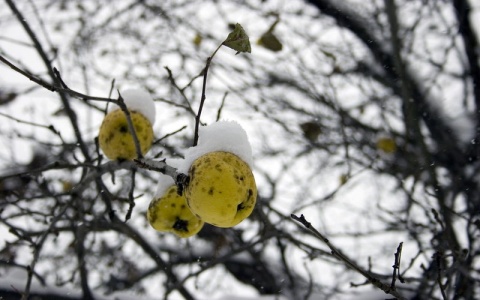
Many photos with close-up images have weakened the background to highlight the subject. So in close-range shooting, use the “average metering” method for exposure.
(4) Prevent distortion
Close-up images are generally close to the subject. But if you are too close to the subject, the effect of the shot will produce a kind of distortion. This distortion will be more obvious if you use a short focal length lens to shoot. You should pay attention to it when shooting.
3. Close-up Shooting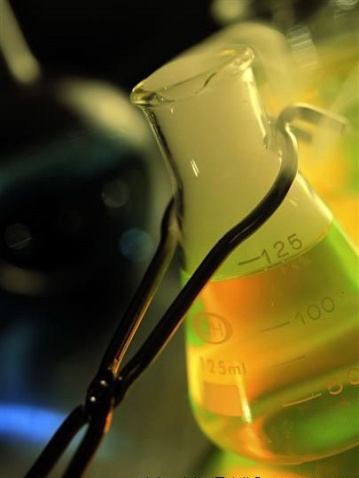
Close-ups are images of heads above the shoulders of the human body or the details of certain subjects. It is an enlargement of the small parts of things, giving people a strong visual impact, strengthening the audience’s understanding and feelings of the displayed image, and deepening the memory. Such as the content of writing on the blackboard, experimental phenomena, facial expressions and expressions of teachers and students, etc.
(1) Determine the shooting distance
The close-up is a step further than the middle shot, filling a certain part of the object in the picture, revealing the internal characteristics of the object from the subtle points. Compared with the middle scene, the close-up pays more attention to revealing the inner dynamics, looking at the essence through the subtleties.
When shooting close-ups, the key to success lies in the unique ability of observation. This can capture some parts worthy of close-ups to open the windows through which the audience can see things inside. For example, the eyes of characters are often close-ups, because people often say that the eyes are the windows of the soul. Indeed, through human eyes, one can see the inner feelings of the characters.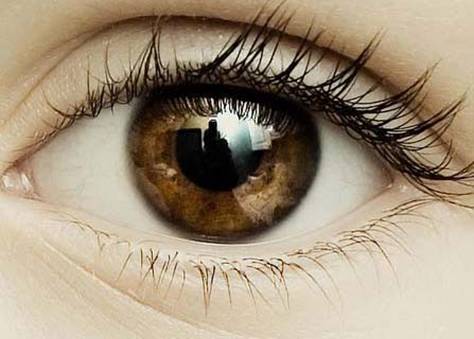
A close-up of the hand
Second, a close-up of a person’s hand. The hand is the focal point of a person’s behavior and movement. And we can see the characteristics of a person’s occupation, age, and so on. The hands also have rich “expressions”. In opera jargon, “finger can speak”. In daily life, people often use various gestures to help express their feelings.
Close-up of a small winter jasmine under a snowy branch, a small grass bud in spring, a lotus in summer. And a red leaf in autumn can all give people the joy of life. It is easier to touch the heartstrings of the audience than other scenes. Therefore, close-ups are often allegorical and lyrical, more subtle, and can inspire people’s imagination.
Because the close-up performance is mainly the local feature of a certain part of the subject. So when shooting, keep as close as possible to the subject, as shown in the picture above.
However, since the camera lens is limited by the recent focus range, once it exceeds this range, the focus cannot be adjusted. If the closest focusing distance of the camera is 0.8m, once it is less than this distance, the camera will not be able to adjust the focus clearly. Therefore, for shooting close-up pictures, the shooting distance should be based on the camera’s closest focusing distance.
(2) The choice of focal length
Medium and long focal length lenses are used for close-up shots. Generally, a lens with a focal length above 135~300mm is used, and a lens above 300mm can also take close-up pictures. However, considering that lenses with focal lengths above 300mm are generally bulky and will easily shake during shooting and affect the image quality, it is generally not recommended to use them.
(3) Selection of equipment
To overcome the limitation of the closest focusing distance, when shooting close-ups, it is best to use a macro lens that specializes in shooting close-up objects. Some lenses have a close-up function, which can also be used when shooting close-ups. Lenses with close-up function will be marked with “M” or “MACRO”.
(4) Method of exposure
Since the close-up picture mainly highlights the subject, any exposure error on the subject will be very obvious. Therefore, you must pay attention when shooting. Generally, spot metering is used when shooting, so as to ensure the proper exposure of the object being shot.
4. Shooting of Distant and Panoramic Views
Features of Long-range Images:
The long-term view is the one that expresses the largest range of space among all kinds of scenes. It is shot at a distance from the subject during shooting, and it includes a large range of sceneries.
The vision is mainly based on nature. The vision always wins with the aura of nature, showing the topographical features, geographical location, mountain and river situation and the environmental atmosphere produced by climate change. Therefore, to construct a long-term picture, we must look at the big picture, pay attention to the overall momentum, and handle the lines of nature itself, such as the ups and downs of the mountains, the direction of the river, the patterns of the fields, the unique tones and lines of the desert and the ocean, etc. And we must be good at using various flow factors. Such as atmospheric conditions, cloud changes, wind and rain, overcast and sunny. They are all moving factors in the distant picture.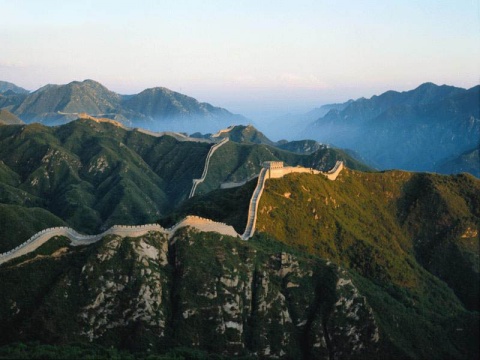
Features of panoramic images:
The purpose of panorama is to show the whole picture of a certain subject and its environment. The panorama is used to explain the environment in which the event occurred and the relationship between the subject and the surrounding environment.
Compared with the vision, the panorama has a clearer content center. The size of the panorama range is always related to the main object, and is determined relative to the size of the main object. For example, the panoramic view of people and indoors is naturally much smaller than the panoramic view of Broadway. But it is called the panoramic view for the subject matter.
The structured panoramic picture mainly considers a certain relationship between the environment and the subject. Pay attention to the contour lines of the inherent characteristics of the main body as a whole, and the echoing relationship between the main body and the surrounding environment in order to achieve rich content and structural integrity.
However, this type of scene is not as good as the medium and close scenes in terms of the details and texture of the scene, as shown in the figure above.
(1) Selection of shooting location
Generally, taking long-distance, panoramic and other photos is to show the magnificent momentum and atmosphere of the whole picture. So when shooting, choosing the shooting location is a very important part.
When shooting distant scenes and panoramas, if you use head-up shooting, the effect of the photos you take may be very mediocre. If you change the shooting position, raise the shooting point, and use overhead shooting, the effect usually obtained is much better than that of head-up shooting.
(2) Confirmation of focal length
The perspective and panorama mainly express the overall sense of the picture. This requires the camera lens to have a large enough angle of view. So when choosing a lens, the medium and telephoto lenses are not suitable. Generally, short focal length lens and standard lens are used to shoot far and panoramic picture effects. Generally, a 24-50mm lens is appropriate.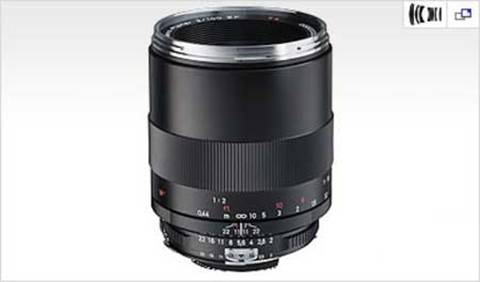
(3) Method of exposure
Since there are many scenes in the distant and panoramic images, the choice of exposure depends on the specific situation. If the brightness distribution between the shots is relatively uniform, you can use the “average metering method” to determine the exposure value.
If the brightness difference of the shot scene is relatively large, and there is a clear contrast between light and dark, you need to change the metering method. On the basis of average metering, further measurement of local bright parts should be carried out. And the two metering results should be comprehensively considered to determine the appropriate exposure.
(4) Control of the depth of field of the picture
In order to enhance the sense of depth in the distant and panoramic images, line perspective and air perspective rules should be used when shooting. And sidelight, side backlight or backlight should be used as much as possible to shoot, while reducing forward light and top light.