Table of Contents
Use of Catch Light
The light source used as the catch light does not require strong power, but it must be coordinated with the environment. Anderson believes that, personally, he would rather choose natural light as the source of eye light. Indoors, it is best to try the light coming in from a window beyond your shoulders to create a catch light, even if it is not the main light source. It is much more natural to use a reflector outdoors than to use an auxiliary flash, especially for close-up photos. Also try to avoid the reflection of the white of the eyes to the main light source, it can only glow with white light tastelessly, making people’s eyes out of balance.
Soft-tone Portrait Lighting
Soft-tone portrait lighting is a uniform city lighting method with a total tone of intermediate colors. This kind of lighting basically uses multiple lamps and several reflectors. Direct, diffuse and reflect the light to the subject. If the lighting is cleverly arranged, you can shoot quite wonderful portraits.
In order to obtain a uniform, comprehensive, soft tone and beautify the lighting effect of the subject, generally 3 indoor photography lights and some reflectors are used. Use two large 300-watt plus soft spotlights side by side in front of the subject. The two lights should be at a certain angle with the subject and a aluminum-coated reflector mounted on a bracket in front of him. In this way, the uniform lighting effect can be achieved by the distribution of light, which is to maximize the intensity of the reflected light. Therefore, the reflector is a critical part of lighting. The headlight should be set quite high and placed on the left side of the subject, just behind his head. Some reflectors can be placed behind and on both sides of the subject to increase reflection.
For specific shooting, first turn on the two soft spotlights in front of the subject, and adjust the angle so that they can evenly illuminate the subject, and at the same time make the aluminum-coated reflector in front of the subject reflect upward Maximum amount of light. A reflector was set up behind the subject, and a white, long cylindrical reflector was also set up in the left example. Then, set up the headlight and raise it to produce strong and uniform illumination on the subject’s left shoulder. The headlight should be high enough to hit the light directly on the reflector mounted on the bracket in front of the subject. Move your hands back and forth on each reflective surface to check the reflective effect, and finally determine the exposure level and start shooting.
Rembrandt-style Light
Rembrandt is a world-renowned Dutch painter. Rembrandt-style lighting is a special lighting technique specially used for shooting portraits. When shooting, the shadow side of the subject’s face is facing the camera, and the light illuminates three quarters of the face. The portraits taken with this light method resemble Rembrandt’s portrait paintings, hence the name.
The Rembrandt-style lighting technology relies on strong side lighting to make any side of the subject’s face present a triangular shadow. It can divide the subject’s face into two, while making the sides of the face look different. If uniform overall lighting is used, both sides of the subject’s face will look the same.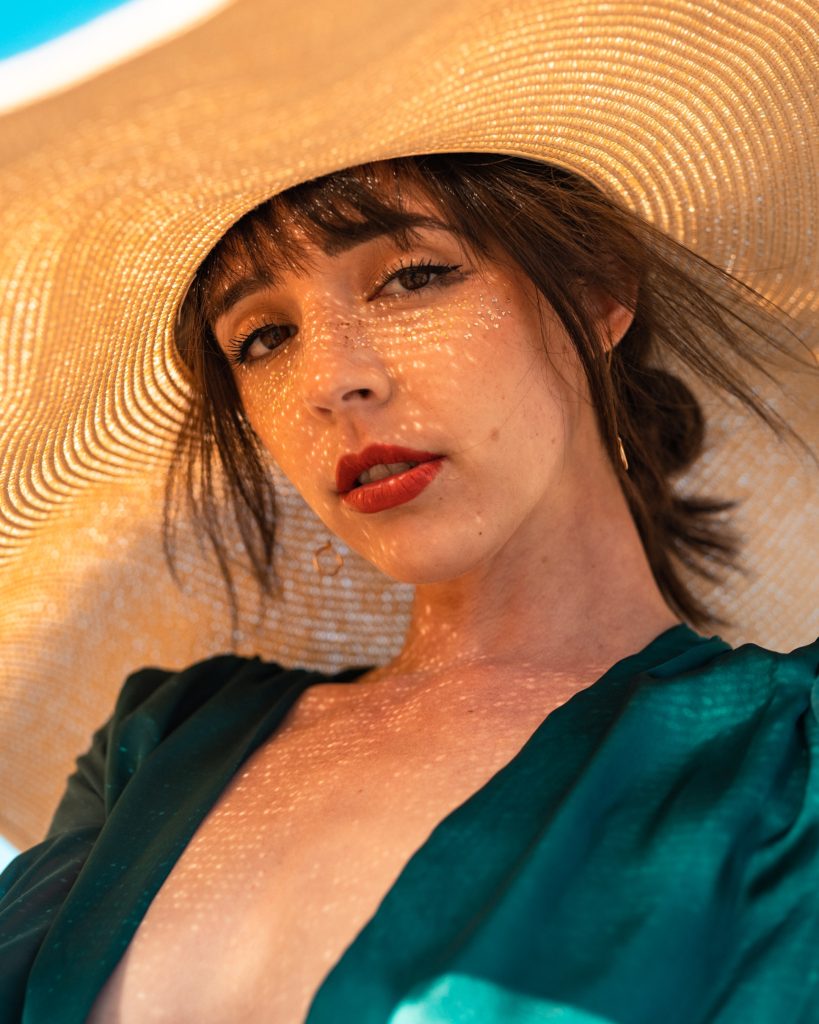
This lighting technique is quite effective because it highlights the subtleties of each face, that is, the sides of the face are different. The lighting effect can also be adjusted arbitrarily with auxiliary light according to the wishes of the photographer: Although the high-contrast form of Rembrandt-style lighting is interesting, the appropriate use of reflectors and auxiliary lights can minimize the contrast and enhance the whole The effect of portrait, so as to shoot extraordinary works.
Generally, the use of Rembrandt-style lighting requires two lamps to illuminate, and after improvement, a third lamp is added to adjust the contrast. Among the two illuminators, a 650-watt quartz main light (A) is placed on the upper left of the photographer, directly illuminating the right side of the subject’s face, just like a soft light auxiliary light (B) on his front , But the latter is placed on the photographer’s left. The white long strip reflector is placed on the left side of the subject.
It can reflect some light to the unlit case of the face. The headlight (C) can shine light on the face of the subject through the reflector, weakening the obvious Rembrandt triangle and brightening the overall tone of the portrait.
For specific shooting, first turn on the 650-watt quartz main lamp (A) and adjust its angle so that the Rembrandt triangle light is cast on the dark side of the subject’s face. Then turn on the main soft light (B) on the front, directly facing the bright side of the subject’s face. It can illuminate the subject’s face and increase the depth, but at this time the triangular bright area is still obvious. Try to make the subject turn his head until the Rembrandt triangle light shines on his cheek just right. And ask the subject’s chin to tilt down. The next step is to meter the light and select the camera’s aperture and shutter combination. Finally, check the background again to see if the hair light will leave bright spots on the background and cause flare in the camera lens. When you start shooting, you can talk easily with the subject so that he can relax and smile. This step is also very important. It must be remembered that the important thing in portrait photography is not to let the effect of a technique exceed the expressiveness of the subject’s face.
Side Portrait Lighting
Shooting a profile portrait has a strong appeal to the subject, because people generally don’t have the opportunity to look at their image from this angle. American photographer M. Richard believes that in order to take a good example of a portrait, in addition to a good pose of the subject, a special lighting method must be used to give the photo a special sense of beauty and a powerful charm. And a deep sense of space.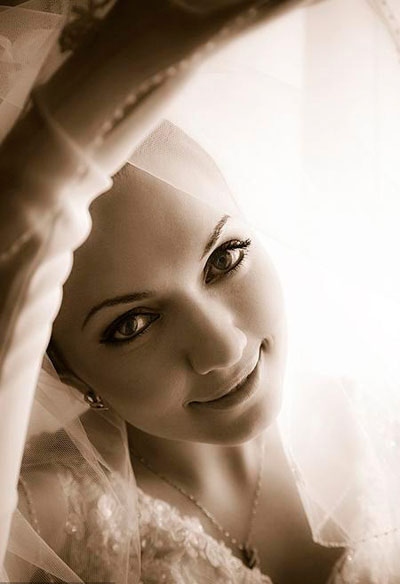
Richard’s experience is that, first of all, the side shoulder of the subject should be at a 45-degree angle to the optical axis of the lens, not parallel to the optical axis of the lens. And make him sit higher so that his nose is perpendicular to the optical axis of the lens. When taking portraits of men, Richard likes to keep their chins slightly lower and their heads slightly towards the background. But no matter which direction the head of the woman’s profile faces-up or down, left or right, the effect works well. The direction of the eyes is also important. The pupils of the eyes of the subject are best to be perpendicular to the optical axis of the lens. Look up when the head is slightly tilted, and look down when the head is lowered.
Regarding the side portrait with light, Richard’s general idea is to arrange strong light from the eyebrows to the cheeks, and try to avoid “hot” the subject’s forehead, eyes, and hands. When taking a side view, three lights and a reflector are generally used to illuminate the face of the subject.
High-contrast Portrait with Light
Taking a high-contrast portrait with no normal pitch is an interesting attempt in black and white portrait photography. It can create some vivid and moving images by using contrasting bright, hard light.
In order to obtain such a high-contrast portrait, in addition to the considerable skill in exposure and development, there are also certain requirements for the lighting when shooting. American photographers J. Mitchell and J. Hannum proposed a simple lighting method in an article in “Darkroom Photography” magazine: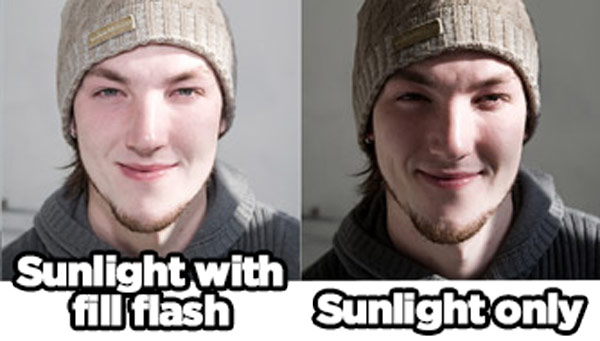
Direct light or scattered light can be used for illumination, generally one lamp or two lamps are better. For the convenience of shooting, it is best to use a spotlight so that you can directly observe the light effect. Of course, flash can also be used. In most cases, only one lamp is sufficient.
If the subject’s hair is very dark, then a second light can be used to directly illuminate the subject’s hair or illuminate from behind to produce a brighter outline that distinguishes the subject from the background.
In order to achieve a moving effect, you can try to illuminate the subject with side light or 45-degree angle of light. Side light only illuminates half of the face of the subject, while 45-degree light can illuminate most of the face, and creates a triangular bright part on the cheek facing the light source.
This high-contrast effect looks best with a dark, unlit background. In order to better distinguish the image from the background, you can brighten the subject’s head with light: Backlit silhouette portraits are actually also It can be regarded as a high-contrast portrait photography.
British photographer M. Kipling pointed out that a backlit photo is the contour image effect of the subject with the light source behind it. Generally, the tolerance of photographic film to feel and express tones is very limited. In contrast, the human eye has a much wider range of perception of tones. In this way, in the photo, darker objects can jump out in silhouette against the brighter background.
For backlit silhouette photos, daylight is often used as the light source, but any light can be used as the light source according to the photographer’s convenience or preference. Kipling believes that it is ideal to take backlit silhouette photos with the sky after sunset or before sunrise as the background. In order to produce a good backlight silhouette effect on the negative, the ratio of the brightest part to the darkest part of the photo is usually 50:1. This is especially true when shooting with a slideshow, because the tone latitude is narrower.