Table of Contents
What Is Three-Point Lighting?
Three-point lighting is a traditional way of using light sources from three different locations to illuminate objects in the scene. There are three different types of lights, backlight, main light and fill light.
Backlight:
The first light source of lighting technology, the backlight (also called “edge light” or “headlight”) shines on the object from the back, thus completing the light setting. This will form a light edge or outline around their head, move the object away from the background, and give a sense of weight. Usually, photographers place the backlight directly behind the subject, or place the backlight in a high enough range, opposite to the main light and pointing to the back of the subject’s head.
Main light.
This is the brightest and dominant light source in the three-point lighting layout, which provides the overall exposure of the scene. Photographers usually place the main light slightly toward the front of the subject and the side of the camera, and place it on a light stand that is at a 45-degree angle to the camera. This will produce a shadow on the other side of the front of the subject, which givs it a certain degree of Depth and size. The main light source creates the atmosphere of the scene, it can create high-key images (uniform, soft lighting and optimistic in the atmosphere) or low-key images (high contrast, deep shadows and very moody), depending on its location and the auxiliary lights used in the overall lighting.
Fill light:
The fill light will look like the main light on the other side of the camera, literally filling in the shadow created by the main light on the object, thereby presenting details in darkness. Usually, the brightness of the secondary light source is lower than that of the main light, and the photographer will control the overall feeling of shooting according to the dim degree of the shooting light. Dim fill light with a high fill rate will produce high contrast, black film shadows, while bright light has a lower, more balanced ratio that can make the subject look more uniform. The fill light is not always a light: it can be a wall, a bounce card, a reflector, or anything that can reflect some light back to the subject to fill the dark area. The fill light and the main light determine the atmosphere of the scene together.
How to use three-point lighting?
There are no rules on how to use three-point lighting. This usually depends on the overall mood that the cinematographer or photographer wants to mobilize. In addition, the subject and the scene are also important reference objects that need to be considered when setting up lighting.
If the photographer chooses a higher fill rate (such as 8:1), the main light will cast sharp shadows and contrast with natural light. Which is so-called “low-key lighting”. it will create dramatic, mysterious, disturbing and alienating emotions, and can show a series of deep sadness mood. Therefore, it is common in noir films, horror films, horror films and dark dramas.
There is a kind of soft lighting called “high-key lighting”, which can create the optimistic, airy, young, optimistic and brisk mood common in sitcoms and comedies. This kind of light is made by shifting the soft light slightly off the center with a 2:1 filling ratio. The photographer can create a soft and flattering appearance. When your subject is a person, it also tends to cover up the skin defect.
Good lighting can help photographers to better control shadows, view objects in the image to a greater extent, and create more interesting and dynamic images.
Lighting settings can help shape the subject so that it performs best or worst. Three-point lighting also helps to add a sense of three-dimensionality to the subject.
What is four-point lighting?
Unlike the backlight that produces the ring or outline of the object, the four-point illumination uses additional “backlight” to illuminate the object behind the object. The background light illuminates background objects, such as outdoor scenery or walls.
In order to obtain the appearance, the photographer places the background light behind the subject, that is, on the ground low or high grid, facing the background elements, such as outdoor scenery or walls.
The fourth light can also help the camera to make the subject more three-dimensional.
Photographers use this technique to draw attention to the background or eliminate shadows cast by foreground elements on the background.
A few tips for setting up three-point lighting
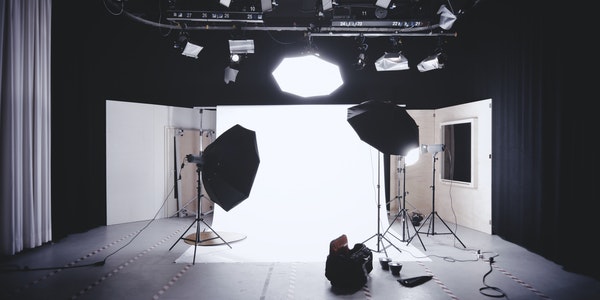
To successfully set up three-point lighting and create beautiful professional videos, there are several key components.
The intensity of the light source.
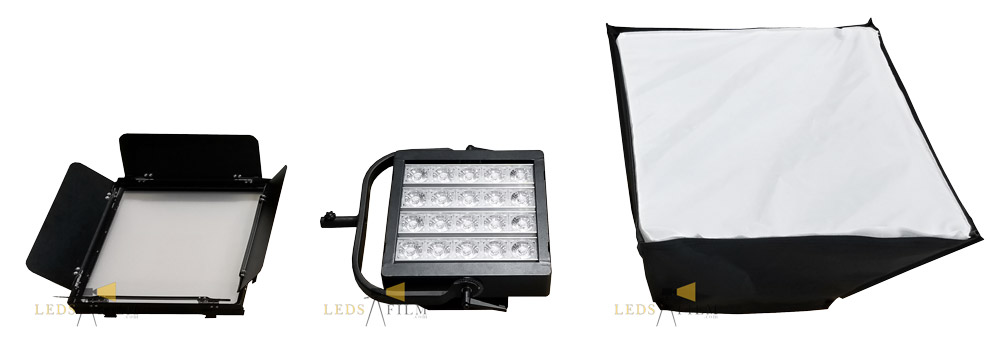
Using LED lights, incandescent lights or fluorescent lights, we can control the output intensity of light, which will affect the appearance of the scene. The sharper light will produce rougher edges and shadows. “Brightness” is a measure of the intensity of a light source. We can use a light meter to measure in lumens.
Light source size and distance.
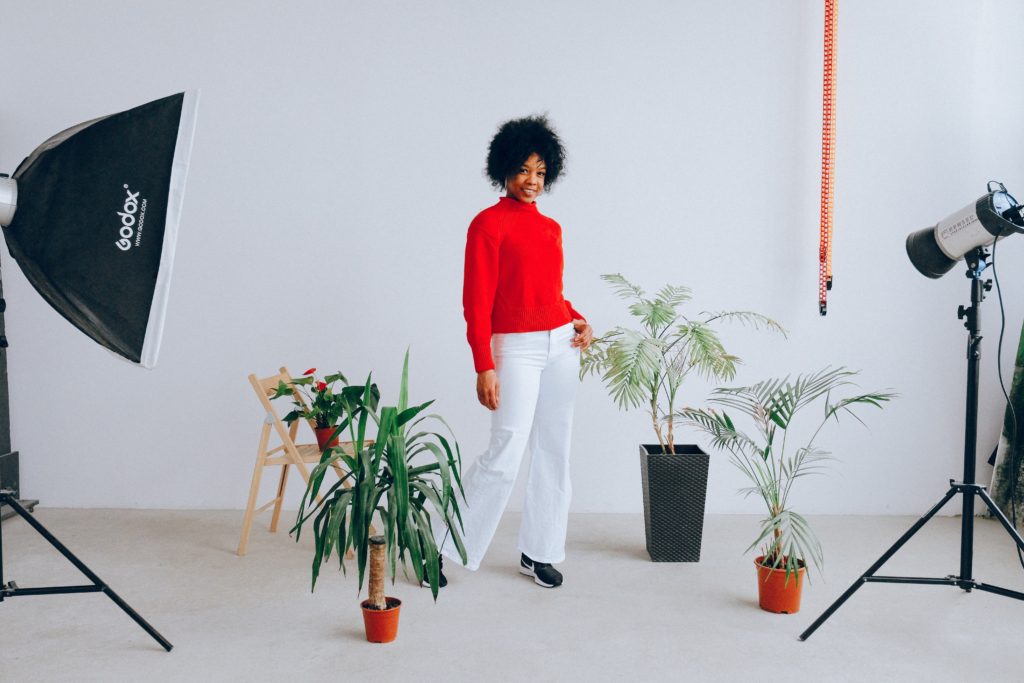
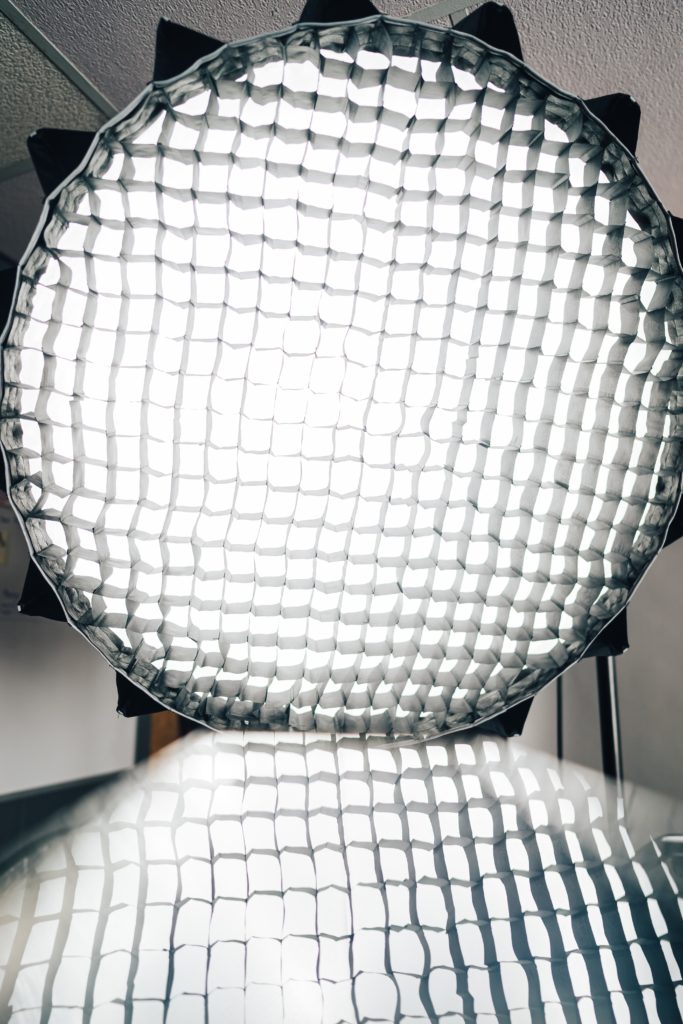
The size of the light source (relative to the size of the subject) determines how “hard” (sharp, sharp edges) or “soft” (smooth, feathered edges) the shadow is. If you pull the shadow back from the shadow, the shadow will become harder, making the relative size of the object smaller. If you place the signal source close to the subject, the shadows will be softer. Due to this relative size condition, the distance from the light source to the object will also affect the softness of the shadow. Smaller light sources will produce harder sharp edges, while larger light sources will soften shadows. In studio lighting, if you want a softer look, you can place magnification modifiers such as umbrellas, soft boxes, or other diffuse reflections between the light source and the object.
The position of the light source.
How do you determine the position of the fill and backlight will affect whether there are deep moody shadows or optimistic or even uniform light in the entire scene. This again has to do with creating the environment wisely—if your main light represents the sun, it should accurately reflect the angle and height of the light source. Position the light relative to the subject, and then let the camera determine where the shadow falls.
The original intention of setting up the light.
You must determine this kind of light in advance. Once you have determined what kind of lighting to use, you can continue to place and adjust the lighting kit to achieve this effect. Before you start to install the lighting kit, you must know exactly what look you want to get and why. According to the environment the character is in, the light source in the scene needs to become meaningful. Is this a cloudy sky? sunset? Dark alley? (You may also need “underpowered” lights. The frightening thing is that having unnatural lights can make the audience feel uncomfortable and make people feel something is missing.) Lighting settings are never random.
Test the lighting settings.
After determining the original intention, size, distance, intensity and location of the lighting, make all the settings so that you can see exactly how all the lighting works together and whether their effects are exactly what you want. If not, please make adjustments until everything becomes the best.