When shooting portrait photography, many people regard shadows as objects that need to be eliminated. So, how to eliminate them?
From another perspective, portrait shadows are actually not that scary. In fact, as long as you know how to use it, shadows can also play a good role.
What I want to explain today are 5 ways to eliminate, control or use shadows to take better portraits. Those who love portrait photography, don’t miss it.
Table of Contents
Related Settings
Spot metering
When the light conditions are more complicated, you can try to use spot metering and place the metering spot on the bright part of the character’s face.
In this way, the highlights will be properly presented, and the scene will be treated as dark to highlight the subject. If the room is really dark, you may also need to manually increase the sensitivity.
Slightly overexposed
There is a principle when shooting scenery, “I’d rather not expose it.” Because in the post-processing link, the details that are seriously overexposed and lost cannot be retrieved.
However, when shooting indoor portraits, there is generally no “severe overexposure” due to insufficient light. The process of correcting under-exposed details often produces additional noise.
Therefore, when controlling the exposure, you can consider making the picture slightly overexposed (about one-third block). This can reduce noise and preserve certain details for the dark parts of the picture.
Auto white balance
The automatic white balance can moderately control the contrast of light and dark of the picture. It may not be a good thing when shooting landscapes, but it is very useful when shooting portraits. If you feel that this is not accurate enough, you can find a piece of white paper and try a custom white balance.
Single Light Source
A single light source (such as a small window or an open door) can do wonders for your image, especially when you are working in a dark space.
If the door/window of the room is facing north (rather than facing east to west), they tend to bring softer, more directional light.
The “magic” of window backlighting
You can also adjust the character’s orientation, the distance to the window and other parameters to obtain different picture effects.
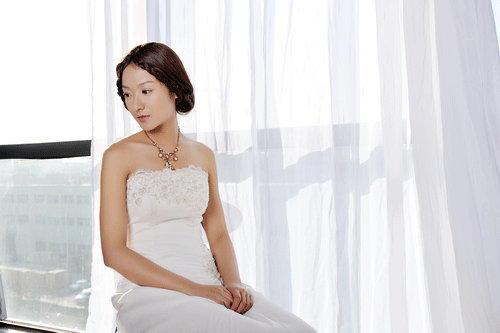
The main body is facing the window, allowing the window light to evenly illuminate her silhouette. The black curtain behind her succeeded in turning the background black and accentuating the subject.
Light Location and Light Quality
Both light position and light quality play an important role in controlling the tone and mood of the image.
The strong and concentrated “hard” light can enhance the overall contrast and drama of the image, emphasize texture and detail, and create shadows with high-contrast edges. Soft light can reduce light and shadow, while weakening the expressiveness of texture and details, which can effectively cover up imperfections.
In terms of light position, the front light can provide uniform illumination without shadows, but it will make the face appear flat. By adjusting the angle of the side light, you can properly create shadows and make the five senses more three-dimensional.
Let’s look at an application example. The character is facing the window, so the lighting effect on the face is even. The person who is leaning toward the window has more three-dimensional facial features, but the skin feels more granular.
The backlight is suitable for shooting dreamy photos, but the details of the subject itself will be missing to a certain extent.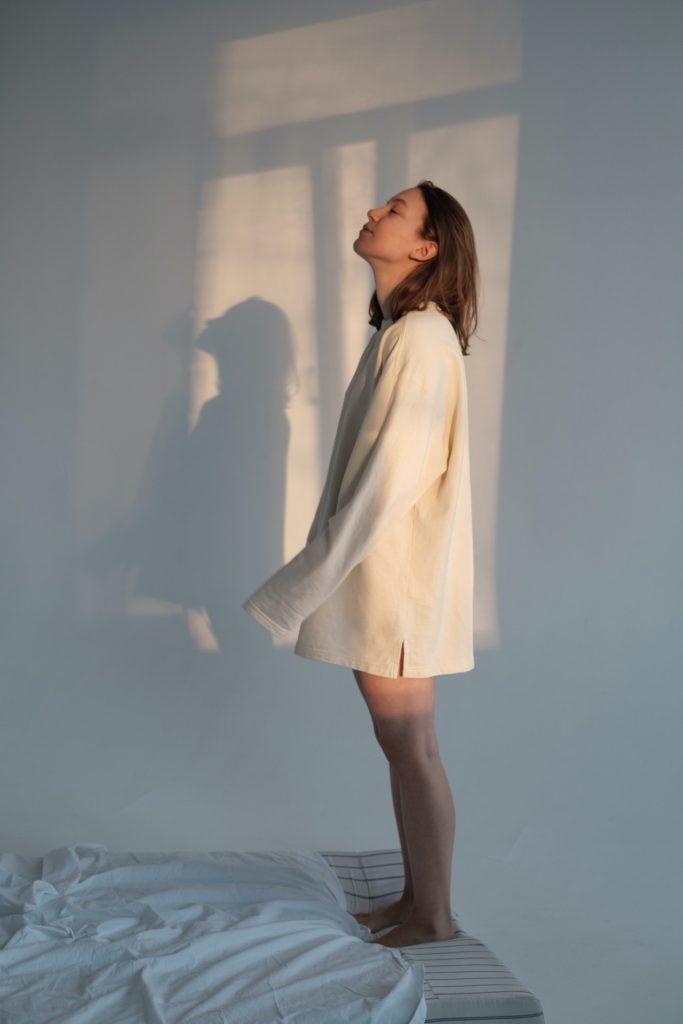
The Distance of the Light Source
The propagation of light follows the “inverse square ratio”, that is, as the distance increases, the energy decreases.
You can turn on the flashlight in the dark room and observe the beam. You will find that the beam is brighter and more concentrated near the torch. At a distance, it tends to diverge and the brightness decreases. You can use this feature to create special effects.
For example, you can place the model near the light source while keeping her away from the background. In this way, the main body will be illuminated, and the other places will become pitch black. On the contrary, if the subject is placed farther from the light source and closer to the background, the lighting will be more uniform and the background will be brighter.
You can also increase the light propagation distance through the reflector (or other reflective surface) to achieve the effect of “increasing the distance to the light source”.
Using props to “Renovate” the Light Source
You can use some window props to “renovate” the window light source.
For example, you can reduce the size of the light source and increase the shadow by partially drawing thick curtains. You can “filter” the light with thin curtains to reduce shadows. You can also do the opposite, using blinds or other objects to create projections of specific shapes.
Application of Light and Shadow
Photography is inseparable from light. Only when there is light, there is a shadow. The relationship between light and the subject is very close, which determines the texture and details of the subject. In different themes, only using different light processing methods can fully reflect the artistic conception that you want to express. The direction of light can be roughly divided into four types: forward light, back light, top light and side light.
1. Portrait Shooting Under Forward-light
The direction of shooting is the same as the direction of light, which is called forward light shooting. Downlight photography is easy to get the effect of adequate exposure, and the subject generally does not appear in obvious shadow areas. For example, the subject and the light source are in a straight line, and the photographer shooting between the two or behind the light source is classified as forward-light photography.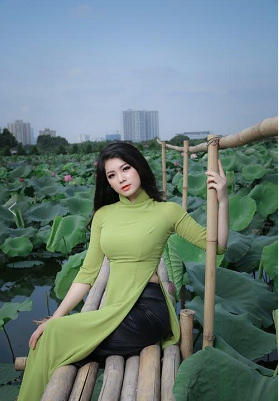
Portraits taken with forward light, uniform exposure but lack of three-dimensionality
It should be noted that if the light intensity is too strong when shooting in forward light, it is easy to overexpose. So we would recommend shooting under a softer forward light. The light in the early morning, dusk and cloudy sky is softer, and the details of the characters are also better. In addition, there are more high-light parts and few shadow areas of the subject in the light shooting, so the three-dimensional sense of the picture is relatively lacking.
Portraits taken in a cloudy sky with smooth light, with better details
2. Portrait Shooting under Side Light
The light shines from the side of the shooting direction, that is, side-light shooting. It is the most commonly used shooting method in portrait photography and is easier to master. It is not prone to overexposure or underexposure. The side light can well shape the lines and shapes of the characters, as well as form the light and shade and layers.
If it is irradiated from the front side, it is the front side light. If the light shines from the back of the character, it is the back light.
In addition, the strength of the side light can be roughly divided into three types: strong light, soft light and weak light. Soft light is the best light for shooting. The two time periods of morning and afternoon are very suitable for photometric portrait shooting. At this time, the exposure is sufficient, and the details of the characters will be very good. When shooting, make sure that the light hits the face of the person, and the exposure of the face is in place as much as possible.
Side-light shooting under soft light, full exposure and obvious details
It should be noted that when shooting with a mobile phone, the photosensitive element of the mobile phone is not large enough, and the ability to shoot in low light is limited. Therefore, try not to choose to use side light to shoot portraits in low-light environments, because this will not reflect the details of the characters. Taking portraits under strong light can easily lead to overexposure, which can lead to dead white exposure and poor details. So also avoid side-light shooting under strong light.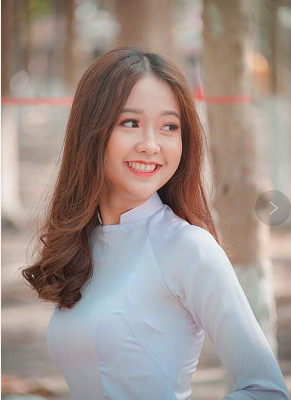
Side light shooting, soft light in the afternoon
3. Portrait Shooting Under Backlight
The direction of shooting is exactly the opposite of the direction of light, and the subject is between the photographer and the light source, which is backlit. Portraits shot in backlight are either severely underexposed or overexposed. Character details are also very bad. Therefore, backlight photography is not suitable for portrait photography. But there is another advantage to backlight photography. When we don’t pay attention to the details of the characters, it will have unexpected silhouette effects.
When shooting portraits under backlight, the focus should be on the sky, and at the same time, some exposure compensation should be appropriately reduced. At this time, someone asked, the portrait is already black, why lower the exposure compensation? Yes, the character itself is underexposed, even if we compensate for the exposure, the character can be brighter. But even so, the details of the characters are not ideal, and they are not in harmony with the overall picture. Instead of doing this, we went the other way, lowering the exposure compensation and making the characters darker. So you can have a silhouette effect.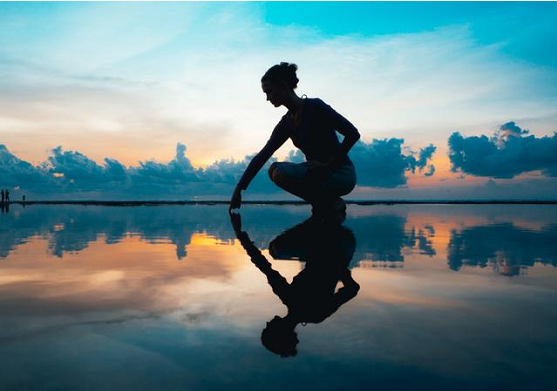
Silhouette effect shot with backlighting before sunrise
When shooting silhouettes of people, the background should be simple and clean, not too complicated. Such as rooftops, seaside, grassland and other scenes with a wide view and simple background. In this way, the outline of the main body of the character can be more prominent, and the body shape and contour beauty of the character can be reflected. Therefore, in the absence of details of the character, the expressiveness of the character is very important, and it is necessary to do some actions suitable for the silhouette.
4. Use Light and shadow to Shoot Portraits
In our shooting scene, the light on some scenes will cast very interesting shadows. Proper use of these shadows can not only enhance the artistic conception of the picture, but also make the picture rich in layers. This kind of shadow is called light and shadow in shooting.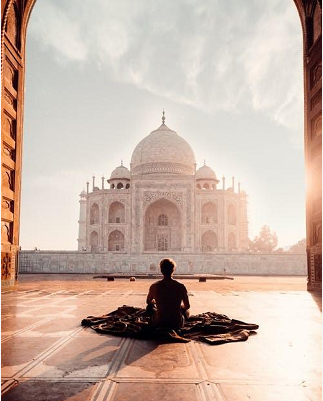
The natural shadow of the character
The effect of light and shadow is easy to appear in the side light environment. For example, in the two time periods of morning and afternoon, because the sun is tilted down at this time, the smaller the angle, the longer the light and shadow. Use light and shadow to compose the picture, and look for places with more beautiful light and shadow to frame the shot. With the embellishment of light and shadow, the plain picture will be more artistic.
The light and shadow formed by the light passing through the window
In addition, when the light shines from the top of the head, the light source is at a vertical angle to the subject and the photographer. This is the top light. Top light is not suitable for taking portrait photos, because it will form a large shadow area and underexpose the face. Here we will not explain the top light.