Night scene portrait photography
Generally speaking, it is more difficult to shoot night portraits. At night, the natural light is reduced to a minimum or disappears. The lighting of the characters depends entirely on artificial light. The color temperature of natural artificial light (street lights, window lights, shop lights) is more complicated, and the illumination is also difficult to meet the needs of reasonable exposure of portraits.
- Preliminary preparation for shooting night portraits
The first is the camera settings. In low light environments, the aperture priority exposure mode is generally selected. Under the premise that the aperture is opened to the maximum, the shutter can be improved by the sensitivity setting. In the night scene shooting, the sensitivity is recommended to be set to ISO400-800. If you encounter a dark light scene you like, you can increase it appropriately, but high sensitivity will also increase the noise of the photo and reduce the picture effect, so it is not recommended to set it above 2000. When the aperture and sensitivity are set, the main adjustment parameter is exposure compensation during the shooting process. By setting the increase or decrease according to different light conditions, to shoot works of different tones.
Generally beginners may think that shooting night scenes needs to increase the exposure compensation to get more details. In fact, more often, the exposure principle of white plus black minus should be followed. Since most of the night scenes are in a low-light environment with more dark parts, the camera’s metering system will automatically increase the exposure in order to ensure that the exposure is in the correct grayscale, so that the dark parts of the picture are too bright. In fact, at this time, the camera reduced the shutter speed, which greatly increased the possibility of shooting virtual. At the same time, the unique taste of night scene portraits was also lost. The feature of night portraits lies in the unique low-light effect of the night scene. The photographer should reasonably express this feature through exposure control, instead of brightening the dark parts according to the camera’s own judgment. The biggest test of shooting night portraits is the small amount of light, so small props that increase the amount of light such as external flashes, handheld LEDs, and outdoor lights are also indispensable.
- Make a light spot
The beautiful spot is the charm of night portraits, which creates gorgeous visual effects for night portraits. The basic technique is a large aperture + a longer focal length + shooting closer to the subject to create a blur effect.
One thing to note is that each spot in the photo is a single light source, not a huge light source can form countless spots, no matter how large a light source can only form one spot in the photo, the same, no matter how small A light source of is also a spot in the photo.
If you want to create a special shape of the spot effect. Use an opaque card or paper, cut out the desired shape on the top, and cover it in front of the lens.
- Scene selection and light control
In terms of shooting scene selection, it is necessary to find places that can make full use of ambient light, such as street lights, restaurants open at night, advertising lights, etc.When shooting, the model’s face can be rushed to the light source, so that the face is natural, Brightness higher than the environment, and then stand out from the darker environment.
The glass walls in urban buildings often have sufficient lighting, and will form a natural light and shadow transition on the ground, which is also an ideal scene. Bring the model closer to the glass window. The face can be softly illuminated. There are no strong shadows, and at the same time, bright light and night scenes, colored lights and solid-color glass walls can form a good contrast. You can also choose the window side of a big shopping mall to use the light source diffused from the window, which is equivalent to a huge soft box.
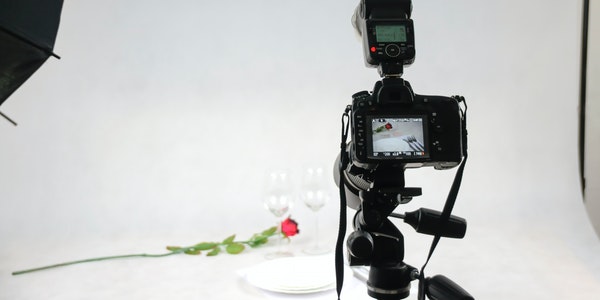
When using the fill light, avoid stiff light effect. It is best to have a small soft box or cover with a white soft cloth in front of the LED light, and it is best to use a soft light umbrella for the flashing light.
If the flashing light is too close to the subject, the light ratio will be too large, and the light will be hard. Highlight parts such as skin or light-colored clothes are easily overexposed. Therefore, we must choose the right distance, and adjust to the best by taking a few more test shots according to the environment.
If you don’t have a soft light umbrella or soft box, you can shoot the flash up to the sky and use the afterglow or reflection to fill in the light. If a scene is illuminated by multiple light sources, it is best to use the existing light as much as possible to reduce artificial lighting, otherwise it will be very messy if it is not handled well.
Moreover, while the position of artificial lighting is fixed, it also restricts the natural expression of the model in terms of angle and light ratio. Many random moments that express specific emotions and variable shooting angles will be forced to sacrifice due to relatively fixed lighting.
If shooting outdoor night scene portraits, it is best to choose when the sky is not completely dark. At this time, the sky in the background will not be dead black, and there will be a faint sky blue, but it will not reduce the unique low light of the night scene. effect. The overall picture will make people feel more layered.
Shooting portraits with “Rembrandt light”
- What is “Rembrandt”
Rembrandt is one of the greatest painters in the 17th century in Europe. His oil paintings often use precise triangular three-dimensional light to outline the contours of the characters, and hide the rest in the light and darkness, giving people a stable and solemn feeling. This technique is called “Rembrandt Rays”.
The concept of “Rembrandt light” extends to photography and becomes a special light technique for shooting portraits. When shooting, the shadow side of the subject’s face is facing the camera, and the light source is shining diagonally from above, covering about three-quarters of the face. The portraits taken in this way of light resemble Rembrandt’s portrait paintings. The essence of “Rembrandt light” is to use light to strengthen the main part of the painting, and use the dark part to weaken and ablate the secondary factors.
- How to shoot portraits with “Rembrandt light”
The Rembrandt-style lighting technique highlights the subtleties of each face, that is, the sides of the face are different. The light effect can also be adjusted arbitrarily with auxiliary light according to the wishes of the photographer.
Generally, the use of Rembrandt-style lighting requires two lamps to illuminate, and after improvement, a third lamp is added to adjust the contrast.
For specific shooting, first turn on the main light and adjust its angle so that the Rembrandt triangle light is cast on the dark side of the subject’s face. Then turn on the main soft light on the front, directly facing the bright side of the subject’s face, it can illuminate the subject’s face and increase the depth, and continue to try to make the subject turn the head until the Rembrandt triangle The light energy hit his cheek just right. Finally, add light or background light to adjust.
