Table of Contents
Control the Lights
To learn to control the lights and control the posture of the subject, the key is to use dramatic lighting. When I say dramatic lighting, I actually mean that there is no light. The less bright these non-model subjects are, the better the final photo.
In fact, consider silhouettes or long-distance night shots, that is, shooting at a distance of 100 to 200 yards from the subject-anyone at this distance looks very good (this is also the reason for the beauty of distance). In any case, we will tell you how to shoot people and provide a list of locations where people who wear jeans that are more expensive than Luxembourg’s GNP and have better expressions often play.
Innovative Composition Techniques
Most of the photos you see are taken either horizontally or vertically, so the shooting angle should be more innovative, yes, innovative! Nowadays, there is a very popular method for portrait photography: switch the camera angle, this angle will make the subject face a certain corner. This method can’t be simpler-just rotate the camera slightly to the right or left, and then shoot. You may need to try a few more times to get the subject in the frame position you want, but this effect (which has existed for many years) will be more popular.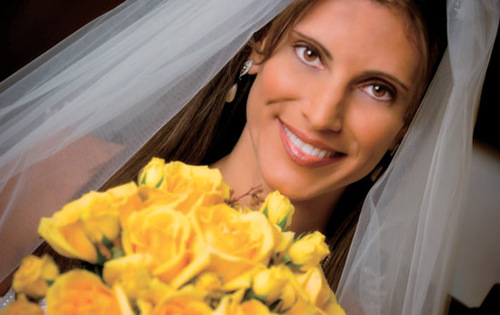
Cut the Top of the Model’s Head
This is the next step in portrait photography, “Don’t leave too much space on the subject’s head”. In this composition technique, you need to trim off the top of the subject’s head. After reading this, you will definitely find it strange. It is a very popular professional technique to fill the frame of the subject’s head.
A compact composition like this has become a very eye-catching effect. As shown in the picture below, it now attracts your attention. You will find that this composition technique is ubiquitous and has become the mainstream method for many top fashion, beauty and portrait photography. (Note: Although it is good to cut the top of the subject’s head, or the edges of the arms, shoulders, hair, etc., you should not cut the chin. People are actually used to seeing the top being trimmed, which will look natural , But it’s visually uncomfortable to see photos of the chin being cropped.)
How to Take Group Photos Outdoors
It is undoubtedly a challenge to illuminate a group photo, and everyone has the same amount of light. This is also the reason why the subject is usually outdoors for better results when shooting a group.
It is easier to use outdoor lighting to illuminate the entire subject. Especially the subject is in the shade (not deep in the shade, just the edge of the shade. But no light spots are projected on the subject through the gaps between branches, windows or buildings). If you are lucky enough to take group photos in cloudy weather, then your job is very simple-just get the subject out of the outdoors. A cloudy sky will take care of the light problem for you, so you can focus on how they pose. (By the way, if you want to get a professional-looking group photo, the photographer would never say, “Now all tall people are standing in the last row.”)
Tips for Posing for Group Photos
The next time you take a group photo, don’t let everyone stand in a row (you know this effect doesn’t look good). Try to get them to gather around certain scenes-certain subjects will arrange their positions naturally. For example, try to make people pose on or around the bed, or on or around chairs, pillars, cars, tables, or anything that can gather them into a whole, so that they don’t stand in a straight line.
Tips for Group Photos of Life
Want to take more attractive group photos of life? Then let the subject take a compact pyramid shape (triangle). But by close I mean that they are all in contact—arms leaning against each other, heads together. One person is at the top of the frame, each person is on the bottom side of the pyramid (as shown in the picture below), and the others are closely leaning in the middle.
In this way, you will find that their bodies are not in a straight line-their positions are staggered. But they are all leaning against each other, which makes the photos look more dynamic and interesting. I haven’t tried this method with a large group of people, but if you have already obtained an interesting group photo of life, this is the most powerful illustration of this method.
Do not illuminate the entire subject evenly
When people look at a photo, they are first attracted by the brightest scene in the photo, so you only want the brightest light to be projected where you want, right? Completely correct!
So, if you take portraits of people, do you want people to pay attention to the subject’s face or crossed arms? Of course so. But most people use the same light to illuminate the entire person, causing the hands on both sides of the subject to have almost the same light as the face. If you want to guide the viewer’s gaze to the position you want, the brightest light should be on the subject’s face, and then gradually go down the body and become darker.
This increases the interest and vividness, and you will find that the visual focus is usually at the high end of the character. By the way, this is also another example of feathering light. This way the edge of the light is the subject’s face, and the light outside the face is perfectly and quickly dimmed (but don’t let it become too dark-it should still be bright, with details, but not as bright as the face). 
How to get better portraits
If you want the person’s shooting posture to look good, you would count 1, 2, and 3 before pressing the shutter button. This almost directly leads to the fact that your portraits cannot have natural expressions. As a photographer, it is your job to discover the natural expression moment of a character and capture this moment in time.
Anyone can stand there, count 1, 2, 3, and press the shutter button at the fourth beep. If you do this, any other person can also take the photos you took.
If you want some special effects, more natural expressions-sincere smiles or expressions, then abandon the old-fashioned practices of 1, 2, and 3, and talk to your subject instead. Inspire them, let them start talking and laughing, or even let them pass the time, and then the time is right-to capture this moment. In this way, their photos are not only well-lit and natural posture, you will make their expressions natural.
Where should the subject be?
Window light, especially the north window light source anywhere, is one of the most beautiful light in portraits. In fact, some professional photographers insist on using only natural window light to shoot all portraits of people.
The windows disperse the incoming light, and the larger the window, the softer and more diffuse the light. So, if you have got some good window light, where should the subject be where the light will be the most beautiful?
You want the subject and its shoulders to face the window (so that the light passes through the subject and there will be soft shadows on one side of the face). Then, let the subject be 6ft (about 1.8 meters) from the window, so that the light is very soft and linger around the subject (if the distance between them is closer, the soft light will change quickly). Also, keep the subject slightly behind the window so that they can touch the edge of the window light instead of direct sunlight. This edge light is very soft and will give you the perfect, magical light that many professional photographers dream of.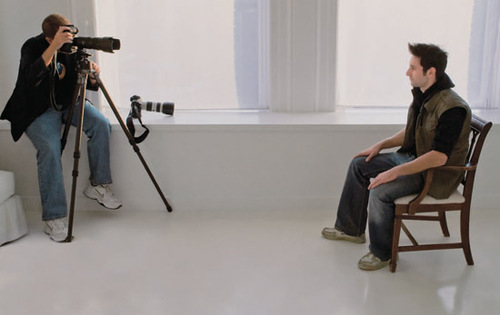
6 ways to deal with facial challenges
By posing and lighting the subject, you can hide or reduce many typical facial problems (such as big nose, round face, wrinkles, big ears, etc.).
Here are 6 quick ways to help you make your subject’s facial expressions look best. 
(1) Bold Subject
If the subject is bald, shoot from a lower angle. Never use things like hair lights.
(2) Wrinkles
If the subject is full of wrinkles, try to illuminate them directly. Because the side light will emphasize the shadow and make the wrinkles more obvious.
(3) Subject with Large Ears
If the subject’s ears are larger, let them turn sideways 3/4 so that only one ear is shown, and then light up. This way one ear will appear on the shadow side of the face (so basically, only one ear appears and the other is hidden in the shadow).
(4) Subject with big nose
If the subject has a big nose, let him turn his head and face the camera directly, with their chin slightly raised, and then shoot from a lower angle, which will not emphasize the nose.
(5) Double Chin
If the subject has a double chin, let him look directly at the camera, and then extend their heads slightly toward the front of the camera. This stretches and tightens the skin of the chin. Also, illuminate them directly (place the light directly above the location of the photographer), which adds a shadow under the chin and hides the double chin.
(6) Round Faces
If the subject has a round face or a fat face, you can laugh at them and let them lose a few pounds. Then when their eyes are full of tears, you will find their most natural expression in the day. Of course, you can also make their faces face left or right and only shoot 3/4 of their faces, so that their faces will not look so round, even though they are of course round.