In this “photographing season”, have you ever photographed works that are particularly impressive and visually stunning? You need some techniques that can significantly enhance the charm of your work.
Today, we will share with you 4 tips for taking better photos of flowers with macro. Guys who are interested in making a good picture, don’t miss it!
Table of Contents
1. Consider the light
When shooting flowers, it is often necessary to emphasize the texture and color of the flowers while minimizing shadows.
Based on this principle, you’d better avoid the violent noon sun as much as possible, and shoot at sunrise and sunset. Use soft light conditions to reduce shadows and highlight texture. At the same time, the pictures often have bright and warm colors, which look very beautiful: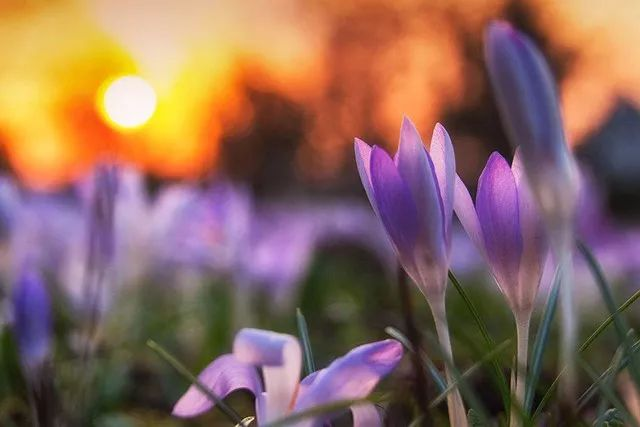
If you are shooting thin and stretched petals or “pompons”-shaped flowers, you can also adjust the shooting angle to allow sunlight to “transmit” through the flower body, highlighting its texture. At the same time, the colorful sky can be used as a background: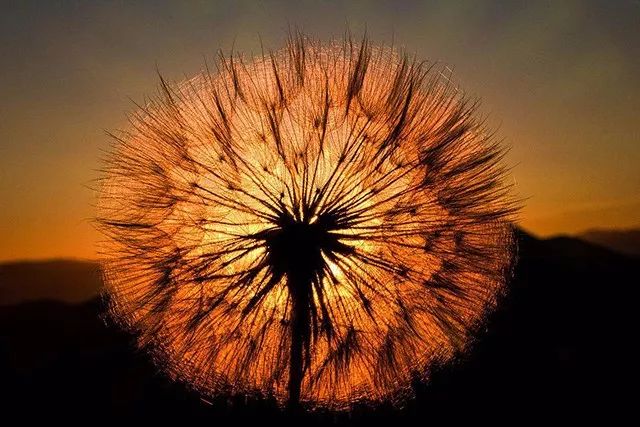
If you can’t wait for the sunrise or sunset, you can also look for the shadows of buildings and trees, or block the direct sunlight with your tools to create shadows that cover the entire screen.
This is similar to the feeling of shooting on a cloudy day, you just need to take the exposure based on the flower body. You can try to lower the exposure compensation manually, and the colors may become more saturated.
2. Focus on details
Tired of shooting full flowers? Try to step back and include more environment, but this can easily make the picture appear cluttered. Also you could move closer and focus on interesting details.
You can focus on some interesting structures, such as petals and stamens: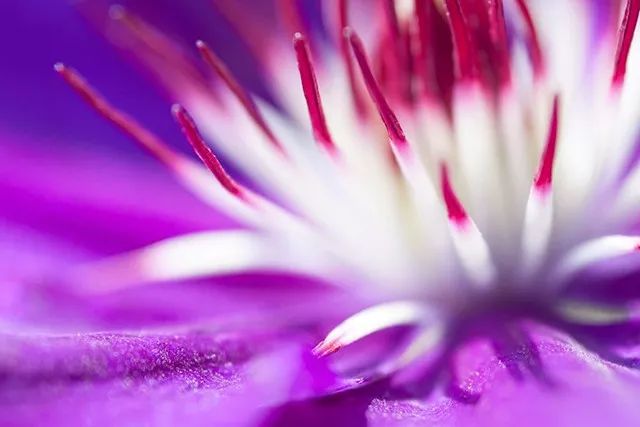
Changing your way of thinking is another thing you can do. Instead of expressing “a certain part of the flower”, you can abstract them and focus on repetitive structures, textures and lines.
You can try shooting perpendicular to the flower surface, which can effectively emphasize the repetitive structure.
You can also try flat shooting, with a large aperture, to show the lines of the stamen or petals.
3. Creative background
A good background is very important for any subject that needs to be highlighted, and flower photography is no exception. You can use natural factors to create a black/white background close to a pure color by controlling the exposure, or you can use some small props to create a pure color background.
Use some simple props, such as black cardboard, blue denim (preferably old, white-washed denim, to make the background more gradual), etc., adjust the focal plane with the large aperture, and you can Get a beautiful solid color background: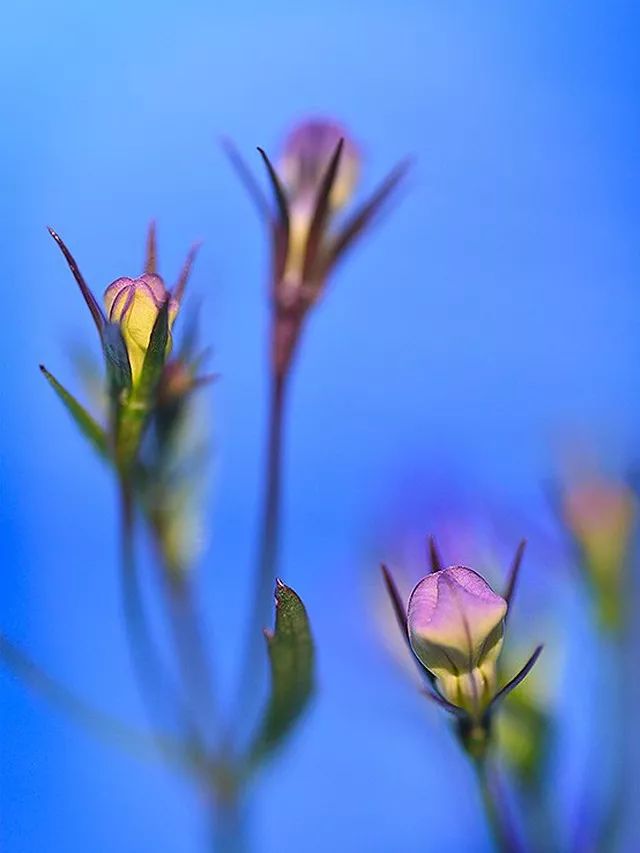
Sky blue background made of blue denim
Not satisfied with solid colors, want a more beautiful background effect?
The beautiful bokeh like the picture below can meet your requirements: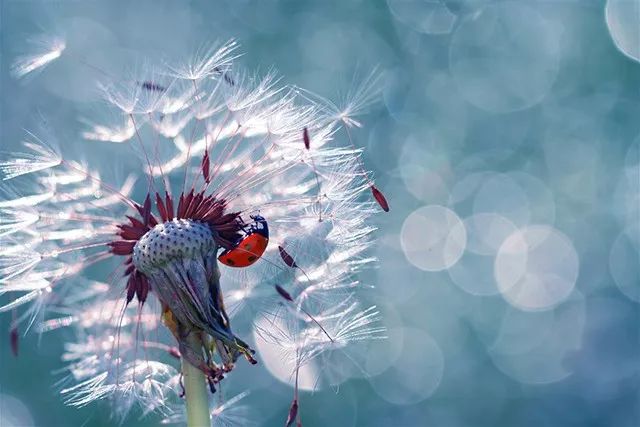
To achieve such an effect, you only need to prepare some gift wrapping paper (or tin foil or aluminum foil) with a metal coating.
The first step is to crumple it up, twist it into a ball, and unfold the wrapping paper, there will be many wrinkles on the surface. Next, you need to find the forward light position and make the wrapping paper plane and the direction of the light source be approximately 45°.
In this way, the wrinkled metal film will reflect light into the lens, and it will appear as a gorgeous out-of-focus bokeh at a large aperture, the bokeh color is the same as the color of the wrapping paper.
Reflected by the crumpled wrapping paper, the light source will become scattered dots
If your camera has a live view function, turn it on so that you can check the depth of field and adjust the bokeh effect on the LCD screen.
4. Artificial dew
Get up early to take photos of flowers. Not only can you take advantage of the soft ambient light, but you can also take photos of the dew on the flowers. Dew is a powerful tool to enhance the quality of flower photography.
The translucent crystal dew condensed on the petals can set off the color of the flower more vividly. Undropped dew drops on the edges of the petals, which give the static flowers a sense of movement, making the whole picture lively and full of vitality.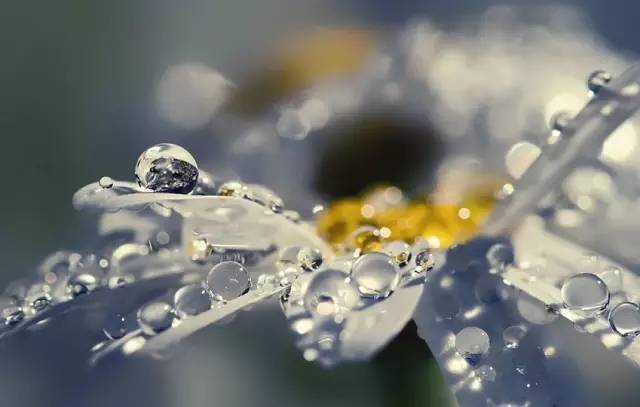
You can also use dew as a special “mirror” by adjusting the shooting angle. By constantly adjusting the shooting angle, so that the reflection of the flower body appears in the dewdrops, such a photo is also very interesting: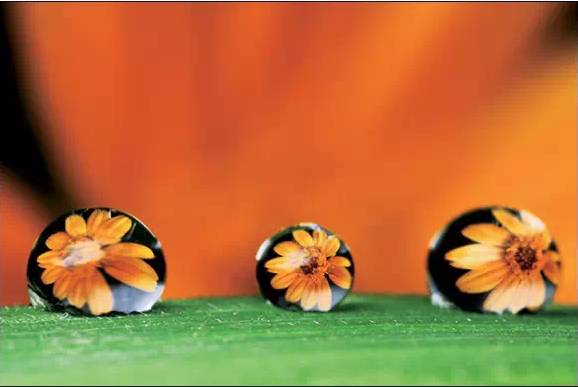
However, not everyone can get up and shoot in the early morning. Moreover, the naturally formed dewdrops have problems such as insufficient quantity, incorrect location, and insufficient shape, so it is better to “customize” ourselves.
In order to make dewdrops fuller and more stable, we can use glycerin-containing solutions to make dewdrops. Bring a small syringe with a needle, and you can put any size droplets anywhere you want.
Almost forgot a very important point. Remember to keep out the wind when shooting, lest you work hard to find a good angle and tighten the focus ring. Suddenly a breeze and dewdrops disappear, then it will be embarrassing~
Composition skills when shooting flowers
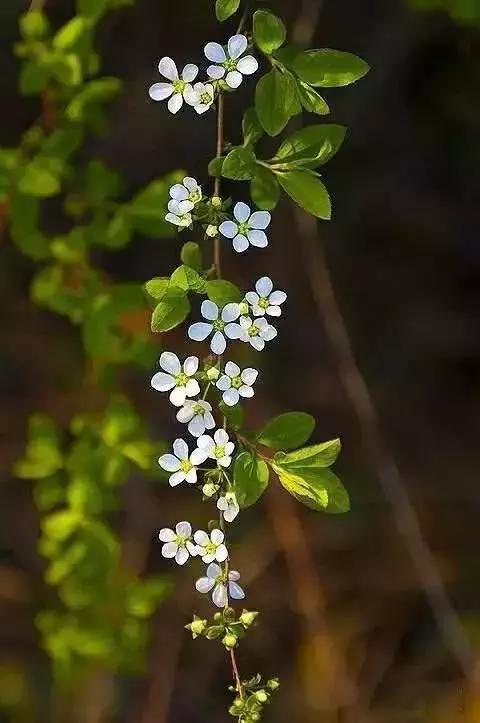
Speaking of the beauty of flowers. Someone asked: “Does the flower have temperament?” Of course there is! If you don’t understand the beauty of form and temperament, how can you shoot well? Try the vertical composition and shoot the flowers to make sure they look good.
Vertical composition + hanging flowers = perfect
When shooting a part of a flower, you should take the angle more carefully. Have you ever thought about shooting down flowers like this? What are the things worth learning in this way:
Novel angles and subtle moments are a beautiful picture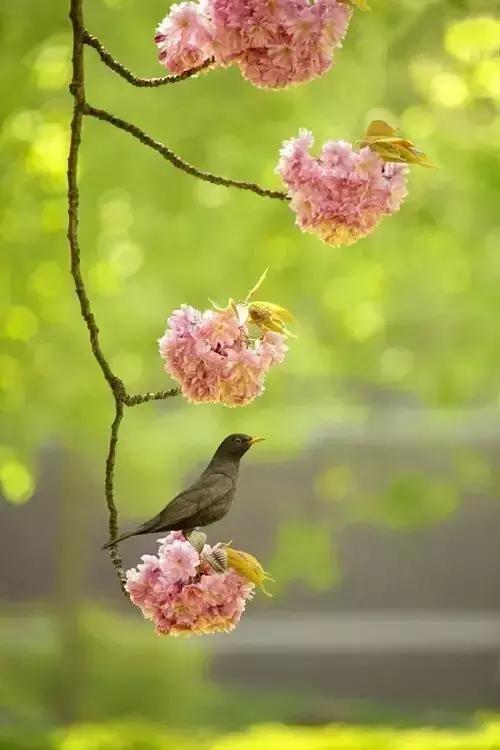
There are also these composition methods you can try:
- Shading method:
Usually when using the foreground, a large area of occlusion is rarely used, so as not to overwhelm the audience, but when the subject’s foreground is relatively single, a large area of occlusion is conducive to highlighting the quietness of the subject.
- Top composition:
The hanging flowers are mainly left blank at the bottom, and the upper part of the screen is cropped above the main body in order to achieve a visual balance.
- Wide angle and small aperture:
Find a high camera position and use a wide-angle small aperture to show a top-down perspective effect.
In the past, the composition used to pay attention to the diagonal, the rule of thirds, the golden section, etc., but now more use of more conventional composition forms. The occlusion method and the top composition are more commonly used to shoot the hanging flowers. The shooting techniques used for different subjects are also different. Breaking through the conventional composition method is more popular nowadays.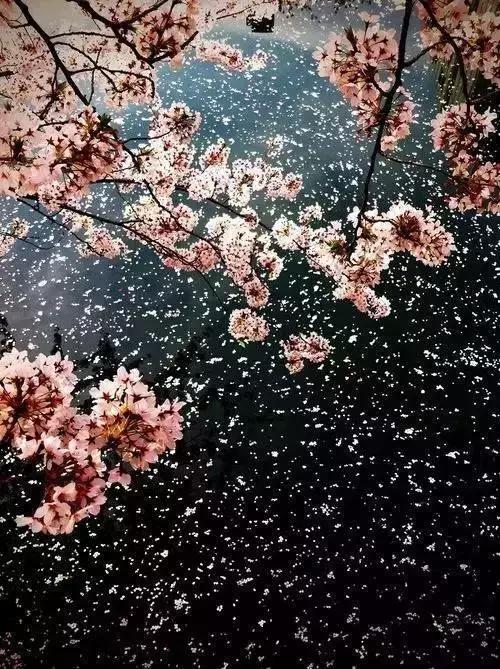
What are the details to pay attention to when you take a good picture of the flower?
1. For the chaotic flower branches, we recommend to use the background to set off the top and bottom composition.
2. When there are more leaves, we can adopt a top-down echoing composition method, using elements other than the main body to add interest to the picture.
3. When shooting with telephoto, it is best to set the aperture value above 2.8, so that the picture will not be easily blurred.
4. Light-colored petals are not suitable for a white background. When shooting, reduce the exposure of the picture appropriately, and then save it in the later stage.
5. With a wide-angle overhead shot from top to bottom, the nearby scenery looks tall and tall, but the fishing boats in the distance seem to be shrunk, and the main body of the picture is a bit messy.
6. Choose different sceneries as the background, doors, windows, rubble, etc., and you can take pictures with retro charm.
7. Light and color can make the picture show more changes.