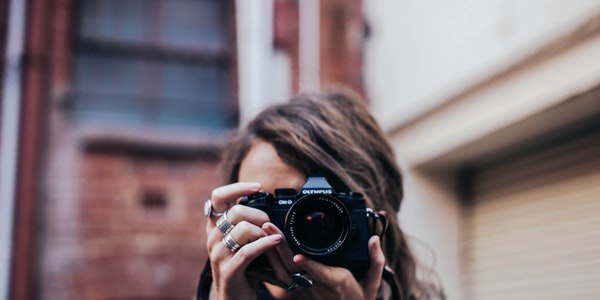
The basic photography principles must be followed: the main body is prominent, the picture is concise, and the disturbing scenery is removed.
Table of Contents
Tip1: Choose a Background That is as Concise as Possible to Highlight the Characters
To take an excellent portrait photo, the first consideration should be to find a suitable environment for shooting. The principle of selecting the environment should conform to the principle of subtraction of photography, that is, the environmental characteristics should be as simple and simple as possible. Only simplified background elements can highlight the main character. Photographers must remember that portrait photography is not a commemorative photo. Those looking at bright, colorful, and strangely shaped scenes are not suitable backgrounds for portrait photography.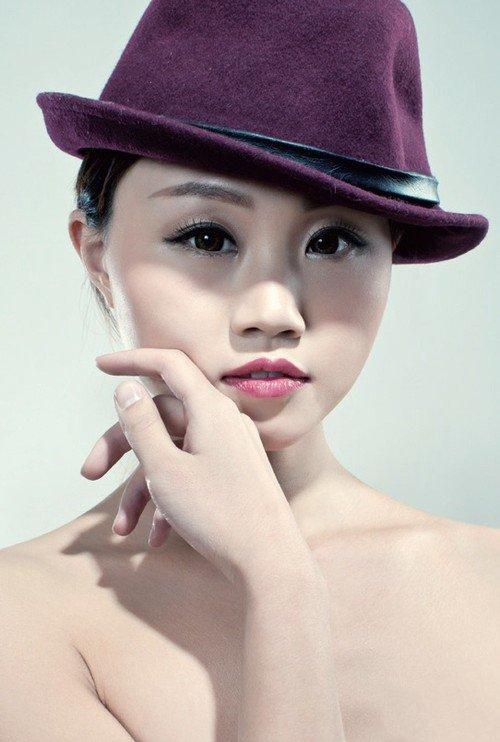
The Layout of the Background in the Studio
It is relatively easy to control the background in the studio. A simple monochromatic background is a common choice. But avoid being too monotonous at this time. For high-key portraits, you can add background lights to control the light and shade and light and shadow changes; while low-key photography. The rendered background cloth is also a good choice.
Outdoor Background Selection
On the contrary, the simple sea, open grass or woods with uniform colors will play a better role in setting off. After finding a suitable environment, the next thing to consider is to blur the background to highlight clear characters, that is, use the aperture value to control the depth of field.
For simple sky, sea and other backgrounds, we can set the aperture to a slightly smaller f/8 or f/11 to make them appear clearer. For slightly messy woods, etc., you can use f/4 or f/2.8 to make them more blurred. These are classic techniques for concise pictures.
In the composition, pay more attention to the horizon in the distance. Try not to pass the character’s neck, otherwise it will easily cause the sensation of cutting the throat. If you want to blur the building on the horizon, the best way is to be farther away, so that it can reduce the proportion of the picture it occupies, and it is easier to blur it.
Tip2: Coordination of Characters and Environmental Background
Shooting environmental portraits requires more consideration from the photographer in terms of creativity and composition than pure portrait photography. At this time, the photographer not only has to consider the character’s styling and lighting, but also the environmental characteristics and lighting effects. And organically combine the two, harmonious and set off each other.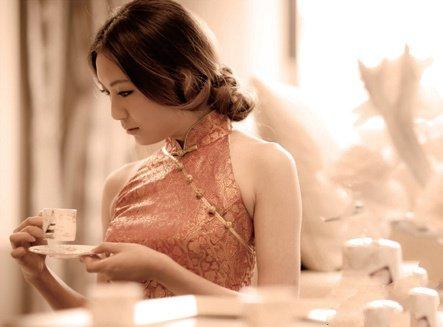
If the environment in the home is a bit messy, you can use the effect of using a long focal length lens, a large aperture and a shallow depth of field. Try to blur the scenes before and after, especially for scenes with a lot of small decorations in front of the table. Use the backlight of the window to shoot and increase the exposure to form a high-key background effect, avoiding the impact of dark scenes in the home on the picture.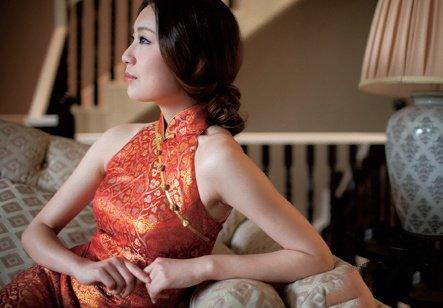
Basic Elements of Indoor Background
This is a group of home portrait photos taken by the photographer. The photographer chose the living room as the shooting location. This is usually the largest and widest room in the home, which can be used by photographers to take pictures freely. The photographer took great pains when framing the scene. The character sits obliquely in a corner of the sofa. The middle shot is a part of the porcelain table lamp, while the blurred staircase forms a texture to increase the sense of change in the picture.
Home portrait photography, because of the influence of space, mostly busts, so it even tests the photographer’s styling ability. The facial expression, orientation, body posture, and hand movements should all be delicate and in place, otherwise it is easy to make mistakes.
Principle of Lighting for Indoor Photography
For indoor portraits, the photographer needs to arrange the characters in a place where the light is appropriate and the background is coordinated and not cluttered. The dining table and sofa in front of the living room window, and the bedside in the living room are all good choices. Here you can usually get closer to natural light instead of being so cluttered.
Of course, before shooting, it is best to clean up the messy knick-knacks to keep the environment clean and tidy as a whole. Some of the methods of home furnishing photographers are worth learning: helping the owner clean up the house before shooting can greatly improve the effect of the picture.
For indoor portrait shooting, natural light should be used as much as possible to create a soft light effect. If you want to brighten up some dark corners in the room, try to use a soft box. Let the face of the character face the light of the window, and the wide light source of the window can be used to form a soft and bright catch light in the eyes of the character, which has an excellent effect.
Tip3: Increase the Prospect of Blur
Photographers with a little basic knowledge usually know to use a long focal length lens (above 150mm) to shoot portraits. This is more conducive to blurring the background, so as to highlight the performance of the characters. A more creative approach is to use a medium and long focal length (85mm~135mm) lens to shoot, and deliberately increase the foreground in front of the lens.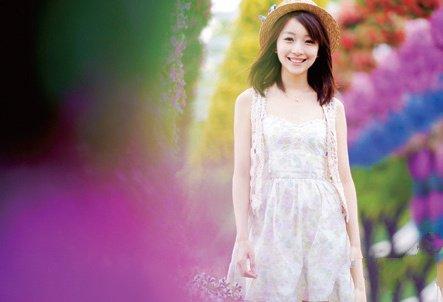
When shooting with the help of blurring the foreground, you can first step back away from the person. Observe what colors and shapes match the scene as the foreground. When choosing the foreground, it is best to focus on natural scenery, such as grass, flowers, branches and leaves, etc., which are relatively light and have a certain degree of light transmission. The artificial objects have rigid lines and dull colors. Even if it is blurred, the effect is too standard.
When the photographer is shooting, he actually uses the blurred foreground as a picture frame. Using its concealing effect, it highlights the characters who do not occupy a large proportion of the picture. This creative method can be described as killing two birds with one stone, that is, emphasizing the subject euphemistically, and adding a sense of depth to the picture.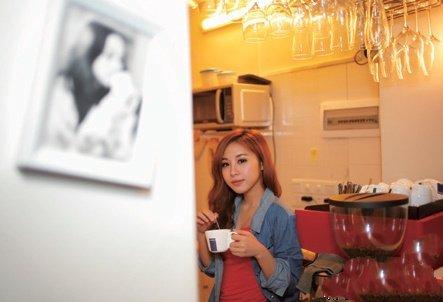
The Role of Blurring the Outlook
The technique of blurring the foreground is conducive to improving the effect of too rigid environmental portrait composition. The photographer used the daily living environment of the characters as the background when shooting this daily home environment work, and used a wall with the owner’s photo as the foreground, and the effect of large aperture and shallow depth of field made the foreground blurry to a certain extent.
This helped the photographer to form a creative shooting technique. The warm-colored environment is the normal state of daily life, while the walls and photos in the foreground are black and white images. There is a strong contrast between color and black and white, clarity and blur. If the characters’ movements are more distinctive, the work will be more successful.
This method not only integrates the blurred background technique, but also uses the blurred foreground technique to increase the overall depth of the picture. The clear character is highlighted by a dual approach.
In practice shooting, you can choose some leaves or flowers as the foreground. Arrange it on the edge or one side of the screen. And keep it as close to it as possible to keep a distance of about 20~30cm. In this way, the effect of small foreground depth is used to form a foggy effect with bright colors. The blur effect is much stronger than the blur of the background. This shooting technique is widely used in the creation of photographs, portraits and documentary portraits.
The Role of Focus
The choice of focus point is very important when shooting. It is best to use the edge focus point that covers the person to complete the focus operation. Otherwise, the camera’s automatic focus will give priority to the closest flowers or leaves. Don’t worry about the leaves or flower edges in the foreground blocking the characters. Under the bokeh effect of the large aperture, the sharp edges will form a blooming effect, which is more artistic.
Tip4: Let the Character’s Eyes Look Straight into the Camera
The look in the eyes in portrait photography is an important point of creation that requires special attention. A portrait photography with eyes directly outside the frame will make the audience stay. In the exchange of eyes, the audience can experience the inner feelings of the characters. This reflects the importance of the eyes in the painting.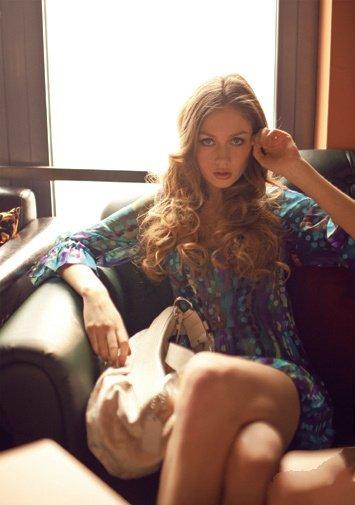
The model’s body is facing the camera directly, and her eyes are also looking directly at the camera. This is a strong impact effect. Especially when the character’s expression is serious, it gives people a feeling of resistance. Show the bold and cool style of the characters. Traditional Oriental women have weak personality characteristics, so this style of photos is not common.
During shooting, professional models can easily look directly at the camera and show different emotional characteristics through their eyes. But when ordinary people are shooting portraits, it is difficult for them to express any feelings for the cold machine of this camera. And she will even develop a sense of fear.
Traditional shooting techniques
It is better to learn the techniques of traditional photo studios. Fix the camera on a tripod, use the wireless remote control to press the shutter. And the photographer faces the model and guides the person’s eyes to the lens through words and gestures. Usually this kind of warm communication will relax the model. And the eyes and body posture will be much more natural.
Before shooting a smiling camera, be sure to remind the model not to turn his body when turning his head. Keep your face as close to the front shoulder as possible, which is the most beautiful shape. Of course, when the model turns his head, the photographer must observe carefully. And when reaching the best angle, he must stop. Keep the model’s movements for a few seconds and finish the shooting quickly.
Tip5: Leave Enough Space for the Eyes to Extend
If you are shooting someone you are not familiar with, even a professional model will feel a little nervous and restrained when looking directly at the camera at first. These expressions will be revealed in the works, forming defects. Therefore, it is better to let the model’s eyes look out of the lens at the beginning to relieve her tension. Let the model’s eyes look out of the camera, you can intentionally slow down the shooting rhythm. Let her relax for a while and immerse herself in her own thoughts. At this time, you can capture her shy and reserved beauty.
When shooting a woman with her eyes down and her head down implicitly, it is easy to have the effect of lowering her eyebrows and drooping her eyes. Therefore, when shooting, we should emphasize reminding people to raise their eyes to keep their eyes wide open. Use reflectors near the waist of the character to create catch light in the pupils.
Extended space for eyes
The gaze direction outside the lens can be divided into three types: head-up, upward and downward. The upward direction of gaze is a metaphor of hope and yearning. Heading up brings a state of concentrating thinking. And downward is shy and shy. No matter adopt which direction, the photographer needs to let his eyes have more space on the screen when composing the picture.
Backlighting in front of the window to shoot high-profile works, not only needs to increase the exposure appropriately, but also needs to fill in the light from the front of the person. Otherwise, the contour lines of the characters facing the light will blur and disappear. The posture of the characters’ arms in front of the table is exquisite: the elbows are as close as possible to form a V shape. This can make the upper body of the character more beautiful.
Looking up from the perspective to show a tall figure
When shooting portraits, different shooting heights will affect the visual perception of the characters in the frame. Under normal circumstances, the photographer takes an upright posture to shoot. That is, the eyes of the photographer and the subject are at the same height. This is in line with our usual appreciation habits. Therefore, the characters in the screen conform to the normal physical characteristics.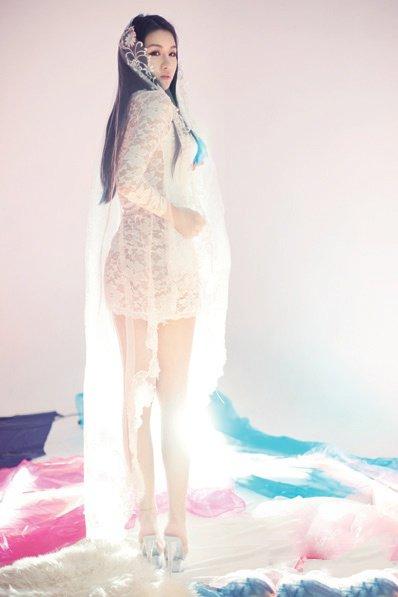
Generally, the head-to-body ratio of a person is 1:6 to 1:7. And the head-to-body ratio of a professional clothing model can reach 1:8. The larger the head-to-body ratio, the taller and more refined figure. Therefore, the photographer asked the model to stand on a small high platform, take a shooting height that is level with its calf, and deliberately use the upward shooting angle to shoot. Under the effect of perspective deformation from near to far, the head of the person is far away from the camera. The proportion becomes smaller, and the figure appears extraordinarily slender. This is also the angle of shooting the catwalk model. So we see the model photos in fashion magazines, the reason is that the legs are extraordinarily long.
But for different shooting subjects and shooting creativity, we might as well try different shooting heights and tilt angles when shooting. For example, when photographing children, you need to squat down and shoot at the height of the child’s eyes. In this way, children’s body proportions will be normal, and the common big head doll effect will not appear. To shoot a model from a lower height will exaggerate the length of the model’s legs, and reduce the proportion of the head. This results in a slender figure and a beautiful visual effect with an enlarged head-to-body ratio.